Solder to Brass: A Practical Step-by-Step Guide
Master soldering brass joints with clean surfaces, proper flux, and controlled heat. This comprehensive guide covers prep, flux choices, heat control, and finishing for brass in jewelry, plumbing, and electronics.

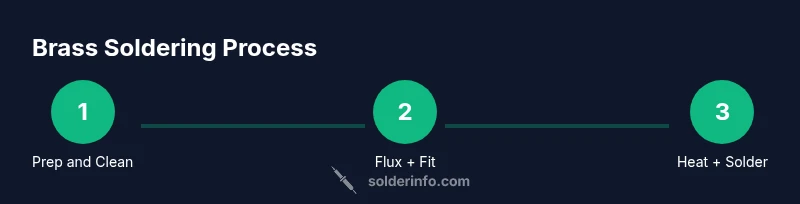
Solder to brass involves cleaning, proper flux, and precise heat to form reliable joints. This guide walks you through prep, solder selection, and finishing steps for brass jewelry, plumbing, or electronics applications. Follow these steps to prevent oxidation and cold joints while using lead-free solder when possible.
Why Brass Presents Challenges for Soldering
Brass is an alloy of copper and zinc. The zinc content makes brass susceptible to oxidation; the oxide forms quickly when heated, which can prevent solder wetting and create weak joints. According to SolderInfo, surface preparation is critical: brass surfaces must be bright, clean, and free of oils and oxides. Start by mechanically cleaning with a brass brushing tool or fine steel wool under gentle pressure to avoid deep scratches. Wipe with a lint-free cloth dampened in isopropyl alcohol to remove oils. If the piece has prior solder joints, remove old residue with a fiberglass pen or fine abrasive. Let the surface dry before fluxing. These prep steps reduce the chance of solder beads forming a dull, grainy joint. After cleaning, inspect with a magnifier to verify a uniform bright surface, free of pitting. The goal is to expose fresh copper on the brass surface for reliable soldering.
Brass Joint Design: Preparing for a Strong Bond
When designing brass joints, think in terms of diffusion area and flow paths. For jewelry, consider lap joints or scarf joints that maximize wetted surface area, creating a visually clean seam. For plumbing brass, ensure square, butt or mitered joints that allow capillary action to pull solder into the seam. Avoid tight gaps that trap flux and form voids. A well-planned joint reduces cold joints and improves mechanical strength. Brass conducts heat quickly, so plan a stepwise heat path and use heat sinks where possible to protect delicate areas. SolderInfo emphasizes aligning parts precisely before applying flux to prevent shifting during heating.
Flux and Solder: Choosing the Right Pairing for Brass
Flux choice drives success as much as solder type. For electronics or small jewelry pieces, use a rosin-based flux and lead-free tin-based solder to promote clean wetting without corrosive residues. For plumbing brass, consider a flux designed for metal pipes and a lead-free solder with good capillary flow. Acid flux should be avoided on brass surfaces intended to remain bright, as it can etch. Apply flux thinly and evenly, focusing on the joint line. The solder should wick into the joint under heat, not be forced into place. If you need extra strength, you can opt for a silver-bearing lead-free solder; ensure proper ventilation due to flux fumes.
Surface Preparation: Cleaning Brass Surfaces Before Soldering
Begin with degreasing to remove oils, fingerprints, and handling residues. Use isopropyl alcohol and a clean cloth to wipe all contact surfaces. Mechanically remove oxidation with a brass brush or fine steel wool, then rewipe to ensure a bright, uniform surface. Dry thoroughly before fluxing. For stubborn tarnish, a light paste of baking soda and water or a mild polishing compound can help; rinse and dry again. Confirm that joints fit well; a good fit reduces the amount of heat needed and minimizes the risk of overheating the brass.
Oxidation Control: Removing Tarnish and Oxide Layers
Oxidation layers act as barriers to solder wetting. After cleaning, scrub lightly with a brass brush to remove any remaining oxide. If oxidation reappears during heating, pause, reapply flux, and reheat with a slower, more controlled motion. Avoid overheating; brass changes color and can warp if exposed to heat too long. Maintain even heat across the joint by moving the flame or iron in small circles and using heat sinks on surrounding areas. Proper flux coverage helps maintain a clean surface and reduces the chance of re-oxidation during soldering.
Heating Techniques: Getting the Right Heat Without Warping Brass
Brass conducts heat rapidly, so control is essential. Use a steady, moderate heat and avoid lingering on one spot. When using a torch, keep the flame moving and test the joint frequently by touching a small amount of solder to the soldering area; if it flows readily, you’re ready to pull away. If using a soldering iron, aim for a temperature range appropriate for brass joints and flux type; avoid scorching the metal. For larger brass pieces, start with wider heat areas and gradually narrow the zone to the joint to minimize distortion. Have a damp sponge ready to clean the tip and maintain flux integrity.
Soldering Jewelry-Grade Brass vs Plumbing Brass: Contextual Tips
Brass used for jewelry is often thinner and requires precision to preserve aesthetics. Practice on scrap brass to perfect heat control and joint geometry before final pieces. Plumbing brass joints demand stronger, more robust joints and may tolerate higher heat and thicker sections. In both cases, ensure the flux and solder are compatible with the brass alloy and local codes. A well-planned sequence, good joint geometry, and adequate ventilation will yield durable results across disciplines.
Finishing and Flux Removal: Getting a Clean, Bright Joint
After soldering, allow the joint to cool naturally and minimize handling. Rinse flux residues with warm water and a mild detergent; avoid harsh solvents that could affect patina if you intend to leave brass looking aged. Dry thoroughly and inspect for bright, continuous seams. For jewelry, a light polish with a soft cloth can restore shine; for plumbing, a thorough wipe-down helps prevent corrosion at the joint. If desired, apply a protective coating to reduce tarnish, especially on exposed edges. Store tools clean to prevent cross-contamination of flux residues.
Safety, Ventilation, and PPE for Brass Soldering
Ventilation is critical when soldering brass due to flux fumes and potential metal fumes. Work in a well-ventilated area or use a fume extractor. Wear safety glasses, heat-resistant gloves, and a breathable, long-sleeve shirt to protect skin from hot metal and flux splatter. Tie back long hair and remove clutter from the workspace. Keep a water source nearby in case of burns and use a fire-safe surface. Check local regulations for plumbing soldering activities, especially when working on potable water lines.
Troubleshooting Common Brass Soldering Problems
If solder refuses to wet, re-clean the surfaces and re-apply flux. A dull joint or poor capillary action indicates insufficient heat or flux coverage. If solder beads along the surface instead of flowing into the joint, adjust the heat and reflow the joint with fresh flux. For joints that crack after cooling, review joint design and ensure there was sufficient diffusion area and heat control. Always practice on scrap pieces to fine-tune your technique before working on final parts.
Authority Sources and Further Reading
For safety guidelines and metalworking best practices, consult official resources like OSHA and university extensions. These sources provide general guidance on safe handling of heat, ventilation, and PPE. Additional reading from national standards bodies helps interpret best practices for metal joints and solder performance. The SolderInfo team recommends reviewing these references to reinforce practical knowledge and improve long-term results.
Tools & Materials
- Brass pieces to join(Cleaned and pre-fitted before soldering)
- Flux appropriate for brass(Rosin-based for electronics/jewelry; plumbing flux if plumbing work)
- Lead-free solder (tin-based or silver-bearing)(Ensure flux compatibility)
- Soldering iron or micro torch(Appropriate power for brass thickness)
- Flux brush or applicator(Even flux application)
- Brass brush or fine steel wool(Surface prep)
- Isopropyl alcohol (70% or higher)(Degreasing before fluxing)
- Lint-free cloths(Wipe oils and residues)
- Fine abrasive (emery or sandpaper)(Lightly smooth joints if needed)
- Heat sink clamps or pliers(Control heat spread and protect delicate areas)
- Safety glasses(Eye protection)
- Gloves(Heat protection)
Steps
Estimated time: 60-90 minutes
- 1
Prepare workspace and safety gear
Set up a clean, ventilated workspace with a stable surface. Put on safety glasses and gloves. Gather all tools and materials so you won’t have to search mid-task.
Tip: Keep a damp sponge for tip cleaning and practice a dry run on scrap brass first. - 2
Inspect and fit the joint
Dry-fit the brass pieces to confirm alignment. Make any necessary notches or joints so solder can wick smoothly. Avoid gaps that are too large or too small.
Tip: A precise fit reduces heat exposure and improves capillary action. - 3
Clean and degrease the surface
Wipe all contact surfaces with isopropyl alcohol. Use a brass brush to remove oxide and fingerprints. Confirm the surface is bright and oil-free before fluxing.
Tip: If your piece carries a patina you want to preserve, test on scrap first. - 4
Apply flux evenly
Brush flux onto the joint and a small surrounding area. Ensure coverage is thin but complete to promote wetting and protect the metal from oxidation during heating.
Tip: Too much flux can cause spatter; blot excess with a clean cloth. - 5
Heat and wick solder into the joint
Apply heat to the joint area with steady motion. When the joint is hot enough, touch the solder to the joint and allow capillary action to draw it in. Remove heat as soon as the joint flows.
Tip: Keep the heat moving and avoid focusing on one spot for too long. - 6
Inspect and rework if needed
Check for an even fillet along the joint. If you see gaps or a dull finish, re-flux and reheat carefully. Avoid over-heating, which can warp brass.
Tip: A bright, smooth seam indicates good wetting. - 7
Clean-up and finish
Rinse with warm water and mild detergent to remove flux residues. Dry completely and buff lightly for shine if desired. Store tools properly to prevent corrosion on tools.
Tip: For jewelry, seal or patina can be added after flux removal if desired.
Quick Answers
Can I solder brass with lead-based solder?
Lead-based solders were common historically but are increasingly restricted due to safety concerns. If permitted locally, ensure proper ventilation and skin protection. For most hobby projects, lead-free solder provides adequate strength and safety.
Lead-based solders are less common today; use lead-free options for safety and compliance.
What flux should I use on brass for jewelry?
Rosin-based flux is typically recommended for jewelry brass joints to promote clean wetting without corrosive residues. Always test flux on a scrap piece first.
Rosin flux works well for jewelry brass joints; test on scrap first.
Why does brass tarnish during soldering?
Brass can oxidize quickly when heated; using flux and proper heat control minimizes oxidation. If tarnish reappears, re-clean and reflux the joint.
Oxidation happens quickly; keep flux fresh and re-clean if needed.
Is heat sinking necessary for brass joints?
Yes. Heat sinks help protect delicate areas and prevent warping by dissipating heat away from the joint during soldering.
Heat sinks are your friends for brass to avoid distortion.
Can I use plumbing flux on electronics brass joints?
Avoid plumbing flux on electronics; choose flux designed for electronics to prevent corrosive residues that could damage sensitive components.
Use electronics-safe flux for electronics and brass joints.
What should I do if the joint won't wet?
Re-clean surfaces, reapply flux, reheat with a steady motion, and test with scrap pieces before retrying the final joint.
Re-clean, re-flux, reheat with steady motion.
Watch Video
Top Takeaways
- Prepare and clean brass surfaces thoroughly before soldering.
- Choose flux and solder suited for brass and your application.
- Control heat carefully to avoid warping and oxidation.
- Design joints for reliable capillary flow and aesthetics.
- Inspect, finish, and clean joints for durable results.