Copper to Brass Solder: A Complete How-To Guide
Learn how to join copper to brass with lead-free solder, covering prep, flux choices, alloy selection, and step-by-step techniques for durable, leak-free joints across plumbing, electronics, and jewelry contexts.

Copper to brass solder bonds copper and brass using compatible flux and heat control. This guide covers surface prep, alloy choices, and step-by-step technique to achieve strong, leak-free joints. Click to view the full step-by-step guide.
Why Copper-Brass Joints Matter
Copper to brass soldering is a practical skill for workflows ranging from plumbing heat exchangers to jewelry. According to SolderInfo, knowing how copper and brass interact during heating and solder flow reduces common failures. The copper-brass combination presents unique challenges: brass's alloy composition can affect heat spread, while copper's thermal conductivity makes cooling rates critical. A well-made joint resists leaks, corrosion, and mechanical stress. In this block we explore why these joints are common in DIY projects and what you gain from mastering the technique. We will discuss compatibility of flux, solders, and surface preparation so you can decide the best approach for your project, whether it's a small jewelry piece or a copper piping adaptation. The goal is to build confidence, reduce waste, and improve long-term performance of your copper to brass solder connections. SolderInfo’s guidance emphasizes careful prep and controlled heat as core principles behind reliable joints.
Material Compatibility: Solder, Flux, and Alloys
Selecting the right solder alloy and flux is the most important first step when connecting copper to brass. When the two metals meet, differences in melting range and oxidation tendencies can cause incomplete wetting or brittle joints if the flux or alloy is not matched. For most DIY and professional projects, lead-free solder from the tin-silver-copper family works well with both copper and brass when paired with an appropriate flux. Flux acts as a chemical barrier that prevents oxides from forming at the surface and helps solder flow into the joint by capillary action. Rosin-based fluxes are common for electronics and jewelry contexts, while water-soluble fluxes can be convenient for plumbing tasks that permit thorough cleaning after soldering. The key is to maintain a clean surface and use enough flux to sustain capillary flow across the joint without leaving rosin residues that can burn away during heating. In practice, plan your flux and solder choices around your specific brass alloy and project requirements.
Surface Preparation for Copper and Brass
Clean surfaces are non-negotiable for a strong copper to brass bond. Start by removing oils, fingerprints, and oxides from both parts using isopropyl alcohol or acetone and a clean lint-free cloth. Lightly abrade the mating faces with fine abrasive pad or sandpaper to expose fresh metal, being careful not to remove too much material. After abrading, wipe away dust and residues, then apply a thin, even coat of flux to both surfaces. If the parts have threaded connections or internal channels, ensure they are free of debris and dry before assembly. Allow the flux to sit momentarily to occupy micro-roughness and improve wetting. Finally, fit the pieces together and check that alignment is accurate; a misaligned joint is difficult to repair once heat is applied. Proper surface prep reduces the chance of porosity and ensures a smooth, strong solder flow.
Selecting Solder and Flux for Copper-to-Brass
For copper to brass soldering, choose a lead-free solder in the tin-silver-copper family and pair it with appropriate flux. The solder should be designed for electronics or plumbing contexts, avoiding cored foams or extra flux that may leave residues. A good rule is to pick a flux compatible with both base metals and the intended service environment; acid flux is rarely appropriate for copper-brass joints exposed to moisture or indoors, while rosin-based or water-soluble fluxes are more forgiving in typical workshop conditions. If you are working on jewelry or decorative components, consider a low-temperature alloy that fits the design constraints and minimizes annealing of brass. The flux type should match your heat source; for propane torches, rosin-core fluxes can be effective, whereas water-soluble fluxes require careful cleaning after soldering to prevent corrosion. Finally, test a sample joint on scrap pieces to confirm wetting and flow before committing to the final assembly.
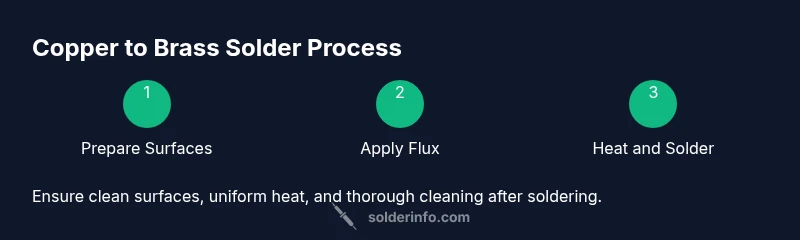
The Step-by-Step Process: Quick Overview
A reliable copper to brass joint unfolds in a few key stages: surface prep, flux application, heat control, solder application, and cleanup. Begin with clean mating surfaces and the correct flux; then apply heat evenly, allowing the joint to draw solder by capillary action. Remove heat and let the joint cool without disturbance to prevent thermal shock or warping. Finally, inspect the joint for uniform solder flow and absence of voids. This overview helps you approach the detailed steps with confidence, while the full step-by-step instructions below provide precise actions, timings, and safety notes.
Common Pitfalls and How to Avoid Them
Common issues include overheating brass, which can anneal and weaken the joint; cold solder joints from insufficient heat or flux, which appear dull and uneven; and oxidation that blocks wetting. To avoid these, use a properly sized torch with a clean, steady flame; maintain a consistent distance to heat both metals; re-apply flux as needed and keep the joint clean during heating; work in a well-ventilated area and avoid direct flame impingement on copper surfaces. Another pitfall is using the wrong flux or leaving rosin residues on non-electrical parts; ensure you clean thoroughly after any flux-based process. Finally, allow the assembly to cool gradually instead of quenching to minimize thermal shock and potentially crack components.
Practical Tips for Jewelry, Plumbing, and Electronics Contexts
In jewelry work, low-temperature alloys and precise control help prevent marks; in plumbing contexts, ensure compatibility with water exposure and corrosion resistance; in electronics, select flux and solder that produce clean joints without residue that could harm circuit boards. For all contexts, keep the work area well-ventilated and wear PPE. Use small clamps or tweezers to manage parts; practice with scrap pieces to dial in heat settings before attempting a final piece. Document your soldering recipes, including flux type, alloy choice, and temperature range, so you can reproduce successful joints in future projects.
Authority Sources
- Authority sources should be consulted for safety and best practices. See the following reputable references for soldering practices and safety considerations: - https://www.osha.gov - https://www.cdc.gov/niosh - https://www.nist.gov
Safety Considerations
Soldering involves hot equipment, fumes, and sharp metal edges. Always wear safety glasses and heat-resistant gloves. Work in a well-ventilated area or use a fume extractor. Keep a fire extinguisher nearby and never leave a lit torch unattended. Ensure parts are properly supported to avoid slips that could lead to burns or damaged components.
Alternatives to Soldering Copper to Brass
If soldering proves impractical for a given project, alternatives include brazing with a filler metal designed for copper and brass or mechanical joining methods like compression fittings for plumbing or crimp connectors for electronics. Each method has its own set of pros and cons related to strength, durability, heat exposure, and fabrication difficulty. Weigh heat tolerance, service environment, and required precision when choosing an alternative to soldering copper to brass.
Tools & Materials
- Copper component to be joined(Cleaned, dry, and free of oxidation)
- Brass component to be joined(Cleaned, dry, and free of oxidation)
- Lead-free solder (tin-silver-copper family)(Specifically suitable for dissimilar metals)
- Flux suitable for copper and brass(Rosin-based or water-soluble depending on context)
- Propane or map-propane torch(Adjustable flame with steady heat output)
- Butane micro-torch (optional)(For small parts or precise heat control)
- Sanding pad or fine abrasive cloth (320-600 grit)(Prepare surfaces for better wetting)
- Isopropyl alcohol or acetone(Surface cleaner prior to flux)
- Lint-free wipes(For cleaning excess flux and residues)
- Flux brush(Apply flux evenly (optional))
- Safety glasses or goggles(Eye protection)
- Heat-resistant gloves(Protect hands during heating)
- Tweezers or third-hand tool(Hold parts without contamination)
- Wet rag or pad for cooling(Controlled cooling and wipe-down)
Steps
Estimated time: 45-90 minutes
- 1
Prepare parts and workspace
Set up a clean, well-ventilated workspace. Clean both copper and brass surfaces with isopropyl alcohol, then abrade lightly to remove oxide and create a fresh metal surface. Wipe away residues and dry completely before proceeding.
Tip: Use separate cloths for copper and brass to avoid cross-contamination. - 2
Apply flux to mating surfaces
Apply a thin, even layer of flux to both surfaces to prevent oxidation during heating and to promote solder flow into the joint. Ensure full coverage but avoid pooling at edges that could cause solder to creep beyond the joint.
Tip: Warm the flux slightly before application for better wetting. - 3
Position parts and secure
Dry-fit the components to confirm alignment. Use clamps or tweezers to hold pieces in place, ensuring there is no movement once heat is applied. Misalignment can produce weak joints that are hard to repair.
Tip: Mark a reference edge to preserve orientation during heating. - 4
Heat evenly and approach the joint with solder
Apply heat to the joint area evenly, maintaining a steady flame distance. Introduce solder to the joint entrance rather than directly onto the flame to encourage capillary flow along the interface.
Tip: Keep the heat moving rather than focusing on a single spot to avoid overheating brass. - 5
Watch for flux glow and wetting
As the metals reach the right temperature, the flux will begin to bubble and the solder will flow into the joint. Stop heating as soon as the joint is fully filled and there are no gaps or voids.
Tip: If you see dull or grainy surfaces, reheat and reapply flux carefully. - 6
Cool and clean
Remove the heat and allow the assembly to cool naturally. Clean any flux residue with wipes or water if using water-soluble flux. Inspect the joint for uniform flow and absence of cracks or porosity.
Tip: Do not quench; sudden cooling can induce stress. - 7
Test and document
Test the joint by gentle flexing or pressure if applicable and observe for leaks or movement. Record the solder type, flux, temperatures, and steps used for future projects.
Tip: Document your recipe; it speeds up repeatability.
Quick Answers
Can I solder copper to brass with a propane torch?
Yes, a propane torch can be used if you maintain steady heat control and proper flux. Avoid overheating brass to prevent annealing and scorching. Practice on scrap pieces to dial in flame size and distance.
Yes, you can use a propane torch as long as you control the heat and flux properly, and practice first on scrap pieces.
Is lead-free solder suitable for copper-brass joints?
Lead-free solder from tin-silver-copper families is generally suitable for copper to brass joints when flux is properly chosen and surfaces are well-prepared. Avoid solders designed for other metals that may wet poorly on brass.
Yes, lead-free solder in the tin-silver-copper family works well if you prep the surfaces and choose the right flux.
Will copper-brass joints be durable for plumbing?
Copper-brass joints can be durable in plumbing contexts when joints are clean, fluxed properly, and cooled gradually. For drinking water systems, ensure compatibility with code requirements and perform leak testing after assembly.
They can be durable if done correctly and tested; always follow plumbing codes and test for leaks.
Can jewelry solder work for copper to brass joints?
Jewelry solder can be used for small decorative joints when working at low temperatures and using appropriate flux. For structural or load-bearing joints, prefer alloys designed for dissimilar metals and controlled heating.
Yes, you can use jewelry solder for decorative joints, but for strength, choose suitable alloys and controlled heating.
What cleaning steps follow flux use?
If you used rosin-based flux, wipe away residues while the joint is warm, then clean with isopropyl alcohol. For water-soluble fluxes, rinse with water and dry thoroughly to prevent corrosion.
Wipe residues, then clean with alcohol for rosin flux; rinse and dry if water-soluble flux was used.
Watch Video
Top Takeaways
- Prep surfaces thoroughly for reliable wetting.
- Choose flux and solder compatible with both metals.
- Control heat to prevent brass overheating and joint failure.
- Inspect joints for uniform flow and clean residues after soldering.
- Document parameters for repeatable results.