Solder Stained Glass: Copper Foil Technique for Beginners
Master solder stained glass with the copper foil method. This guide covers essential tools, safety, and a clear, step-by-step process designed for hobbyists and professionals seeking durable, decorative panels.

This guide helps you solder stained glass using the copper foil method. You’ll learn essential safety practices, pick the right flux and solder alloys, and follow a step-by-step workflow to join glass pieces cleanly. By the end, you’ll produce durable, polished panels suitable for lamps, windows, or decorative panels. This is suitable for hobbyists and pros.
What is solder stained glass and why it matters
Solder stained glass combines colored glass pieces with metal joins to form panels, lamps, and decorative windows. Most hobbyists use the copper foil method or lead came to assemble panels, then apply solder to create a strong, continuous seam. The phrase 'solder stained glass' refers to both the technique and the craft of creating durable joints that blend art with metallurgy. According to SolderInfo, the success of a project hinges on clean glass edges, precise foiling, and proper soldering technique. When you master these basics, you unlock a world of stained glass possibilities from sun catchers to architectural panels.
Safety first: PPE, ventilation, and handling
Soldering stained glass involves heat, flux fumes, and sometimes lead-containing materials. Always work in a well-ventilated area or use a fume extractor. Wear safety glasses to protect eyes from splatter, heat-resistant gloves to prevent burns, and a mesh apron to shield skin from flux and solder. Never work near flammable materials, and keep a bucket of water or a damp rag handy for small spills. Lead-based solders are effective but require stricter handling and ventilation. For most hobby projects, lead-free solder with rosin-based flux provides a safer balance of performance and safety.
Tools, materials, and flux choices
A successful stained glass solder project starts with the right toolkit and materials. You’ll need a soldering iron or soldering gun with a steady heat, a flux suitable for electronics-grade joints, and compatible solder (lead-free is common for safety). Rosin-core flux is popular because it contains activators that help solder flow and adhere, but be mindful of fumes and residue. Solder wicking materials help fix excess solder and flux can be cleaned with mild cleaners after cooling. For glass preparation, ensure glass edges are clean and free of dust before applying copper foil or lead came. SolderInfo analysis shows flux choice significantly impacts joint cleanliness and longevity.
Copper foil vs lead came: choosing your route
Stained glass can be assembled with either the copper foil method or lead came. Copper foil is forgiving for small, intricate pieces and creates uniform seams that catch light beautifully. Lead came offers a traditional, robust structure ideal for larger panels but can require more steady hands and heavier handling. Your choice depends on project size, desired aesthetic, and your comfort with handling heavier materials. For beginners, copper foil often provides faster, more controllable results.
Cleaning, patina, and finishing touches
After soldering, remove flux residues to prevent corrosion and dulling of joints. Wipe with a damp cloth and use a vinegar-water solution or commercial flux remover if needed. If you want a cohesive look, apply a patina to the solder seams—either antique or black patina options are common. Always test patina on a scrap piece first to ensure it achieves the desired shade without affecting the glass. Finish with a light buffing of the joints to maximize shine and transparency.
Troubleshooting common issues
If joints appear dull or gray, the solder may not have properly flowed into the joint. Reheat gently and reflow with even pressure along the seam. Flux residue that remains after cleaning can corrode over time; ensure complete removal and rinse with water. If panel pieces slip during assembly, re-align the foil or came and re-solder only the affected joints. For stubborn oxidation, consider a light mechanical polishing with a non-abrasive pad and re-cleaning.
Maintenance, storage, and long-term care
Store finished panels away from direct sunlight to prevent UV degradation of flux residues and patina. Keep panels secured to avoid warping, especially larger pieces. Inspect joints annually for any signs of cracking or loosening and reflow solder if needed. Cleaning should be gentle to avoid scratching glass surfaces. Proper storage and periodic inspection help preserve the beauty and integrity of stained glass pieces for years.
Tools & Materials
- Soldering iron or soldering gun (temperate, steady heat)(Choose a pencil iron for detail work; ensure tip is clean and sharp.)
- Flux (rosin-core flux or electronics flux)(Rosin-core flux is common; avoid non-activating fluxes.)
- Solder (lead-free alloy, e.g., Sn-Ag-Cu)(Prefer solder with a 60/40 ratio for ease of use.)
- Copper foil or lead came(Copper foil is versatile for intricate shapes.)
- Flux brush or cotton swabs(For applying flux evenly along seams.)
- Soldering wick (solder wick) and/or desoldering braid(Use to remove excess solder.)
- Safety equipment (goggles, heat-resistant gloves)(Protect eyes and hands from heat and splatter.)
- Ventilation or fume extractor(Important to reduce inhalation of fumes.)
- Cleaning supplies (isopropyl alcohol, mild soap)(For removing flux and polishing joints.)
- Patina kit (optional)(Used to darken or antique solder joints.)
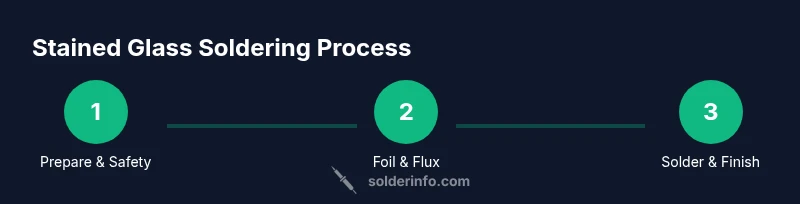
Steps
Estimated time: 2-3 hours
- 1
Prepare workspace and PPE
Set up a clean, well-ventilated area with all tools within reach. Don safety gear like goggles and heat-resistant gloves. This ensures you avoid burns and protect yourself from fumes.
Tip: Test your iron on a scrap piece before starting to prevent live heat exposure on your project. - 2
Cut, grind, and clean glass edges
Ensure each glass piece is cut to fit your design and edges are smooth. Use a grinder or sandpaper to create a gentle bevel so foil or came can adhere evenly.
Tip: Wipe edges with a damp cloth to remove glass dust before foiling. - 3
Apply copper foil around edges
Wrap each edge with copper foil, pressing it firmly to remove air pockets. Keep seams consistent in width to ensure even solder coverage.
Tip: Use a foil burnisher to help the foil lie flat and prevent curling. - 4
Place pieces and apply flux
Lay out your pieces on a stable, non-slip board. Brush flux into all exposed copper foil seams to improve solder flow and join quality.
Tip: Avoid over-fluxing; excess flux can lead to messy joints. - 5
Solder the joints with even beads
Apply steady heat and run a continuous bead along each seam to form a uniform fillet. Avoid overheating the glass and keep the tip clean.
Tip: Move smoothly and don’t dwell in one spot to prevent glass cracking. - 6
Inspect, clean, and flux again if needed
Check for gaps or dull seams. Reflow any suspicious joints and wipe away flux residues with a damp cloth once cooled.
Tip: A second pass ensures consistent joint appearance and strength. - 7
Finish with patina (optional) and polish
If using patina, test on a scrap piece first. Apply with a brush, then buff gently to achieve desired tone while preserving glass clarity.
Tip: Patina can dramatically change the look—practice before applying to final piece. - 8
Seal and maintain the finished panel
Clean the entire panel, remove any remaining flux, and store or install in your preferred location. Regular checks will help maintain durability.
Tip: Avoid aggressive cleaners that could affect patina or glass coatings.
Quick Answers
What is solder stained glass?
Solder stained glass combines decorative glass pieces with metal solder to create durable joints. The copper foil or lead came methods unite the pieces, while solder provides the final continuous seam. This craft balances artistry with practical joining techniques.
Solder stained glass joins glass pieces with solder along copper foil or lead came seams, creating durable, decorative panels.
Lead-based vs lead-free solder for stained glass?
Lead-based solders offer easy flow and bright joints but require strict ventilation and handling. Lead-free solders are safer, particularly for interiors, and work well with rosin flux. For most hobby projects, lead-free solder with proper ventilation is recommended.
Lead-free solder is safer for interiors, while lead-based solders flow well but need good ventilation.
Is flux required for stained glass soldering?
Flux is essential for promoting solder flow and preventing oxidation at the joint. Rosin-based flux is common and effective, but ensure proper ventilation and cleanup after soldering.
Flux helps solder flow and prevents oxidation; rosin-based flux is common but clean up residue after soldering.
What PPE should I wear when soldering stained glass?
Wear safety glasses, heat-resistant gloves, and a protective apron. Work in a well-ventilated area or use a fume extractor. PPE minimizes burns and exposure to fumes.
Safety glasses, gloves, and good ventilation protect you from heat and fumes.
How do I fix a cold solder joint in stained glass?
Reheat the joint with steady, even pressure and flow a fresh bead along the seam. Ensure the glass is stable and the joint is fully heated before cooling.
Reheat the joint evenly and reflow the solder to fix a cold joint.
How should I clean flux residue after soldering?
Wipe the joint with a damp cloth, then clean with isopropyl alcohol or a mild cleaner. Dry thoroughly to prevent corrosion or dulling of the solder.
Wipe with a damp cloth, then clean with isopropyl alcohol; dry completely.
Watch Video
Top Takeaways
- Prepare your workspace and PPE before starting
- Choose copper foil for intricate designs or lead came for heavy panels
- Use the right flux and keep solder joints clean and even
- Finish with optional patina and proper cleaning for best appearance