How to Solder Aluminum Together: A Practical Guide
Learn safe, effective methods to solder aluminum together, including surface prep, flux selection, and heat control. This comprehensive guide by SolderInfo covers tools, steps, and troubleshooting to help hobbyists and professionals achieve reliable joints without warping.

By the end of this guide you will learn how to solder aluminum together using proper surface prep, flux, and a suitable filler method. Aluminum forms a stubborn oxide layer, so you’ll use aluminum-ready solders or brazing alloys and careful heat control to minimize warping. This quick answer outlines the essential steps and safety considerations.
Why aluminum is tricky to solder
Aluminum is widely used in electronics enclosures, plumbing, and jewelry because it is light and strong, but soldering it is notoriously challenging. The primary culprit is the naturally forming oxide film that appears almost instantly on fresh aluminum surfaces. That oxide is resistant to wetting by most solders and fluxes, which makes reliable bonding difficult unless you address it directly. The SolderInfo Team notes that successful aluminum joints rely on three core factors: rigorous surface preparation, an aluminum-compatible flux, and a filler metal designed for aluminum. On top of that, aluminum conducts heat differently from copper or steel, so heat management is critical to avoid overheating and warping delicate parts. Standard tin–lead solders simply won’t wet aluminum effectively, which is why aluminum-specific solder or brazing approaches are favored for clean joints. With the right approach, you can create reliable aluminum-to-aluminum or aluminum-to-steel joints for electronics housings, mechanical assemblies, or small jewelry components.
According to SolderInfo, mastering aluminum bonding also means planning joint geometry that can tolerate some alloy mismatch and thermal expansion. In practice, expect a more meticulous prep routine and longer time to establish a solid bond than you would with softer metals. This section sets the stage for practical methods you can apply, backed by general engineering principles rather than a single product recipe.
Preparation and safety
Getting a successful aluminum joint starts long before you touch the filler metal. Begin by setting up a clean, well-ventilated workspace and donning appropriate PPE: eye protection, gloves, and a respirator or good fume hood if you are flux-intensive. Work on a stable surface with clamps or heat sinks to protect delicate parts from heat distortion. Ensure the workpiece is free of oils, grease, and fingerprints; even tiny residues can prevent proper bonding. Prepare scrap pieces to practice your technique before attempting final joints. Practicing on scrap allows you to optimize flame or heat control and joint geometry without risking your main parts. Soldering aluminum produces fumes that require ventilation, so never skip airflow. The SolderInfo team emphasizes patience; rushed prep often leads to weak joints or surface oxidation reappearing after cooling.
- PPE and ventilation are non-negotiables for safe aluminum work.
- A clean, clamped setup reduces movement and heat sinks prevent warping.
- Practice on scrap to dial in technique before final assembly.
Choosing the right filler and flux
Choosing the right filler metal and flux is essential when you want to solder aluminum together. Look for aluminum-compatible alloys or solders that are specifically formulated for aluminum bonding, or brazing alloys designed for aluminum-to-aluminum or aluminum-to-steel joints. Flux should be designed to work with aluminum oxides and should promote wetting of the oxide layer so the molten filler can bond to the base metal. Avoid general-purpose fluxes that are not rated for aluminum, as they can leave residues that hinder joint quality. If you are uncertain, start with a small test joint and monitor how the flux behaves under heat. Remember, the flux’s role is to break the oxide barrier and permit the filler to flow smoothly into the joint. SolderInfo analysis shows that the right combination of flux and filler dramatically improves wetting and joint strength when done consistently.
- Use aluminum-specific flux and aluminum-compatible filler metal.
- Test on scrap pieces to confirm wetting and flow.
- Keep residues clean after cooling to prevent corrosion or interference with future joints.
Surface prep and joint design
Surface preparation is the most critical step in achieving reliable aluminum solder joints. Start with a thorough degrease using a solvent like acetone or isopropyl alcohol to remove dirt, oil, and fingerprint oils. Then remove the native oxide layer by light mechanical abrasion with a non-contaminating pad or fine abrasive cloth—do not gouge the metal, but create enough roughness for good mechanical interlock. Abrasion should be followed by another solvent wipe to remove particulates. When designing the joint, favor interlocking shapes that provide more contact area and resist peeling forces. If possible, pin or rivet the parts to restrict movement during heat application. Soldering aluminum joints benefits from surfaces that are flat and well-aligned; misaligned parts can cause gaps where filler metal fails to bond properly.
- Degrease thoroughly before any mechanical prep.
- Create a light abrasive texture to improve wetting.
- Favor joint designs that maximize contact area and stability during heating.
Heat management and technique
Aluminum requires careful heat management to avoid thermal damage and oxide regrowth during the process. Apply heat evenly to the joint, using heat sinks on delicate areas to resist spreading heat into the surrounding metal. Begin with the base metal at a moderate temperature and then introduce the filler material when the base metal is clean and receptive. If using a torch, maintain a steady, controlled flame and avoid overheating any one area, which can warp or anneal the metal. If you are using a soldering iron, keep the tip clean and use a larger tip to distribute heat evenly. The aim is to keep the oxide layer suppressed long enough for the filler to wet the surface, flow smoothly, and fill the joint. After the joint flows and cools, inspect for uniform fillet and absence of voids.
- Use heat sinks to protect surrounding features.
- Maintain even heating to prevent warping.
- Keep a clean, ready workpiece and tip to stabilize the process.
Troubleshooting and common issues
Even seasoned hobbyists encounter issues when soldering aluminum. Common symptoms include a dull, non-wetting joint, oxide re-formation after cleaning, or fractures along the joint after cooling. If you encounter these, pause and re-evaluate your prep: re-clean, re-abrade, re-apply flux, and reheat slowly. Always inspect the joint after cooling; if you see voids, cracks, or insufficient coverage, you may need to rework the area with more flux and better heat control. For thin or intricate parts, consider using a jig to maintain alignment while the filler flows. Finally, keep in mind that aluminum bonding might not be as strong as a welded joint for heavy mechanical loads; for critical loads, consider alternative joining methods or thicker sections.
- Re-clean and re-flux if wetting fails.
- Use jigs or clamps to maintain joint alignment during heating.
- Consider alternative joining methods for structural parts.
The SolderInfo perspective on aluminum joining
From a practical standpoint, the aluminum-to-aluminum joint is feasible with the right filler and flux, but it demands patience and meticulous prep. The SolderInfo team highlights that practice and test pieces are invaluable for developing a repeatable process. With consistent preparation, a well-chosen filler, and controlled heat, you can achieve joints suitable for electronics housings, hobby projects, and jewelry components. Remember to document your process and adjust based on the joint geometry and material thickness.
Tools & Materials
- Temperature-controlled soldering iron or micro torch(Choose a tool with enough heat capacity to quickly bring the joint to temperature without overheating surrounding material.)
- Aluminum-compatible filler metal (solder or brazing alloy)(Select a filler designed for aluminum bonding and compatible with your base metals.)
- Aluminum flux rated for aluminum bonding(Apply as directed; some fluxes require heat-activation or short dwell times.)
- Solvent/degreaser (e.g., acetone)(For initial cleaning of oils and residues.)
- Isopropyl alcohol (70% or higher) for final wipe(Final wipe to remove flux residues or particulates.)
- Scotch-Brite pad or fine abrasive cloth(Light abrasion to break oxide surface and improve wetting.)
- Clamps, magnets, or heat sinks(Keep parts aligned and protect surrounding areas from heat.)
- Safety gear (goggles, gloves, respirator/ventilation)(Protect eyes, skin, and lungs from fumes and hot metal.)
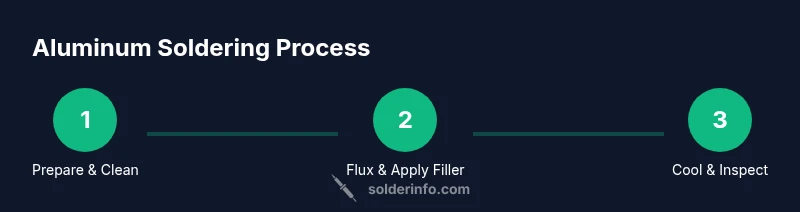
Steps
Estimated time: 2-3 hours
- 1
Prepare workspace and safety gear
Set up a clean, well-ventilated area. Put on eye protection, gloves, and a respirator if available. Secure the workpieces with clamps or a jig to minimize movement during heating.
Tip: Always have a dedicated area for aluminum work to avoid cross-contamination with other metals. - 2
Clean and degrease surfaces
Wipe with solvent to remove oil, then lightly abrade the bonding surfaces to disrupt the oxide layer. Wipe again to remove particulates before fluxing.
Tip: Even a light scratch improves wetting; don’t over-scratch and dull the joint. - 3
Apply flux and position filler
Apply aluminum-specific flux to the surfaces and keep the filler metal nearby. Align joint faces so filler can flow smoothly when heat is applied.
Tip: Flux should be applied generously but not dripping; too much flux can hinder visibility of the weld line. - 4
Heat and feed the filler
Apply heat gradually to the joint, allowing the filler to flow into the joint once the base metal is ready. Avoid overheating the surrounding area to prevent warping.
Tip: Use a slow, even motion and keep the filler in contact with the joint to encourage capillary flow. - 5
Cool and inspect
Allow the joint to cool naturally, not with accelerated cooling. Inspect for a uniform, glossy fillet and absence of gaps or cracks.
Tip: If the joint looks dull or has voids, rework with extra flux and heat in a controlled fashion. - 6
Test and clean up
Test the strength with a gentle stress test on scrap pieces. Clean the area to remove flux residues and set aside for final use.
Tip: Document your procedure so you can reproduce successful joints later. - 7
Document process and reflect
Record the filler type, flux, temperatures, and any adjustments for future projects. A consistent process yields repeatable results.
Tip: Keep a small notebook or digital log for reference.
Quick Answers
Why is aluminum difficult to solder compared to other metals?
Aluminum forms a rapidly re-forming oxide layer that resists wetting by common solders. Without proper flux and surface prep, the filler won’t bond well and joints fail. Using aluminum-specific flux and filler helps overcome this oxide barrier.
Aluminum forms a stubborn oxide layer that makes wetting hard. Proper flux and prep are essential for a reliable joint.
Can I use ordinary electronics solder on aluminum?
Ordinary electronics solder typically won’t wet aluminum effectively. You need an aluminum-compatible filler or a brazing alloy designed for aluminum, plus flux formulated for oxide removal and wetting.
No, standard solder isn’t reliable for aluminum; use aluminum-friendly filler and flux instead.
What flux works best for aluminum bonding?
Fluxes engineered for aluminum aim to dissolve the oxide layer and promote wetting. Look for products labeled for aluminum bonding and follow the manufacturer’s instructions for preheating and dwell time.
Use a flux designed for aluminum to break the oxide and help the filler flow.
Is soldering aluminum permanent and strong enough for mechanical loads?
For small, non-structural joints, aluminum soldering can be durable when done correctly. For high-load or critical parts, consider brazing or welding as alternative joining methods.
It can be strong for light-duty joints, but for heavy loads you may need welding or brazing.
Can I solder aluminum pipes or tubing?
Yes, but joints in tubing require careful heat management to avoid warping and cracking. Use compatible filler and flux, and clamp joints securely during heating.
You can solder aluminum pipes, just manage heat well and clamp the pieces.
How can I avoid oxide re-formation during the process?
Keep the joint hot and covered with flux during bonding, and perform the bonding in a single continuous step if possible to minimize oxide re-formation.
Keep heat on the joint and flux present to prevent oxide from reforming during bonding.
Watch Video
Top Takeaways
- Prepare surfaces thoroughly before attempting joints
- Use aluminum-specific flux and filler metal
- Control heat to prevent warping and oxide growth
- Test joints on scrap pieces before final assembly