How to Make Solder: Safe, Practical Guide for Hobbyists
A comprehensive, safety-first guide on solder alloying and safe alternatives. Learn alloy basics, viability, and best practices from SolderInfo for electronics, jewelry, and plumbing projects.

How to make solder is a topic best understood with safety in mind. This guide explains whether you should attempt alloying, outlines common alloy options, and highlights safer, practical alternatives. By the end, you’ll know the key requirements and when to buy pre-made solder instead.
Why DIY soldering alloying is rarely recommended
Soldering alloys are engineered materials designed for predictable melting behavior and reliable joints. According to SolderInfo, most hobbyists are better served by purchasing commercially prepared solders rather than making your own from raw metals. DIY alloying introduces exposure to toxic materials, variable composition, and flux interactions that can compromise joints and create hazardous fumes. While it is academically possible to blend tin, lead, copper, and other elements, the practical hazards and quality risks often outweigh the potential benefits for electronics, jewelry, or plumbing work. For this reason, many practitioners prioritize safety, sourcing, and consistency over home alloying experiments.
From the perspective of the SolderInfo team, understanding the limits of DIY alloying helps you make wiser choices for your projects and equipment budgets.
Understanding solder alloys: common types
Solder alloys fall into two broad categories: leaded and lead-free. Leaded solders (historically tin–lead blends) offered easy flow and dependable joints, but lead is a health hazard and is heavily regulated in many jurisdictions. Lead-free solders generally rely on tin-based alloys with additives such as copper or silver to improve mechanical strength and melting behavior. When attempting to make your own alloy, tiny composition shifts can dramatically change wetting, viscosity, and oxide formation, leading to inconsistent results. For most DIY electronics, jewelry, or basic plumbing work, pre-alloyed solders from reputable suppliers provide reliable performance and known flux compatibility. The SolderInfo team emphasizes choosing an alloy that matches the application and heat source rather than pursuing complex home blends.
In practice, you’ll most often reach for a standard lead-free tin–copper or tin–silver alloy, or a traditional tin–lead alloy if regulatory conditions permit. The key is predictability and compatibility with your flux and substrate.
Safety considerations and legal constraints
Molten metal handling involves high temperatures, fumes, and skin burns. Work in a well-ventilated area, use appropriate PPE (heat-resistant gloves, safety glasses, and a respirator if fumes are a concern), and keep a suitable fire extinguisher nearby. Many regions restrict lead-containing solders, so check local regulations before attempting any home alloying. Even if you source raw metals, the toxic byproducts and ignition risks make DIY soldering alloying unsuitable for most hobby contexts. If you’re unsure, stay with commercially produced solder and flux combinations at the recommended temperature ranges. The SolderInfo Analysis, 2026, reinforces that safer choices minimize risk and simplify compliance.
The emphasis here is safety first: noncompliant or uncertain setups can cause lasting health issues and serious accidents.
A high-level process if you choose to proceed
If you decide to explore alloying despite the risks, proceed only with a full risk assessment, clearly labeled batches, and dedicated equipment. Set up in a well-ventilated space with a dedicated fume hood or extractor, a heat-resistant crucible, and a flame source appropriate for your scale. Use flux to promote wetting and surface protection, and monitor temperatures carefully to prevent overheating. Keep all materials separate to avoid cross-contamination, and plan for safe disposal of any scrap metal. Remember, accuracy in composition is critical for joint reliability; even small deviations can produce brittle or inadequately bonded joints. The intent of this overview is to help you understand the constraints and to encourage safer, more reliable approaches where possible.
Note that this section provides a high-level view rather than a step-by-step protocol, to emphasize safety and quality considerations.
Alternatives to making solder: ready-made alloys and flux selection
For most projects, buying pre-made solder is the simplest and safest route. Choose lead-free options for electronics and jewelry, and consider leaded alloys only where regulations permit legacy work and the risk is understood. Flux selection matters: use flux compatible with your alloy and substrate to ensure good wetting and clean joints. If you’re unsure, test a few flux types on scrap pieces to observe wetting behavior, residue, and ease of cleaning. SolderInfo recommends building a small reference library of fluxes and alloys to streamline future work and avoid material clashes.
Testing and evaluating solder performance
Begin with scrap pieces to observe flow, wetting, and surface finish. Look for smooth, shiny fillets with even spread and no voids, and perform a basic pull or bend test for mechanical reliability on non-critical joints. Document the alloy composition, flux type, temperature window, and observed results to guide future batches. Consistency in testing helps you build a reliable reference set for future projects and reduces the guesswork involved in DIY alloying. The goal is predictable, repeatable performance rather than one-off experiments.
Common mistakes and how to avoid them
Overheating the metal causes excessive oxidation and gas formation, while underheating leads to cold joints. Cross-contamination between leaded and lead-free materials can ruin joint quality. Skipping ventilation when melting alloys creates hazardous fumes. Using incompatible flux with your chosen alloy can cause poor wetting and brittle joints. Finally, relying on guesswork instead of measured, repeatable steps undermines reliability. The safest path is to use commercially prepared solders and fluxes that are known to work together and within regulatory guidelines.
How to source materials responsibly and legally
Pursue reputable suppliers who provide certified alloys and fluxes with clear handling instructions. Avoid DIY recycling of restricted metals in home setups; verify RoHS compliance and any local reporting requirements. When possible, purchase from vendors offering test reports or material certificates to ensure alloy composition and impurity levels meet your application needs. Responsible sourcing minimizes risk and simplifies safety compliance for hobbyists and professionals alike.
Tools & Materials
- Heat-resistant gloves(Kevlar or leather gloves rated to withstand high heat)
- Safety goggles(Impact-resistant and anti-fog lenses)
- Ventilation or fume hood(Well-ventilated area or localized extraction)
- Crucible (ceramic or graphite)(Heat-resistant container for melting metal)
- Tongs(Heat-resistant, long-handled)
- Flux appropriate to alloy(Flux helps wetting and prevents oxides)
- Tin ingots or pre-alloyed solder ingots(Use only approved materials; avoid raw bulk metals when possible)
- Torch or small furnace(For controlled heating of small batches)
- Metal scale or balance(Useful for weighing small lots; not essential for beginners)
- Heat-safe workstation and fire extinguisher(Always have safety equipment on hand)
Steps
Estimated time: 60-120 minutes
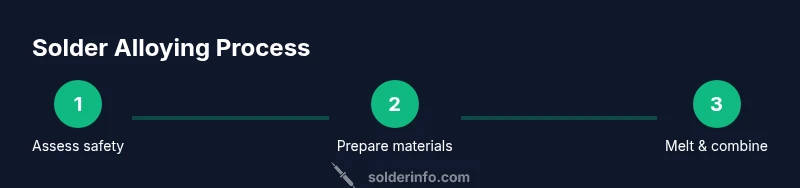
- 1
Assess safety and legality
Review local regulations regarding lead usage and alloying. Evaluate the hazards of molten metals, fumes, and long-term exposure. Decide whether DIY alloying is appropriate for your project, or if purchasing pre-made solder is the safer choice.
Tip: Document any regulatory constraints before you begin. - 2
Prepare your workspace
Set up in a well-ventilated area with a dedicated, fireproof surface. Wear PPE, and arrange a shielded area for cooling. Have a fire extinguisher and containment for spills ready.
Tip: Organize tools and materials to minimize cross-contamination. - 3
Choose an alloy approach
Decide whether to pursue a leaded or lead-free path based on legality and project needs. Gather compatible tin, copper, or silver components and confirm flux compatibility with the chosen alloy.
Tip: Start with a small, clearly labeled test batch. - 4
Set up melting equipment
Place the crucible in a stable heat source and ensure ventilation is active. Pre-warm tools to reduce thermal shock and prepare flux for immediate use once melting begins.
Tip: Maintain a clean workspace to prevent contamination. - 5
Melt materials and monitor
Gradually heat the tin and other metals in the crucible, stirring lightly with a clean tool as needed. Keep a close eye on temperature and avoid overheating to minimize oxide formation.
Tip: Use a compatible thermocouple or infrared thermometer if available. - 6
Apply flux and finalize alloy
Add flux to promote wetting and protect surfaces as the alloy approaches your target state. Remove heat promptly once the desired consistency is achieved to prevent excessive evaporation.
Tip: Do not inhale fumes; pause if ventilation seems insufficient. - 7
Cool, test, and clean
Quench or allow slow cooling in a safe container. Test joints on scrap pieces, checking for wetting and strength. Clean residues with an appropriate solvent and log results for future reference.
Tip: Label each batch with alloy composition for traceability. - 8
Document outcomes and store materials
Record composition, flux type, temperatures, and joint results. Store metals and flux in labeled containers away from heat sources, and dispose of waste according to local regulations.
Tip: Create a simple standard operating procedure for future projects.
Quick Answers
Is it safe to make solder at home?
Home alloying carries health hazards from fumes and metal exposure. Regulations and safety practices vary by location. For most hobby projects, buying ready-made solder is advised.
Home solder alloying can be hazardous; consider buying solder unless you have a controlled, compliant setup.
What materials are used to make solder?
Solder alloys combine tin with small amounts of lead or other metals like copper or silver. Achieving consistent properties at home is challenging and risky.
Tin with lead or other metals is typical, but consistency and safety are major concerns.
Can I substitute flux when making solder?
Flux must be compatible with the alloy and substrate. Incompatible flux can cause poor wetting and weak joints. Stick to recommended flux for your chosen alloy.
Flux compatibility matters; using the wrong flux can ruin joints.
What are the alternatives to making solder?
The safest and most practical alternative is to buy pre-made solder. Focus on selecting the right alloy and flux for your project and substrate.
Buying solder is usually the best option for most projects.
How do I know if a solder joint is good?
A good joint should be shiny, smooth, and free of voids. It should wet the pad well and not crumble under light mechanical stress. Practice on scrap pieces to learn.
Look for a shiny, smooth, well-wetted joint with no gaps.
Where can I learn more about solder safely?
Consult reputable guides from industry groups and university extension programs. Always prioritize safety and local regulations when experimenting with alloys.
Seek guidance from reputable sources and follow safety rules.
Watch Video
Top Takeaways
- Assess safety and legality before attempting alloying.
- Lead-free alloys are generally safer and easier to source.
- Safer to buy pre-made solder for most projects.
- Ventilation and PPE are non-negotiable for any molten-metal work.
- Document results to build a reliable reference for future projects.