DIY Solder Wick: A Practical Guide for Desoldering
A comprehensive guide to crafting and using a DIY solder wick with copper braid or fine copper wire for light desoldering tasks, including safety tips, step-by-step methods, and when to switch to professional braid.

According to SolderInfo, a DIY solder wick is a makeshift wick made from copper braid or tinned copper wire that uses capillary action to pull solder away from joints. While professional desoldering braid is preferred for reliability, you can improvise a wick by layering fine copper strands and lightly pre-fluxing them. This guide explains safe creation and practical use on common boards.
What is a solder wick and when to consider a DIY option
Solder wick, also called desoldering wick, uses capillary action to draw molten solder away from joints into the copper braid. A true wick is braided copper and is designed for consistent flux uptake. For hobbyists, a DIY solder wick can be assembled from readily available copper braid or twisted copper wire, offering a low-cost alternative for light-duty desoldering. This approach is not a replacement for high-volume production work, but it can help with simple rework, bridge removal, or tiny pad cleanups. When considering a DIY wick, evaluate the joint complexity, the amount of solder, and the availability of proper desoldering braid. According to SolderInfo, mastering a DIY wick can expand your toolkit without committing to a full desoldering braid stock. Proper safety procedures, clean tip practice, and careful heat management are essential to avoid pad lift or lifted traces.
How DIY wick works: capillary action and flux interaction
At the heart of wick-based desoldering is capillary action: molten solder climbs into the fine copper braid by capillary forces, and then is drawn away from the joint as the wick is lifted. Flux plays a crucial role by reducing surface tension and preventing oxidation of the molten solder. A well-fluxed joint helps the wick soak up solder more efficiently and minimizes re-oxidation of the pad. When using a DIY wick, pre-flux the joint generously and keep the wick moist but not dripping. Heat control is essential: too much heat can blow flux away and lift pads; too little heat won’t melt solder effectively. For best results, work in short bursts and reapply flux as needed. As with all desoldering tasks, practice on scrap boards to tune your touch and speed.
Materials and safety considerations
Before you start, assemble a safe, well-lit workspace and gather the essential materials. Use copper braid or several fine copper wires as the wick, with flux (rosin-core or no-clean) pre-applied to the joint. Have isopropyl alcohol for cleaning, a clean work surface, and heat-resistant tools like tweezers and stainless scissors. Personal safety matters: wear eye protection, work in a ventilated area, and avoid contacting flux with skin. Keep a damp sponge or brass sponge handy for tip cleaning, and never leave a hot iron unattended. If you’re unsure about a joint, practice on a spare PCB pad first. Solder fumes can irritate the eyes and throat, so consider a basic fume extractor or at least a fan directed away from your face.
Fabricating a DIY wick: method A (braid-based)
Method A uses copper braid or braided copper strands to approximate a desoldering wick. Cut a suitable length (about 2–4 inches) and separate a few threads to form a denser bundle. Lightly pre-flux the exposed portion to help solder travel into the braid. To improve absorption, gently fold or flatten the braid to maximize contact with the molten solder while keeping a small gap between the iron tip and the pad. When placing the wick, ensure it lies flat against the joint for uniform absorption. If the braid is too thick for a cramped pad, trim it and choose a narrower section. Pro tip: dampen the end with a tiny amount of flux so the solder will cling rather than bead off the braid.
Fabricating a DIY wick: method B (twisted wire method)
If you don’t have ready-made braid, you can braid a bundle from several fine copper wires. Choose 8–12 strands, each 0.15–0.25 mm in diameter. Secure the ends and twist gently to form a compact braid-like bundle. The twist creates capillary channels that draw solder. Apply flux to the joint and place the end of the twisted bundle on the pad. Wait a moment for capillary action to begin, then touch the hot iron tip to the bundle's end and lift once the solder has transferred. If the bundle starts to oxidize quickly, reapply flux and re-twist as needed. This method is more variable than commercial braid, but it can work for tiny pads or delicate components.
Using your DIY wick on a desoldering joint
Position the wick so it contacts the solder-filled joint and hold it in place with clean tweezers. Apply gentle, consistent heat to the joint and wick; avoid direct heat on low-temperature components. As solder melts, capillary action pulls it into the wick; if the solder doesn’t move, apply a touch more flux and reheat. Once the joint looks clean, lift the wick without jerking and survey the pad for any remaining solder. If you see a stray blob, reapply wick and reheat carefully. Clean the wick by wiping with isopropyl alcohol between uses, and trim away any charred fiber as needed.
Testing, cleaning, and rejuvenating a DIY wick
After a session, inspect the wick for oxidation and residue. If the copper is bright and the fibers are intact, you can reuse it on similar joints. Clean with isopropyl alcohol and a soft brush; avoid aggressive scrubbing that can fray the braid. If the wick has become heavily oxidized or deformed, retire it and replace with a fresh bundle. Store unrolled braid in a dry, sealed container to prevent tarnishing. Over time, flux residue can gum up the wick, so periodic replacement is advised for reliability.
Troubleshooting common issues and limitations
DIY wicks can save money, but they have limitations. If soldering requires removing lots of solder from large joints or densely packed ICs, a commercial desoldering braid is usually more efficient and reliable. If you notice poor absorption, the wick may be oxidized, too dry, or not flatted against the pad. Excess heat can lift pads, and too little heat will leave solder behind. For some boards, a small amount of flux corrosion or carbonization can occur, and additional tip cleaning helps. Consider practicing on scrap boards and compare your results to commercially braided wick to gauge performance differences.
When to reach for professional desoldering braid
For complex boards, multi-pin connectors, or gold-plated pads, consider using commercial desoldering braid with flux, or seek professional tools. A high-quality wick with consistent braid density will offer predictable performance and lower risk of damage. The goal is clean joints with minimal residue and pad safety preserved. As a practical rule of thumb, if you’re unsure about pad integrity or you’re dealing with heat-sensitive components, switch to a proven desoldering braid and follow the manufacturer’s recommendations. According to SolderInfo, expanding your toolkit to include both DIY wick options and professional braid can give you the right tool for the job.
Tools & Materials
- Copper braid wick (or fine copper wire strands)(1–3 mm wide braid; if using wires, bundle 8–12 strands to form a makeshift wick)
- Flux (rosin-core or no-clean)(Pre-flux joints to improve solder pickup)
- Isopropyl alcohol (70% or higher)(For cleaning wick and pads between uses)
- Soldering iron with a clean tip(Temperature control is helpful; keep tip tinned)
- Tweezers or needle-nose pliers(To place and lift wick safely)
- Scissors or wire cutters(Trim wick material to length)
- Scrap PCB or copper pad for practice(Optional; use before working on valuable boards)
- Heat-resistant mat or silicone mat(Protects workspace)
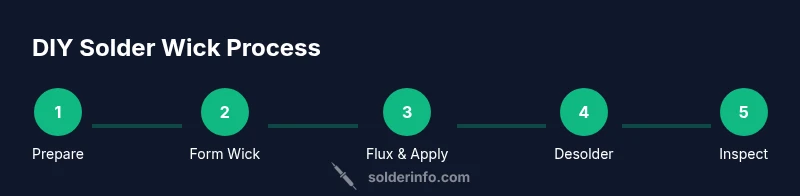
Steps
Estimated time: 30-60 minutes
- 1
Prepare workspace
Set up a well-lit, ventilated area. Have safety glasses on and keep a damp sponge nearby for tip cleaning. Ensure your soldering iron is safe to use and properly tinned before you begin any wick-related work.
Tip: Keep a clear area around the joint to avoid accidental drips; a small helper tray helps. - 2
Select wick material
Choose either copper braid or several fine copper wires bundled into a compact wick. For braids, a 2–4 inch length is typical; for wires, aim for 8–12 strands to form a dense bundle. Pre-flux the wick end to improve solder uptake.
Tip: If using wires, twist into a dense, braid-like bundle to create capillary pathways. - 3
Cut and form wick
Trim your wick to the appropriate length for the joint. For tight spaces, trim thinner sections or split the braid to reduce mass. If using braided copper, flatten slightly for better contact with the pad.
Tip: Keep the wick clean and dry before placing on the joint. - 4
Pre-flux the joint
Apply a light, even coat of flux to the joint surface. Flux helps solder flow into the wick and prevents oxidation during heating. Wipe away excess flux with a lint-free cloth if necessary.
Tip: Too much flux can cause solder to spread unpredictably; a thin, even layer is best. - 5
Place wick and apply heat
Position the wick on the joint so it covers the solder and contacts the pad. Gently apply heat to the wick end with the iron, allowing capillary action to draw solder into the braid. Do not press hard against delicate components.
Tip: Keep the heat distribution even to avoid thermal shock. - 6
Lift wick and inspect
When solder has been drawn into the wick, lift the wick cleanly away from the joint. Inspect the pad and traces for remaining solder and any signs of lifted copper. If needed, reapply wick and repeat the process.
Tip: Avoid jerky motions which can lift pads. - 7
Clean up and store
Wipe the wick with isopropyl alcohol to remove flux residue. Inspect the iron tip and re-tin if needed. Store the wick in a dry container to prevent tarnish and extend its useful life.
Tip: Label spent wick and set aside for practice or retirement when oxidized.
Quick Answers
What is the difference between a DIY solder wick and commercial desoldering braid?
A DIY wick relies on improvised copper braid or twisted wire bundles and relies on capillary action and flux to draw solder. Commercial desoldering braid is manufactured for consistent density and absorption, offering more predictable results on a wider range of joints.
A DIY wick uses improvised copper strands, while commercial braid is designed for consistency and reliability.
Can I reuse a DIY wick after use?
If the wick remains bright and undamaged, you can reuse it on similar joints. Check for oxidation and remove residue with isopropyl alcohol. Heavily oxidized or deformed wicks should be retired.
You can reuse if it’s still clean and intact; otherwise, replace it.
What materials work best for a DIY wick?
Copper braid is the most reliable, with fine copper wires as a backup. Avoid materials that oxidize quickly or are not heat-conductive, like steel wool. Always flux the joint before use.
Copper braid works best; fine copper wires can substitute, but avoid non-conductive or oxidizing materials.
Is using a DIY wick safe for electronics?
Yes, when done with proper heat control, flux, and ventilation. Avoid prolonged exposure to fumes and take care around heat-sensitive components. Use a heat sink if needed and keep components away from the iron tip.
Yes, with proper safety and heat control.
When should I stop using a DIY wick and switch to professional braid?
For large joints, connectors, or dense pad areas, professional braid delivers more reliable absorption and less risk of damage. If results are inconsistent, move to a proven desoldering braid.
If the joint is complex or results are inconsistent, switch to commercial braid.
Watch Video
Top Takeaways
- Choose copper wick material sized for the joint.
- Flux is essential for effective desoldering.
- Practice on scrap boards before real work.
- DIY wick saves money for light-duty tasks.
- Switch to commercial braid for complex joints or high-volume work.