Clean Solder Iron Tip: A Practical How-To Guide
Master safe, effective methods to keep a clean solder iron tip, prevent oxidation, and improve heat transfer. Explore cleaning steps, tinning, and routine maintenance for reliable joints.

By the end of this guide you will reliably restore and maintain a clean solder iron tip. You will learn how to remove oxidation, select the right cleaning method, and re-tin for optimal heat transfer. Before you begin, gather a brass sponge, sponge or cloth, isopropyl alcohol, tip cleaner, and your soldering iron at operating temperature.
Why a clean solder iron tip matters
A clean solder iron tip is the heart of reliable soldering. When the tip oxidizes, heat transfer is inhibited and solder refuses to wet the surface, causing cold joints and frustrated troubleshooting. The phrase clean solder iron tip isn't just cosmetic; it's a practical requirement for consistent results across electronics, jewelry, and plumbing projects. The SolderInfo team emphasizes that tip maintenance affects accuracy, joint quality, and tip lifespan. In short, a clean tip means cleaner solder, less rework, and safer work conditions.
Oxidation forms a protective layer of copper oxide that insulates heat and disrupts wetting. Prolonged heat and contaminants from rosin flux create sticky residues that can corrode plating and blunt the tip. The result is slower heat transfer, uneven solder flow, and increased risk of cold joints. Regular cleaning minimizes these issues by restoring the tip's metallic surface, promoting even heat distribution, and letting solder wet the tip quickly.
Implementing a routine for keeping a clean solder iron tip also reduces maintenance costs and downtime. Beginners can see immediate improvements in joint clarity as wetting improves. Experienced technicians notice more consistent joints and less time spent chasing temperature settings. The goal isn't perfection on every pass, but steady reliability over dozens of connections. According to SolderInfo, a disciplined cleaning routine pays off in reliability.
Signs your tip needs cleaning
Detecting when to clean a solder iron tip is as important as how you clean it. A clean solder iron tip should wet a wire or pad quickly with a smooth, shiny surface. If you notice dullness, skip-wet solder, or blobs that ball up rather than flow, the tip is likely oxidized or contaminated. Sticky residue around the tip or greenish or brownish films indicate rosin residue or corrosion. You may also observe decreased heat transfer efficiency, requiring higher temperatures to achieve proper wetting. Routinely inspect the tip after every few joints to catch buildup early. If joints look dull or require extra probing, perform a quick cleaning before continuing. Regular checks help you avoid large rework and preserve the tip's life. Keeping a clean solder iron tip reduces the risk of damaged boards from uneven heat and oxidized copper.
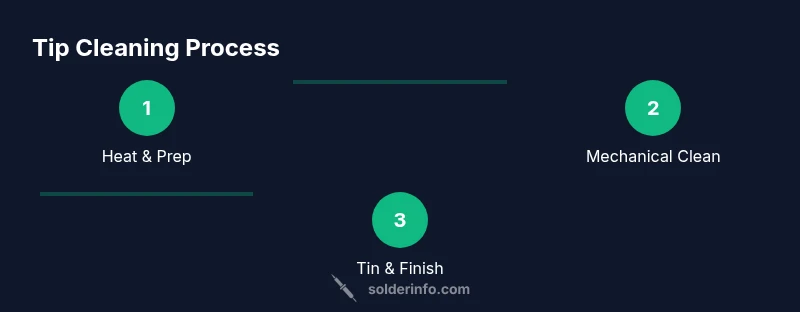
Mechanical cleaning methods: brass sponge and damp sponge
Mechanical cleaning is the first line of defense against oxidation. A brass sponge or brass wool pad is preferred over steel wool because it removes oxide without abrading the tip plating. Start with the iron at operating temperature, then gently scrub the tip on the brass surface in small circular motions. Wipe away residues with a lint-free cloth. If using a damp sponge, ensure the sponge is moist but not dripping; a light puff of water creates steam that helps lift oxidation. Wipe the tip while the iron is hot to prevent quick re-oxidation, and immediately proceed to tin the tip after cleaning for best results. For beginners, practice with scrap boards to learn the right pressure and motion. Using brass or damp sponge consistently gives you a clean solder iron tip with reliable heat transfer and long tip life. Keeping the tip clean during the process improves wetting and reduces rework on delicate components.
Chemical cleaning options: flux cleaners and tip tinners
Chemical cleaners and tip tinners provide an extra boost when oxidation is stubborn. Tip tinner or first-choice flux cleaners remove stubborn oxides that mechanical cleaning can miss. Apply a tiny amount on the tip while the iron is hot and gently scrape or wipe with a lint-free cloth. Do not saturate the area; a small amount goes a long way. After cleaning, re-tin the tip with fresh solder to protect the surface and restore heat transfer efficiency. When used properly, chemical cleaners extend tip life and keep joints clean, especially in environments with heavy flux use. Always follow manufacturer recommendations and ensure good ventilation when using chemical cleaners. The goal is to restore the tip surface without removing protective plating or introducing contaminants.
How to tin a clean tip for longevity
Tin the tip as soon as you finish cleaning to prevent oxidation and to improve heat transfer for the next joint. Gather a small amount of solder and apply a thin, even coating across the tip while it is still hot. Wipe away excess solder to leave a light, uniform layer. A properly tinned tip heats more efficiently, wets surfaces quickly, and resists oxidation. Re-tin at the end of a session to preserve performance for the next use. If you notice dullness after tinning, re-clean and re-tin before resuming work. This habit reduces downtime and protects the tip over many sessions.
Choosing the right tip for your task
Tip choice matters for clean solder iron tip maintenance. Larger tips dissipate heat differently from finer ones, so select a size appropriate for the pad width and joint type you typically work with. Consider tip material and plating; some tips wear oxide films differently, influencing cleaning frequency. Keep spare tips for different tasks to minimize wear on any single tip. Rotating tips can extend life and keep performance consistent across electronics, jewelry, and plumbing applications. The right tip reduces cleaning frequency and helps you maintain a clean solder iron tip with predictable results.
Safety and maintenance routine
A disciplined maintenance routine reduces the risk of accidents and prolongs tool life. Always unplug the iron before changing tips or cleaning, and place it in a stand during breaks to prevent burns. Work in a well-ventilated area and avoid inhaling fumes from flux. Clean the tip while hot using a brass sponge or damp sponge, then immediately tin it. Wipe the work surface and tool after each use to minimize residue transfer. Short, daily checks keep the tip in good shape and prevent buildup from accelerating. Schedule a deeper clean weekly if you work with rosin flux or lead-free solder, and replace worn tips when necessary. The routine should be simple, repeatable, and integrated into your soldering workflow.
Common mistakes to avoid
Avoid letting oxidation accumulate on the tip by skipping cleaning steps during busy sessions. Never use steel wool or harsh abrasives on a tip, as these can remove plating and shorten life. Don’t drown the tip in water or clean while it is submerged; this can cause thermal shock and tip warping. Over-cleaning with aggressive scrubbing can dull the tip and reduce performance. Always keep at least a small quantity of solder on the tip during cleanup to prevent oxidation. Consistently using the recommended cleaning tools and methods yields better results and longer tip life.
Quick troubleshooting and setup checklist
If you still experience poor wetting after cleaning, verify that the iron is at the proper working temperature and that you are using fresh flux and solder. Check that the joint area is clean and free of contaminants, and consider replacing the tip if pitting or heavy wear is evident. Use a brass sponge for mechanical cleaning and a damp sponge as a secondary option to remove stubborn oxides. Keep a regular tinning habit and set up a quick daily routine to ensure a consistently clean solder iron tip. For the best outcomes, combine mechanical cleaning with a light application of flux, then re-tin to seal the tip surface. Authority sources include OSHA guidance on safe soldering practices, NIOSH recommendations for protecting workers from solder fumes, and NIST material-handling standards. Authority sources: https://www.osha.gov, https://www.cdc.gov/niosh/index.html, https://www.nist.gov
Authority sources
- OSHA: Soldering safety guidelines and general handling practices. https://www.osha.gov
- NIOSH: Worker's health considerations when working with fumes and solvents. https://www.cdc.gov/niosh/index.html
- NIST: Standards for material handling and tool maintenance. https://www.nist.gov
Tools & Materials
- Soldering iron with adjustable temperature(Choose a model with stable temperature control; avoid overheating)
- Brass sponge or brass wool cleaner(Preferred over steel wool to avoid tip damage)
- Damp sponge or soft cloth(Damp sponge works well if brass cleaner is unavailable)
- Isopropyl alcohol (90% or higher)(Used for quick wipe before and after cleaning)
- Tip cleaner or tip tinner(Assist in removing heavy oxidation when needed)
- Solder (assorted sizes)(Keep fresh for tinning after cleaning)
- Lint-free disposable cloths(For wiping and finishing without leaving fibers)
- Soldering tip wrench or pliers(For safe tip replacement)
- Soldering stand(Keeps the hot iron safely upright when not in use)
Steps
Estimated time: 10-15 minutes
- 1
Power off and safety check
Unplug the iron and place it in the stand. Allow the tip to cool slightly if needed before handling. Prepare your workspace with clean surfaces and good ventilation. This step reduces burn risk and ensures you work in a controlled environment.
Tip: Always respect heat safety; a hot tip can cause accidental burns or fires. - 2
Pre-clean while hot
Plug the iron back in and let it reach operating temperature. Wipe the tip lightly on a brass sponge to remove loose oxidation. Wipe with a lint-free cloth to remove loose residue.
Tip: Do not scrub aggressively; you want to remove oxide without eroding plating. - 3
Mechanical cleaning with the brass sponge
Gently scrub the tip on the brass sponge using small circular motions. Keep the iron at temperature to maximize oxide removal. Wipe the tip after cleaning to remove oxide fragments.
Tip: Maintain a light touch; excessive force can damage the tip. - 4
Optional cleaning with a damp sponge
If oxidation persists, wipe the tip on a damp sponge to lift residues. Immediately dry and proceed to tin the tip to prevent rapid re-oxidation.
Tip: Only use a damp sponge; excess moisture can cause steam and splatter. - 5
Apply tip cleaner or tin the tip
If heavy oxidation remains, apply a thin layer of tip cleaner or tin with solder. Wipe away excess and re-tin to restore a protective surface.
Tip: Use minimal cleaner; heavy applications can strip protective plating. - 6
Tin the tip for longevity
With the iron hot, coat the tip with a thin layer of fresh solder. This reduces oxidation and improves heat transfer for the next joint.
Tip: Avoid pooling solder on the tip; a light coat is sufficient. - 7
Inspect and store safely
Inspect the tip for shine and uniform coating. If okay, turn off and unplug the iron, then store in a safe stand.
Tip: A clean tip stored properly lasts longer and warms up quickly next use. - 8
Regular maintenance cadence
Set a daily or per-session cleanup ritual. Frequent cleaning preserves tip geometry and ensures reliable joints over time.
Tip: Consistency beats intensity; short daily cleanings outperform infrequent deep cleans.
Quick Answers
How often should I clean a solder iron tip?
Clean the tip whenever you notice oxidation, dullness, or poor wetting. For heavy use, perform quick cleanings between major steps and a thorough clean at regular intervals.
Clean the tip whenever you see oxidation or poor wetting. For heavy use, do quick cleanings between steps and deep clean periodically.
Can I use steel wool to clean the tip?
No. Steel wool can damage the tip plating and shorten its life. Use a brass sponge or approved cleaners instead.
Avoid steel wool; it can damage the tip. Use brass sponge or approved cleaners.
Is it better to tin the tip after cleaning?
Yes. Tinning after cleaning protects the tip from oxidation and improves heat transfer for the next joint.
Yes—tin the tip after cleaning to prevent oxidation and improve future heat transfer.
What is the safest cleaning method for beginners?
Start with a damp sponge and brass sponge while the iron is hot, then re-tin. Avoid aggressive scrubbing and keep sessions short.
Begin with a damp sponge and brass sponge, then re-tin. Don’t scrub hard.
What should I do if the tip looks pitted or worn?
If the tip is badly pitted or loss of plating is evident, replace the tip rather than attempting repairs. Clean tips perform best.
If the tip is badly pitted, replace it for reliable performance.
Watch Video
Top Takeaways
- Keep a clean solder iron tip to ensure reliable joints.
- Use brass sponge or damp sponge for mechanical cleaning.
- Tin the tip after cleaning to prevent oxidation.
- Follow a consistent maintenance routine for best results.