Can You Solder Metal Together? A Practical How-To Guide
Learn how to solder metal together safely and effectively across electronics, plumbing, and jewelry. This guide covers metal compatibility, filler choices, surface prep, heat control, safety, and troubleshooting with clear, step-by-step instructions.

Yes, you can solder metal together, but success depends on metal compatibility, filler metal, flux, and heat control. Soldering works best when surfaces are clean and oxides are removed, favoring copper, brass, and many steels. Aluminum and galvanized steel require special flux and methods. This guide covers fundamentals, safety, and step-by-step instructions for reliable joints.
Can you solder metal together? Key concepts
Soldering metal together is a foundational skill in electronics, jewelry, and plumbing. The core idea is to create a metallurgical bond by melting a filler metal that flows between the mating surfaces and then solidifies to form a solid joint. Not all metals solder well with the same filler metal, and surface oxides can prevent bonding. The success of a solder joint depends on metal compatibility, the right flux, clean surfaces, and proper heat management. When you can match metals that are solder-friendly—such as copper, brass, and many steels—with a suitable alloy and flux, you’ll create reliable joints. In this guide we’ll cover the basics, practical tips, and safety considerations so you can decide if soldering is right for your project and how to do it correctly.
Solder types and flux basics
Solder comes in various alloys and forms, each with its own melting point and wetting behavior. Common electronics solders are tin-based alloys, with lead-free variants (often tin-silver-copper) preferred for health and environmental reasons. A eutectic solder alloy, such as 63/37 (tin/lead) or a lead-free alternative like Sn-Cu, melts at a single temperature, reducing the chance of a lagging joint. Flux is essential to prevent oxide formation and to help the solder flow into a tight joint. Rosin-core flux is typical for electronics, while paste flux or water-soluble flux can be used for plumbing or jewelry, depending on the metal and environment. Always choose flux compatible with the metal and solder you intend to use and remember to clean flux residues after soldering.
Surfaces, metals, and joints compatibility
The metals you plan to join determine which solder and flux are appropriate. Copper, brass, and many steels solder well with standard tin-based solders, while aluminum and galvanized steel require special flux and techniques due to their oxide layers and reactivity. Before you solder, remove oils, grease, and oxides with a suitable degreaser and abrasive pad, then thoroughly dry the surface. Pre-tinning a copper or brass piece (applying a thin coat of solder to the surface) can improve wetting. If you’re attempting aluminum or other challenging alloys, use a flux formulated for those metals and apply heat carefully to avoid burning through the base metal.
Tools and safety gear you need
A proper setup makes all the difference. Essential tools include a temperature-controlled soldering iron or hot air tool, solder wire of an appropriate alloy, flux, a flux brush, a wire brush or scouring pad, and safety equipment such as safety glasses and good ventilation. A heat-resistant workspace mat or board, isopropyl alcohol for cleaning, and a small clip or jig to hold parts in place will help you maintain alignment. For jewelry or delicate electronics, consider a fume hood or external ventilation to manage fumes. Always read product datasheets to confirm flux and solder compatibility with your metals.
Cleaning, prep, and oxide removal
Begin with a clean slate: degrease the metal surfaces with isopropyl alcohol or acetone, then scrub with a wire brush to remove oxides. For stubborn oxidation, a gentle abrasive pad can help; avoid removing too much material. After cleaning, wipe dry and apply a thin layer of flux to both surfaces. Flux not only cleans but also protects the joint during heating by preventing new oxide formation. For copper and brass, you’ll typically see the flux turning the surface slightly shiny as it wets, signaling readiness for soldering.
Step-by-step overview for a basic joint
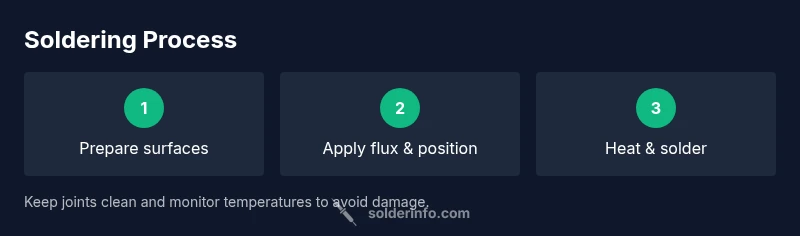
A basic solder joint follows a predictable sequence: prepare, apply flux, heat, and then solder. Start by clamping the pieces so they stay in position. Apply flux to the joint surfaces and bring the heated tip of the iron to the joint. Touch the solder wire to the joint, not the iron tip, and allow the molten solder to flow into the gap. Remove heat as soon as the joint wets and a smooth, shiny fillet forms. Finally, allow the joint to cool undisturbed and clean any flux residue. This overview helps you understand the flow before you dive into the full step-by-step guide.
Troubleshooting common problems
Common issues include cold joints, where the solder doesn’t flow completely, giving a dull, gray appearance; or overheating, which can damage delicate components or warp thin metal. If a joint looks dull or grainy, reheat briefly and try again with a fresh amount of flux. If flux residue is excessive, wash it off with isopropyl alcohol after cooling. In electronics, a poor joint can cause intermittent connections or increased resistance; in plumbing, leaks indicate inadequate wetting, so reflow with proper heat and flux.
Advanced tips for tricky metals
Several metals present special challenges. Aluminum requires an aluminum-specific flux and often a dedicated filler metal with higher surface energy compatibility. Stainless steel and galvanized surfaces benefit from pre-tinning and specialized flux to prevent oxide formation. If you’re joining dissimilar metals, consider a brazing approach or a mechanical connector designed for that pairing. For jewelry, smaller filament solders and careful heat control are key to avoiding burn marks and maintaining a clean aesthetic.
Maintenance, storage, and disposal of soldering materials
Store solder and flux in a cool, dry place away from moisture and direct sunlight. Keep solder reels clean and covered to avoid dust contamination. Flux residues should be cleaned promptly; some fluxes are corrosive if left on metal surfaces. Dispose of spent flux and spent cleaning solvents according to local hazardous waste guidelines. Regularly inspect your tips and re-tin as needed to prevent oxidation and improve heat transfer. Proper maintenance extends the life of your tools and improves joint quality over time.
Tools & Materials
- Soldering iron or hot air tool(Adjustable temperature control; 50-60W for general use; use lower heat for delicate metals.)
- Flux (rosin-core or paste flux)(Choose flux compatible with the metal and solder; apply thin, even layer.)
- Solder wire (appropriate alloy)(Lead-free alloys are common; Sn-Cu or Sn-Ag-Cu for electronics; consider brazing filler for heavy metals.)
- Flux brush(For precise flux application and to spread flux evenly.)
- Wire brush or abrasive pad(Clean oxide layers before soldering.)
- Safety gear (goggles, fume mask, ventilation)(Protect eyes and lungs from fumes and hot splatter.)
- Degreaser (isopropyl alcohol or acetone)(Clean surfaces before fluxing.)
- Heat-resistant mat or board(Safe workspace to protect surfaces.)
- Clamps or jig(Hold parts in place during soldering.)
Steps
Estimated time: 30-45 minutes
- 1
Prepare workspace and materials
Set up in a well-ventilated area and lay out all tools and materials. Plug in the soldering iron and verify the temperature control. Gather cleaning agents, flux, solder, and protective gear so nothing is missing before you start.
Tip: Test heat on a scrap piece to ensure the iron is at a suitable temperature without overheating the actual work. - 2
Clean and prep the metal surfaces
Use degreaser to remove oil and grease, then scrub oxides with a wire brush or pad. Wipe dry and inspect the surfaces for dull or pitted areas that could hamper wetting.
Tip: Ensure surfaces are completely dry before fluxing to prevent steam pockets under the joint. - 3
Apply flux and position parts
Apply a thin, even layer of flux to both surfaces and align the parts carefully. If the joint needs to be held, use clamps or a jig to maintain position during heating.
Tip: Too much flux can foamingly spill and cause solder to wick away from the joint; less is more. - 4
Heat and introduce solder
Touch the solder to the joint (not the iron tip) as you heat, allowing it to melt and flow into the joint. Maintain steady heat and avoid moving parts too soon.
Tip: Feed solder slowly; a good joint should flow and capillary-wet without excessive build-up. - 5
Inspect and reflow if needed
Let the joint cool slightly to check for a smooth, shiny fillet. If the joint looks dull or incomplete, reheat and apply a small amount of solder.
Tip: Do not overheat; excessive heat can damage the base metal or burn flux residues. - 6
Clean up and test
Cool completely, then clean flux residues with isopropyl alcohol. Test the joint mechanically and, if applicable, electrically or pressure-wise.
Tip: Document any defects for future improvements and adjust technique accordingly.
Quick Answers
Can you solder different metals together without special preparations?
Soldering different metals is possible, but it requires careful preparation, the right flux, and often a compatible filler alloy. Some metal pairs bond reliably, while others require brazing or mechanical connectors. Always assess compatibility before attempting a joint.
Yes, you can, but you need proper preparation and the correct filler and flux for the specific metal pair.
Is aluminum soldering feasible, and what does it require?
Aluminum soldering is challenging due to its oxide layer; it usually requires specialized flux, higher heat, and sometimes a dedicated aluminum solder. For most projects, consider mechanical fasteners or brazing as alternatives.
Aluminum soldering is possible with the right flux and setup, but it’s more demanding than other metals.
What temperature range should I aim for when soldering metals?
Temperature depends on the solder alloy and metal. Electronic solders melt around typical soldering iron temperatures, while plumbing solders may require higher heat. Always start at a lower setting and increase carefully to avoid damaging the base metal.
Start with a lower heat and adjust upward as needed for the solder to flow properly.
Do I always need flux when soldering metals?
Flux is essential for most soldering tasks to prevent oxidation and improve wetting. Some pre-tinned surfaces may reduce flux needs, but for most metals and joints, flux helps ensure a reliable bond.
Flux is usually needed to get a good bond and prevent oxidation during soldering.
Is lead-free solder as strong as traditional leaded solder?
Lead-free solders are common and safer for consumer use, but some formulations have different flow and wetting characteristics. For critical joints, test and compare performance, especially in high-reliability electronics.
Lead-free solders are widely used; test your joints to ensure they meet your reliability needs.
What safety steps should I take when soldering around jewelry or electronics?
Work in a ventilated area, wear eye protection, and minimize skin contact with flux. Keep liquids away from electronics unless they’re designed for it, and clean residues thoroughly after soldering.
Always ventilate and protect yourself; clean up flux to avoid skin and electronics damage.
Watch Video
Top Takeaways
- Prepare surfaces and flux correctly.
- Use compatible metals and solders.
- Control heat to avoid oxidation and damage.
- Inspect joints thoroughly and clean residues.
- Store materials properly to extend life.