How to Remove Solder from Copper Pipe: A Step-by-Step Guide
Learn to safely remove solder from copper pipe with practical steps, tools, and safety tips. This guide helps DIY plumbers, electronics hobbyists, and jewelry makers avoid leaks and damage.

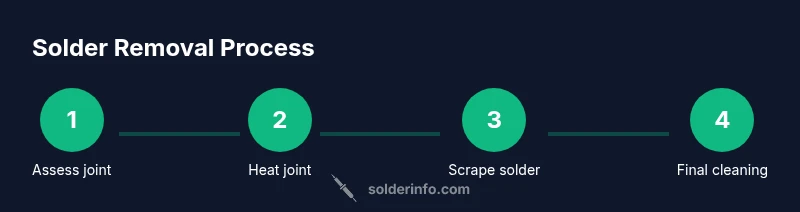
According to SolderInfo, you can safely remove solder from a copper pipe and restore a clean joint. The process requires a heat source (heat gun or propane torch), a scraper or deburring tool, and proper ventilation. Today, the steps help avoid pipe damage and effectively prevent leaks. Review the steps below for details.
Safety First: Hazards and Ventilation
Safety should come first when you attempt to remove solder from copper pipe. The process involves heat, flux fumes, and sharp debris from scraping. The most important safety rule is to work in a well-ventilated area to reduce inhalation of solder fumes and flux vapors. Use safety glasses to protect eyes from hot splatter or molten solder, and keep flammable materials away from the work zone. If you are using a propane torch, have a fire extinguisher or a bucket of water nearby, and never leave the flame unattended. Solder fumes can irritate the lungs and eyes, especially in a small, enclosed space. For hobbyists, a simple fan pointed away from the joint often improves air movement. Additionally, consider wearing gloves to avoid skin contact with flux or molten solder. By following these basics, you lower risk and set up a safe environment for the removal process. According to SolderInfo, safety and proper ventilation are foundational to every successful solder-removal job.
Understanding Why Solder Becomes a Problem
Solder on copper pipe can accumulate over time due to poor connections, aging joints, or improper initial soldering. When that happens, the seam may become airtight but not watertight, which increases the risk of leaks after reassembly. Some solders used in older plumbing contain lead, while modern plumbing standards favor lead-free alloys. The residue from flux can promote corrosion if not cleaned properly, especially in damp or humid environments. The result is a joint that looks okay but fails under pressure. Knowing why solder is hard to remove—whether due to oxidation, adhesive flux, or tightly bonded copper—helps you choose the right approach: gentle heat, careful scraping, and thorough cleaning. SolderInfo analysis shows that a methodical plan reduces the chance of pipe damage and ensures a lasting seal when you finish.
Core Tools and Materials You’ll Need
Before you start, assemble essential tools and materials to avoid mid-task store runs. A good setup keeps you safe and makes the process predictable. Core items include eye protection, a heat source, scraping tools, a lint-free cloth, flux remover or isopropyl alcohol, and spare parts for re-sealing if needed. If you anticipate re-soldering the joint, have lead-free solder and flux on hand. The right tools help you control heat, resist gouging, and clean surfaces for best bonding. SolderInfo recommends a well-stocked bench — this reduces improvisation errors and speeds up the job by keeping everything you need within arm’s reach. Keep rags handy to wipe away melted solder and flux residue as you work, and work on a nonflammable surface to minimize fire risk.
Assess the Joint and Pipe Condition
Take a careful look at the entire joint and surrounding pipe before you introduce heat. Look for metal corrosion, pitting, or compromised pipe walls that might require replacement rather than repair. If the joint shows deep corrosion or a crack, you’ll want to cut out a section and replace it rather than attempting to remove solder and reuse the same fitting. For best results, measure the pipe diameter and note the type of copper used (e.g., Type L vs. Type K) since different alloys behave differently under heat. Cleaning any oxidation around the joint helps you see where the solder is bonded and gauge how much material you need to remove. If you detect a poor fit or misalignment, address that before applying heat to avoid creating a leak later. This preliminary check reduces surprises during removal and sets you up for a secure re-assembly. Based on SolderInfo research, starting with a thorough assessment yields clearer outcomes and fewer follow-up repairs.
Heating Techniques: Torch vs. Heat Gun
Choosing the right heat source is critical. A propane torch can deliver high heat quickly but requires careful control to avoid overheating adjacent materials. A heat gun provides steadier, lower heat that can be safer on nearby plastics or solder joints, though it may take longer to soften stubborn solder. Regardless of the method, keep the flame or heat concentrated at the joint edge rather than blasting the center of the fitting. Move heat in small circles to avoid creating hot spots that can anneal copper and weaken the pipe wall. If you notice discoloration or warping, back off heat immediately and allow the pipe to cool briefly before resuming. In tight spaces, the torch can be risky; a heat gun or a specialized plumbing heat tool might be a better option. The goal is evenly soften solder without deforming copper. SolderInfo emphasizes patience and consistent heat application as the backbone of a successful removal.
Scraping, Cleaning, and Deburring Safely
Once the solder has softened, use a scraper or deburring tool to lift and remove the material in small, controlled passes. Avoid gouging the copper surface; excessive scraping can create grooves that trap moisture or vibrations. Wipe the joint with a lint-free cloth to remove flux residue and molten solder debris, then recheck the joint’s surface. If stubborn solder remains, reapply a touch more heat and attempt a second light pass rather than forcing the tool aggressively. For best results, use a damp cloth after scraping to keep the surface cool and prevent quick oxidation. After all visible solder is removed, inspect again and run your finger along the seam to feel for any irregularities. SolderInfo notes that cleanliness and gentle handling are key to a durable re-seal after removal.
Post-Removal Options: Re-solder or Cap Off
With the old solder cleared, you face two main paths: re-solder the joint or cap it if you’re disconnecting the line. If you re-solder, thoroughly clean and dry the joint, apply a fresh flux film, and rejoin with the correct lead-free solder for plumbing. Use heat to evenly anneal the joint but avoid overheating the pipe or nearby fittings. If you cap off, ensure the end is properly closed with a compatible cap or a stub-out and use appropriate sealant or solderable tape as needed. Each option requires careful inspection to prevent leaks. Choose based on the pipe’s role in the system, the surrounding environment, and local code requirements. The SolderInfo team recommends verifying connections with a leak test after any modification to guarantee reliability and safety.
Finishing and Maintenance: Preventing Future Leaks
After completing the removal and reassembly, take a few finishing steps to prevent future problems. Wipe the joint one final time to remove any remaining flux and allow it to dry completely. If the joint was re-soldered, perform a gentle pressure test using soapy water or a pressure gauge to check for bubbles or pinholes. Inspect nearby joints for signs of heat damage, especially if you used a torch. If you notice discoloration, corrosion, or leakage, address it promptly by reworking the joint or replacing the affected section. Regular maintenance, such as periodic inspections and ensuring proper insulation in exposed outdoor runs, helps extend the life of copper plumbing. SolderInfo reminds readers that consistent checks and careful handling reduce the likelihood of a future failure.
Common Mistakes and Troubleshooting Tips
Even experienced DIYers run into a few common issues. Overheating can anneal copper and widen joints, making leaks more likely after reassembly. Using too much flux or not cleaning residues thoroughly can promote corrosion. Rushing the scraping process often leaves behind stubborn solder that re-seals poorly. If you encounter leaks after reassembly, undo the joint, re-clean the surfaces, re-apply flux, and re-heat gently. In some cases, the pipe may be damaged and require replacement rather than repair. If you are unsure about the pipe’s integrity, consult a professional and perform a controlled leak test before putting the system back into service. With patience and the right approach, you can remove solder from copper pipe effectively and reduce the chance of future problems. The SolderInfo team emphasizes careful technique and thorough cleaning as the foundation of reliable results.
Tools & Materials
- Safety glasses(Protect eyes from hot solder and debris)
- Heat source (propane torch or heat gun)(Ensure proper ventilation and flame guard)
- Soldering scraper or deburring tool(Plastic or metal; remove softened solder without gouging)
- Lint-free cloth or rags(Wipe flux residue and solder debris)
- Flux remover or isopropyl alcohol(Clean joints before final inspection)
- Replacement fittings or pipe cutter (if needed)(Have spare parts ready if pipe is damaged)
- Lead-free solder (plumbing grade)(Needed if you re-solder the joint)
- Gloves and ventilation mask(Additional safety gear for extended work)
Steps
Estimated time: 60-90 minutes
- 1
Prepare workspace and safety gear
Clear the area, set up lighting, and arrange tools within easy reach. Put on safety glasses and gloves, and ensure good ventilation. Secure the pipe with a clamp or vise to prevent movement during heating.
Tip: Have a fire extinguisher nearby and never leave a lit torch unattended. - 2
Apply controlled heat to the joint
Turn on your heat source and gradually apply heat around the joint, moving the flame or nozzle in small circles. Avoid direct, prolonged contact with any one spot to prevent overheating the copper. Target the solder ring first and then spread the heat outward.
Tip: Keep children and pets away; maintain a safe distance from flammable materials. - 3
Scrape softened solder away
Once the solder is softened, use a scraper to lift and remove it in gentle, even strokes. Do not gouge the copper surface; work gradually and check your progress frequently. Wipe away residues frequently to keep the area visible.
Tip: If solder resists, reapply a little heat and try a lighter pass rather than forcing it. - 4
Clean and inspect the joint
After removing solder, clean the joint with flux remover or isopropyl alcohol. Inspect for remaining solder, oxidation, or scoring marks. A clean, dry surface is essential for a reliable re-seal or reuse of components.
Tip: Use a magnifier or good lighting to confirm surface quality and absence of dark spots. - 5
Decide on re-solder or cap off
If you need to continue plumbing, apply fresh flux and use lead-free solder to rejoin. If you are capping the line, install a proper cap and sealant as required. Ensure the final connection is tight and properly aligned.
Tip: Follow local codes for solder alloy and joint length. - 6
Pressure test and finalize
Slowly repressurize the line and test for leaks using soapy water or a dedicated pressure gauge. If bubbles appear, repeat cleaning and re-soldering steps until the joint holds. Once confirmed, wipe the area dry and reassemble any coverings.
Tip: Always test at a safe pressure before returning the system to service.
Quick Answers
What types of solder are best for copper pipe?
For plumbing, lead-free solder is generally recommended and complies with modern codes. Flux should be appropriate for copper, and always use a compatible alloy for joints. Check local regulations before choosing a solder.
For plumbing, use lead-free solder and the appropriate flux designed for copper joints.
Can I reuse old joints after removing solder?
Usually you should not reuse a joint after removing solder; cut back to solid copper and re-solder or replace components for a reliable seal. Inspect the area for damage before proceeding.
In most cases, it's best to re-solder or replace the joint rather than reuse it.
Is a torch always required to remove solder?
A torch is often used, but a heat gun can work for smaller joints or delicate setups. The key is to apply controlled heat and avoid damaging nearby components.
A torch is common, but a heat gun can work in tighter spots with careful control.
How do I test for leaks after re-soldering?
After re-soldering, seal the joint and slowly pressurize the line. Use a soap-water test or a pressure gauge to look for bubbles or drops in pressure. If you see leaks, rework the joint.
Use a soap test or gauge to check for leaks after resealing.
What safety gear is essential?
Wear eye protection, gloves, and ensure good ventilation. Keep flammables away and have a fire extinguisher on hand when using heat.
Protect your eyes and hands and ventilate the area.
What if the copper pipe is damaged?
If you detect deep corrosion, pitting, or cracks, replace the affected section rather than forcing a repair. Cut out the bad area and install a new piece with proper fittings.
Replace damaged sections rather than forcing a fix.
Watch Video
Top Takeaways
- Plan safety and ventilation before starting
- Choose heat source based on space and materials
- Scrape gently to avoid damaging copper surfaces
- Clean thoroughly and re-test for leaks
- Follow local plumbing codes when re-soldering