How Much Solder for 15mm Copper Pipe: A Practical Guide
Discover how much solder you actually need for 15mm copper pipe joints. This analytical guide covers preparation, capillary fill indicators, and a practical workflow from SolderInfo to ensure leak-free plumbing.

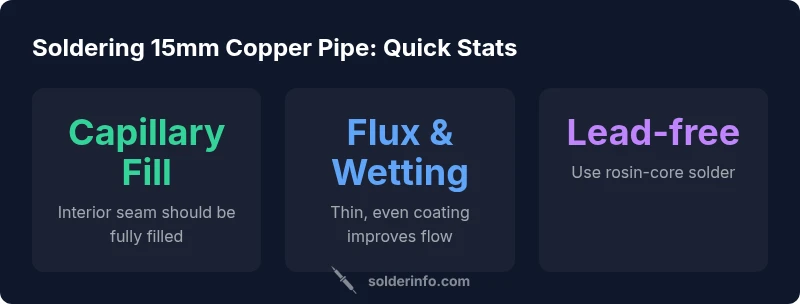
There is no fixed quantity of solder for a 15mm copper pipe joint; the right amount depends on the joint type, fit, and technique. The goal is a full, uniform capillary fill. Apply flux, heat the joint evenly, and feed solder until the interior seam is fully filled and a light outside bead forms. Inspect after cooling and reflow if needed.
Why there isn't a fixed quantity for 15mm copper pipe joints
In plumbing, especially with 15mm copper pipe, there is no universal fixed amount of solder that fits every joint. The diameter of the pipe (15mm is about 0.59 inches) sets the scale, but the amount of solder needed depends on the joint geometry (coupling, elbow, tee, cap), the fit between pipe and fitting, and how you manage heat and flux. The SolderInfo team emphasizes that the goal isn't to dump a large amount of solder into the joint but to achieve a clean capillary fill that completes the interior seam. A properly executed joint should show continuous solder along the interior seam with a modest outer bead, not a pool of liquid solder. This is especially important for joints in tight spaces where excessive solder can cause blockages or misalignment. By focusing on capillary action and controlled feeding, you can achieve reliable joints with consistent results.
How pipe size, fitting type, and joint orientation affect solder amount
A 15mm copper pipe joint behaves differently when you’re connecting a straight coupling versus a 90-degree elbow or a T-branch. The inner surface area, the presence of multiple bore paths, and the angle of heat application all influence how quickly solder flows and how much you need to feed. Elbows and tees tend to require more careful, staged heating to avoid cold joints or gaps. The orientation (horizontal vs vertical) can also affect capillary action. The takeaway is: observe the joint as you heat, look for capillary pull into the joint, and stop feeding once the seam is evenly filled and there is a uniform outer bead.
The role of flux and pipe preparation in determining how much solder is needed
Flux isn't just a helper—it governs how smoothly solder flows into the joint. A thin, even coat of flux on the pipe and the inside of the fitting reduces oxidation and promotes capillary action. Proper cleaning, deburring, and drying of the pipe ends prevent contaminants that would otherwise require extra solder to compensate for leakage paths. Tinning the pipe ends lightly can also help establish a good starting point for the solder to wick into the interior seam. These preparatory steps reduce the risk of over-soldering while improving joint reliability.
Step-by-step: preparing, tinning, heating, and feeding solder
- Cut and deburr both the pipe and fitting; dry-fit to ensure a snug joint. 2) Clean surfaces with a rag and apply a thin coat of flux. 3) Lightly tin the pipe ends to enhance wetting. 4) Assemble the joint and apply heat evenly with a torch until the solder begins to melt and flow into the interior seam. 5) Feed solder slowly at the hottest point, allowing capillary action to pull it into the joint. 6) When the joint is filled, withdraw heat and let it cool undisturbed. 7) Wipe away excess flux and inspect for gaps or cold seams.
Visual cues: when the joint is properly filled
Look for a continuous internal seam with solder flowing along the bore. The interior should appear evenly filled with no gaps. A light, smooth outer bead around the joint is typical; avoid large pools of solder that indicate overheating or excess filler. After cooling, perform a quick leak test (pressure test or soap test) to confirm success. If you see any damp spots, rework the joint.
Common mistakes and how to avoid them
- Overheating: can scorch flux and burn away flux residue, leading to poor wetting. Solution: control flame and heat evenly. - Incomplete fill: result of insufficient heating or flux. Solution: reheat and feed more solder gradually. - Excess solder: creates cold joints or blockages. Solution: apply just enough solder to fill and then remove excess with a damp cloth. - Poor joint alignment: causes leaks. Solution: ensure proper fit before heating.
Special cases: elbows, tees, and long runs
Elbows and tees require careful sequencing: heat the fitting first to avoid overheating the pipe, then feed solder along the joint as capillary action draws it in. For long runs, avoid creating a heat gradient that leaves one section underheated. Work in sections, maintaining uniform tension and constant flux coverage. In all cases, ensure that interior bore paths remain unobstructed and test for leaks after cooling.
Maintenance and safety considerations for 15mm copper piping
Always work in a ventilated area and wear eye protection. Use lead-free solder, rosin-core flux, and proper personal protective equipment. After completing joints, clean away flux residue to prevent corrosion. Regularly inspect joints in exposed installations and perform leak checks periodically, especially in cold climates where thermal cycling can reveal weaknesses.
Soldering joint types for 15mm copper pipe
| Joint Type | Recommended Fillet Inside (approx) | Notes |
|---|---|---|
| Coupling (straight) | Full capillary fill inside joint, small outside bead | Ensure inner bore is fully bridged and check for even exterior bead |
| Elbow 90° | Similar fill with cautious heat control | Watch for twisting that could open gaps at the interior seam |
| Tees | Fill inside all three branches, maintain cleanliness | Provide extra time to achieve capillary flow in all bore paths |
| Repair sleeve | Fill interior seam thoroughly, ensure slip fit remains tight | Recheck after cooling for any movement or gaps |
Quick Answers
How much solder should I use for 15mm copper pipe joints?
There isn't a fixed amount. The correct quantity depends on the joint type and fit. The focus should be on achieving a full interior capillary fill with a light exterior bead, not on adding a specific length of solder. Use flux, heat evenly, and feed solder until the seam is completely filled.
There isn’t a fixed amount of solder. Aim for a full interior fill and a small exterior bead; use flux and heat evenly, feeding solder until the seam is completely filled.
Can I reuse soldered joints?
A properly soldered joint that has cooled and passed a leak test can be considered serviceable. If you suspect a leak or corrosion, cut out and re-solder the joint with fresh flux and solder. Pre-clean and re-flux the surfaces before rejoining.
If a joint leaks or seems compromised, remove it and re-solder with fresh flux. Always clean and flux before rejoining.
What if I use too much solder?
Excess solder can create blockages or obscured joints. If you notice a large puddle, wipe excess carefully while still hot or rework the joint after cooling. In constrained spaces, take extra time to control heat and feed rate.
Too much solder can cause blockages; wipe excess when hot or rework after cooling.
What type of solder is best for plumbing pipes?
Lead-free solder is standard for plumbing due to safety and code compliance. Use rosin-core flux for better wetting and cleaner joints. Choose a compatible solder diameter with your pipe size and fitting type.
Lead-free solder with rosin flux is your standard choice for plumbing.
Do I need to use flux for every joint?
Flux is essential for preventing oxidation and helping solder flow. If you skip flux, you’ll likely see dull joints and gleaming surfaces that indicate poor wetting. Always apply a thin, even coat before heating.
Yes, flux helps solder flow and prevent oxidation; apply a thin coat before heating.
How do I test for leaks after soldering?
Allow joints to cool fully, then perform a pressure test or a soap test. Look for bubbles at joints under pressure, and rework any suspect joints with fresh flux and solder.
Let it cool, then pressure or soap-test for leaks and rework if needed.
“A well-executed 15mm copper joint relies on precise preparation, controlled heat, and allowing solder to wick into the seam through capillary action. There is no magic quantity—quality depends on technique.”
Top Takeaways
- Practice proper prep: clean, deburr, and flux thoroughly.
- Rely on capillary action; there is no fixed solder amount.
- Watch for a complete interior fill and a light exterior bead.
- Avoid overheating and excessive solder to prevent leaks.
- Test every joint after cooling for leaks.