Can You Solder a Pinhole in Copper Pipe? A Practical Repair Guide
Learn safe, code-compliant methods to repair a pinhole in copper pipe with soldering techniques. Step-by-step guidance, tools, and common pitfalls for DIY homeowners and professionals.

Yes. A pinhole in copper pipe can be repaired, typically by removing the damaged section and replacing it with a coupling or end cap. Shut off water, drain the line, clean the pipe, and use flux and lead-free solder with a controlled torch.
Why pinholes happen in copper pipes and can you solder a pinhole in copper pipe
Pinhole leaks in copper water lines usually arise from corrosion, microcracks, mineral buildup, or high pressure over time. Location matters: holes near joints or bends are common, and thin-walled sections from aging are especially vulnerable. Can you solder a pinhole in copper pipe? In many cases, the answer is yes, but the repair choice depends on the hole size, pipe condition, and accessibility. According to SolderInfo, durable repairs rely on clean preparation, proper flux application, the right solder alloy, and closely matched fittings. If the damage is isolated and the surrounding tube remains sound, a properly executed repair can stop the leak. If the pipe wall is thinned or the hole is near a critical joint, replacing a small section may be more reliable and code-compliant. This section lays out how to evaluate the site, select an approach, and execute a repair that lasts.
Safety and prerequisites
Before you touch the pipe, prepare the area and protect yourself. Shut off the main water supply and drain the line completely, leaving it dry to improve solder adhesion. Wear safety glasses and heat-resistant gloves; keep flammables away from the work area; ensure there is good ventilation when using a open flame torch. Check for nearby electrical or gas lines before cutting or heating materials. If you’re unsure about local plumbing codes, consult the permit guidelines or a licensed plumber. A careful plan reduces surprises and helps you avoid creating additional leaks.
When to patch vs replace and how to decide the best approach
Patching with a cap or a small collar can work for very small, clean holes in straight sections where the pipe wall remains thick. However, if the hole is larger than a standard pinhole, the wall is corroded, or the pipe is near a joint, replacement of a short section with a properly sized coupling is often more durable and compliant. Soldered patches may fail if the pipe is not perfectly dry, if corrosion is spreading, or if the fittings aren’t fully seated. In some cases, replacing a longer section or bending the pipe to avoid repeat failures is the safer long-term option. Always evaluate the pipe’s age, the extent of damage, and accessibility before committing to a repair.
Tools and materials you'll need (overview) and what to gather in advance
A successful repair depends on having the right tools and materials on hand. You’ll typically need a pipe cutter, deburring tool or sandpaper, a brush or cloth for cleaning, flux (rosin-based), lead-free solder, appropriate fittings (couplings or caps), and a fire-safe surface to work on. Dry rags, a bucket, and a sealable container for waste can help keep the workspace tidy. If you’re patching a hole, you’ll need a compatible cap or a short section of copper and a coupling; if replacing, you’ll need a length of pipe equal to the cut-out section. Having a gas-free area and a fire extinguisher nearby is a wise precaution. For a more systematic checklist, keep a written plan and verify all components before heating begins.
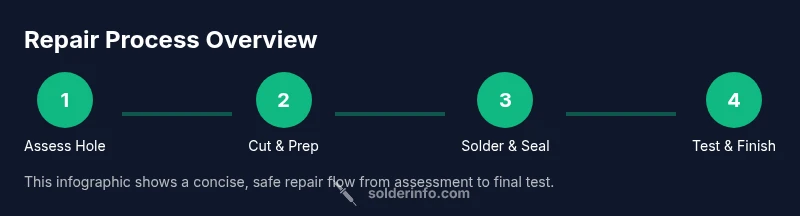
Step-by-step repair overview (high level) and what to expect
- Assess the hole and plan the repair. 2) Shut off water and dry the line. 3) Prepare the pipe ends and fittings. 4) Apply flux to the cleaned surfaces. 5) Position the coupling or cap and solder, keeping the flame away from combustibles. 6) Allow the joint to cool naturally and wipe away excess flux. 7) Test for leaks with water pressure and, if safe, a gentle air test. 8) Finish by cleaning the area and documenting the repair for future maintenance. This overview gives you the framework; the STEP-BY-STEP section provides granular actions.
Testing for leaks and final finishing steps
Once the repair cools, slowly restore water supply and inspect the joint for any drips. A pressure test (within normal household pressure) helps confirm seal integrity. If you notice a leak, power down and recheck the joint: clean frayed edges, reapply flux, and re-solder if needed. Wipe away flux residue to prevent corrosion, and ensure the area is dry before re-testing. Finally, insulate exposed sections if needed and observe the repaired line over several days for any signs of slow leaks or corrosion.
Common mistakes and best practices to avoid recurring leaks
Common pitfalls include overheating the copper, which can anneal and weaken the metal, or failing to dry the surface thoroughly before soldering. Using too much flux or not cleaning the pipe adequately can trap debris and cause leaks. Always use lead-free solder for drinking-water lines and verify that fittings are fully seated and the joint is allowed to cool undisturbed. Taking time to plan, properly-clean surfaces, and testing under gentle pressure reduces the likelihood of future leaks.
Tools & Materials
- Pipe cutter (copper pipe)(Clean, straight cut; adjust to pipe OD)
- Deburring tool or sandpaper (emery cloth)(Smooth edges for better joint seating)
- Flux (rosin-based or paste flux)(Use rosin flux for copper piping)
- Lead-free solder (type: 95/5 or 60/40)(Ensure compliance for drinking water)
- Propane or MAP propane torch with regulator(Keep flame controlled and away from combustibles)
- Replacement copper pipe section or coupling/cap(Match outer diameter and wall thickness)
- Dry rags or towels(Clean up flux and water)
- Bucket and towel for drainage(Catch water and keep area tidy)
- Safety glasses and heat-resistant gloves(Personal protection)
- Fire extinguisher(Nearby as precaution)
Steps
Estimated time: 60-120 minutes
- 1
Shut off water and depressurize
Close the main water supply and open a nearby faucet to relieve pressure. Use a bucket to catch any residual water. Keep the area dry to improve solder adhesion.
Tip: Double-check the shut-off valve works before proceeding. - 2
Assess hole and decide repair method
Evaluate the hole size, wall thickness, and proximity to joints. Decide whether to patch with a cap, patch collar, or replace a short section of pipe.
Tip: If the wall shows signs of corrosion, plan for replacement rather than patching. - 3
Prepare pipe ends and remove damaged material
Use the pipe cutter to remove the damaged section cleanly. Deburr the cut edges and remove oxidation from both ends plus the replacement piece.
Tip: Keep cuts square for best joint alignment. - 4
Apply flux and fit the connector
Coat the pipe ends and the inside of the fitting with flux. Position the coupling or cap so that it sits firmly against the pipe without gaps.
Tip: Wipe away excess flux to prevent corrosion. - 5
Solder the joint with a controlled flame
Heat the joint evenly with your torch, feeding solder into the joint as it sweats. Stop when a smooth, even bead appears around the fitting.
Tip: Heat from the outside edges toward the center to avoid heat concentration. - 6
Cool, inspect, and test for leaks
Allow the joint to cool naturally. Refill water gradually and inspect for drips. If a leak appears, re-clean, re-flux, and re-solder the joint.
Tip: Never force-cool with water; rapid cooling can stress the joint. - 7
Finalize and document the repair
Wipe away flux residue, recheck alignment, and consider insulation for exposed sections. Note the repair in your home maintenance log.
Tip: Keep spare fittings on hand for future repairs. - 8
Plan for longer-term prevention
Regularly inspect for corrosion, replace aged pipes, and maintain proper water pressure to minimize future pinholes.
Tip: Schedule annual checks if your home is over 40 years old.
Quick Answers
Is it safe to solder copper pipe indoors?
Yes, provided you follow proper ventilation, keep flames away from combustibles, and wear protective gear. Always check local codes and shut‑offs before starting.
Yes, it’s safe if you follow ventilation, protective gear, and local codes, and you shut off the water first.
When should I replace the pipe instead of patching a pinhole?
If the pipe wall is thinning, corrosion is widespread, or the hole is near a joint, replacing a short section is usually more reliable than patching.
If the pipe is seriously corroded or near a joint, replacement is often the safer option.
Do I need to use lead-free solder for all repairs?
Yes. Use lead-free solder for drinking-water lines to comply with safety standards and avoid lead contamination.
Absolutely, use lead-free solder for any drinking-water pipes.
Can I test for leaks with normal household pressure after repair?
Yes, gradually restore water and observe the joint for several minutes. For a more thorough test, perform a gentle pressure test as you monitor the joint.
Slowly restore water and watch the joint for leaks for a few minutes.
What are common mistakes beginners make when soldering copper?
Overheating, rushing joints, not cleaning properly, and skipping flux can lead to weak joints and leaks. Take your time and verify each joint.
Common mistakes are overheating, not cleaning, and skipping flux.
What if the hole is very close to a valve or fitting?
If the leak is near an valve, consider replacing the short section or moving the valve if possible to create a clean repair area.
If the hole is near a valve, you may need to replace the section or adjust the valve position.
Watch Video
Top Takeaways
- Shut off water and relieve pressure before work.
- Choose patch or replace based on pipe condition and hole size.
- Use lead-free solder and proper flux for safe, durable joints.
- Test leaks with water pressure and inspect carefully.
- Document repairs for future maintenance and safety.