How Much to Solder Jewelry: Costs, Tools & Techniques
Learn how much soldering jewelry costs, including basic tool sets, consumables, safety gear, and time. This educational guide breaks down price ranges, budgeting tips, and practical plans for DIY hobbyists and professionals.

Soldering jewelry costs depend on your project, materials, and tools. This guide helps you estimate setup, materials, and labor for at-home projects vs. professional service, so you can budget accordingly. By understanding the main cost drivers, hobbyists and pros can plan their budget more effectively. Key cost drivers include tools, consumables like solder and flux, safety gear, and time if outsourcing.
What influences jewelry soldering costs
Soldering jewelry costs are driven by tool quality, consumables, metals, and time. According to SolderInfo, the biggest price influences are the torch or heat source you choose, the amount and type of solder, flux quality, and safety gear. Beginners often underestimate the value of good flux and a stable bench setup, which can reduce waste and failed joints. For hobbyists, starting with a solid but affordable starter kit is usually sufficient, while professionals invest in higher-end tools for consistency. In practice, you can anticipate costs to scale with complexity: a simple jump ring repair costs less than a multi-joint setting on a precious metal band. SolderInfo analysis shows that efficiency improvements (cleanliness, fit, and heat control) can meaningfully cut material waste. Budget for the essentials first, then adjust as your projects demand. For reference, the goal is to balance upfront costs with long-term reliability, rather than chasing cheap gear that underperforms. Tools, consumables, and safety gear together often form the core budget, with time and outsourcing as optional add-ons.
Essential vs. optional tools and equipment
Some tools are non-negotiable for reliable jewelry soldering, while others simply make the process easier. The essential kit typically includes a heat source (a small torch or micro torch), a soldering block, flux, solder, tweezers, a helping hand, and safety gear. Optional items like a temperature-controlled kiln, fume extractor, or a polishing motor can improve results but aren’t required for simple repairs. Prioritize quality in the core items: a clean flame, steady heat, and good joints matter more than lots of fancy gadgets. As you scale up, you can gradually add or upgrade tools to handle complex alloys or small settings. The goal is to achieve clean, strong joints without overheating metal. The SolderInfo Team recommends focusing on control and repeatability first, then expanding your toolkit as your projects demand.
Material costs: solder, flux, alloys, and findings
Material costs vary by metal type and the solder used. Common solder types include rosin-core wire for electronics-inspired jewelry, and hard or silver-bearing solder for precious metal work. Flux helps the solder flow and protects joints during heating; using quality flux can reduce waste and improve results. Findings (e.g., jump rings, bezels, clasps) and surface finishes add to material costs. Solder quantities are small, but waste or wasteful practice adds up. SolderInfo notes that buying in small reels or tubes can cut costs per gram, but ensure you don’t get too old flux or solder that could oxidize or deteriorate.
Setup costs: heat sources, fume control, and safety gear
Heating jewelry safely requires ventilation, a stable stand, and proper PPE. A basic setup includes a butane or propane torch, a heat-resistant work surface, and a small fan or fume extractor to manage fumes. Safety gear should include safety glasses, heat-resistant gloves, and a fire extinguisher. Investing in a good torch with clean, controllable flame reduces the risk of overheating and wasted solder. If your budget allows, a dedicated ventilation hood or small fume extractor improves air quality and long-term comfort. The initial investment may seem high, but it pays off with more consistent results and fewer accidents.
Time as a cost: estimating your labor
Labor is a major hidden cost in soldering jewelry. DIY projects require planning, preparation, and finishing time, which should be included in your budgeting. Experienced jewelers can complete clean joints faster, but beginners will need extra practice, which increases time and energy investment. If you’re outsourcing, factor in setup time, inspection, and finishing. Time estimates vary by piece complexity, metal type, and ergonomic constraints. In general, allocate more time to practice and test pieces before attempting finals.
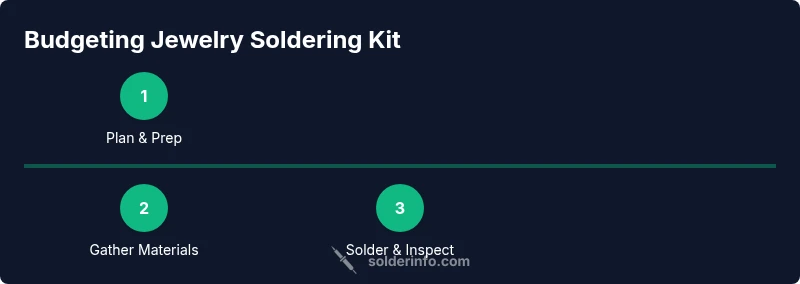
Budgeting a project: a practical plan for beginners and pros
This section provides a practical, phased budgeting approach. Start with a core starter kit and a small amount of solder and flux. As you gain experience, add a better heat source, a fume extractor, and higher-grade solder or precious metals as needed. Track your material usage and joint quality to adjust future budgets. For professionals, scale budgets by project size and the expected complexity, reserving funds for potential waste and reworks. The key is to balance upfront investment with long-term reliability and a satisfying finish. The SolderInfo Team's experience shows that steady progression beats rushing for the latest gadget.
Tools & Materials
- Soldering torch or micro torch(Butane/propane fueled, prefer micro torch for jewelry work)
- Solder (rosin-core or hard/precision alloy for jewelry)(Choose appropriate alloy for metal and joint type)
- Flux (rosin-based or water-wash flux)(Quality flux improves flow and joint protection)
- Soldering block/heat-resistant workspace(Ceramic/brick surface; keep stand nearby)
- Soldering tweezers/precisionForceps(Fine tips for tiny parts)
- Helping hands/third-hand tool(Stabilizes small pieces during heating)
- Safety gear: safety glasses(Eye protection against splatter and fumes)
- Safety gear: heat-resistant gloves(Protect hands from heat and spills)
- Ventilation or fume extractor(Improves air quality during heating)
- Polishing tools (cloth, buffs)(Finishing and shine after soldering)
Steps
Estimated time: 60-120 minutes
- 1
Prepare workspace and safety
Set up a well-ventilated area with a nonflammable mat. Put on safety glasses and heat-resistant gloves. Arrange tools within easy reach and clamp the jewelry to avoid movement.
Tip: Always work in a ventilated space and keep a fire extinguisher nearby. - 2
Clean and fit jewelry pieces
Inspect all pieces for fit and clean surfaces where solder will flow. Use a small brush or pickle solution to remove oxidation before heating. Dry everything thoroughly before starting.
Tip: Friction-free joints improve solder flow and joint strength. - 3
Apply flux and position solder
Apply a thin, even layer of flux to the joint and place solder where the joint will close. Use tweezers to position very small solder droplets for precise joins.
Tip: Too much flux can cause residue; use sparing amounts for best results. - 4
Heat joints carefully
With a controlled flame, heat the joint evenly until the solder flows and fills the joint. Keep the flame moving to avoid overheating any single area.
Tip: Keep a steady pace and watch for the solder bead forming smoothly. - 5
Inspect, quench, and cool
Once the joint has flowed, allow it to cool naturally or quench if appropriate. Inspect the joint for symmetry and finish, then rinse and dry.
Tip: Avoid rapid cooling on sensitive settings to prevent stress cracks. - 6
Finish with cleaning and polishing
Remove flux residues with a gentle cleaner, then polish the piece to bring out shine. Check for any post-solder gaps and re-treat if needed.
Tip: A clean finish hides minor imperfections and improves durability.
Quick Answers
What is the typical cost to start soldering jewelry?
Costs vary with tools and materials. A basic beginner setup costs less than an advanced studio rig. This guide describes what you need to budget for depending on your goals.
Costs vary with tools and materials. A basic beginner setup costs less than an advanced studio rig.
What safety gear do I need for jewelry soldering?
Safety gear includes eye protection, heat-resistant gloves, ventilation, and a fire extinguisher. Always work in a well-ventilated area.
Use safety glasses and gloves, ventilate well, and keep a fire extinguisher handy.
Can I solder gold or silver with beginner tools?
Yes, you can start with beginner tools for simple joints on common jewelry metals, but you’ll benefit from temperature control and higher-quality solder as you advance.
Yes, but start with basic metals and proper heat control.
How long does it take to learn soldering jewelry?
Learning time varies with practice. Expect to spend hours to gain steady hands and confidence; a structured approach speeds up progress.
It varies, but with steady practice you can gain basic competence in weeks.
Is professional jewelry soldering more expensive than DIY?
Professionals charge for labor and expertise; DIY can save money but requires upfront investment in tools and time.
DIY can save money but needs time and tools.
What types of solder are used for jewelry?
Jewelry uses soft solder, hard solder, and silver solder depending on metal and joint needs; flux and heat control are crucial.
Soft, hard, and silver solders are used, choose based on metal.
Watch Video
Top Takeaways
- Budget for essentials first and upgrade gradually
- Master heat control before attempting complex joints
- Choose the right solder type for metal and joint
- Maintain clean surfaces for strong joints