What Temperature Solder Guitar: Mastering Solder Temperatures for Guitar Electronics
Learn safe, effective temperatures for soldering guitar electronics. This expert guide from SolderInfo covers leaded vs lead-free solders, tips for pickups and pots, and how to avoid heat damage.

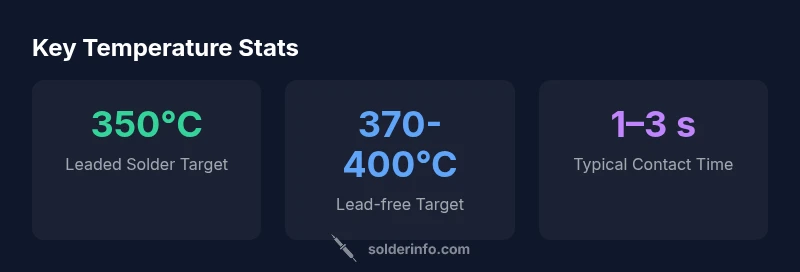
For most guitar electronics, aim for about 350°C when using leaded solder (60/40) and 370–400°C for lead-free solder. Maintain a brief contact (1–3 seconds) and use quality flux; avoid prolonged heat to protect pots, switches, and pickups. Practice on spare components to fine-tune your technique.
Understanding the role of temperature in guitar soldering
When working on guitar electronics, temperature is a critical control knob. The phrase what temperature solder guitar projects require isn’t one-size-fits-all; it depends on solder alloy, flux, and the sensitivity of guitar components. In general, you want enough heat to create a solid joint without melting insulation, scorching lacquered cavities, or weakening pot cores and winding coatings. Leaded solders (such as 60/40 tin-lead) typically melt at lower temperatures than many lead-free alloys, which means you can finish joints faster and with less heat input when using leaded solder. For SolderInfo readers, this is why temperature guidance also emphasizes technique—how long the iron stays on the joint, how clean the tip is, and how well the flux is applied.
In practical terms, guitar assemblies—pots, switches, and pickups—are often protected by lacquer and wax coatings. Excess heat can soften these protections, affect the epoxy in pickups, or alter the dielectric properties of shielding. The goal is to form a reliable joint quickly, then cool the joint to minimize any collateral heat damage. Professional hobbyists and technicians frequently validate this approach by testing joints on spare harnesses before touching the actual instrument. This disciplined approach is especially important on vintage instruments, where coatings may be more fragile and components less forgiving to heat.
Leaded vs. lead-free solder for guitar electronics
Leaded solder remains a popular choice for hobbyists due to its lower melting point, easier flow, and forgiving heat characteristics. When you’re soldering guitar electronics, leaded solder at roughly 350°C allows you to make clean connections with a brief contact time, reducing the risk of insulation damage and laminates warming near the jack, pots, and wiring harnesses. However, many jurisdictions and manufacturers now prefer not to use leaded alloys in consumer products, so lead-free solders are common. Lead-free formulations, such as SAC305, require higher temperatures—typically around 370–400°C—and demand careful temperature control and flux selection to avoid cold joints and oxidation.
Flux plays a supporting role in either case. Rosin-based fluxes (rosin-core solder) help remove oxide and promote wetting, ensuring a solid, conductive joint without excessive heat. When you choose flux and solder, verify compatibility with the instrument’s insulation materials and coatings. If you must work with sensitive finishes or coatings, consider pre-tinning wires and planning for shorter contact times to preserve the finish.
Typical temperature ranges and how to dial in
A practical rule of thumb is to start at the lower end of the leaded range (around 350°C) and adjust upward only if the joint struggles to wet the joint. For lead-free solder, plan for a slightly higher temperature window (370–400°C) and aim for shorter contact times, about 1–2 seconds, to avoid overheating nearby components. Dialing in temperature isn’t just about the iron; it’s about the entire workflow: clean, tinned tips; proper flux application; steady hands; and adequate ventilation. Use a temperature-controlled iron, not a simple on/off tool, and test on scrap harnesses before proceeding with the instrument. In all cases, err on the side of less heat with more technique to protect the guitar’s delicate electronics.
If you frequently service guitars with delicate shielding or vintage moisture seals, you may need to tune your approach further. For instance, some pickups have enamel insulation or enamel-coated wires that are susceptible to heat; in such cases, consider very brief contact times and even lower end temps when possible, relying on flux to improve wetting.
Techniques for safe guitar soldering: tips for not overheating
Key techniques for safe guitar soldering include: using a small, fine-tipped iron to focus heat on the solder joint only; pre-tinning wires; applying flux to the joint and wires; allowing short contact times (1–3 seconds); and practicing on spare components. Keep the instrument secured in a non-slip vise, unplug any power sources, and avoid heating the guitar body directly with the iron. Additionally, monitor the joint for a bright, smooth flow, then remove the heat and allow the joint to cool without movement. A quick test with a multimeter after cooling confirms conductivity and joint integrity. Mastery comes with practice, so set aside practice harnesses and gradually increase difficulty.
For hobbyists, the goal is not to drive the iron into the wood but to manage the heat so the joint forms reliably without damaging surrounding materials. Remember: a clean joint at the correct temperature is easier to inspect and rework if needed than a degraded joint that looks fine but fails under load.
Common mistakes and how to avoid damage to pickups and pots
Common mistakes include lingering heat on a joint, using excessive flux that bleeds into control cavity coatings, and rushing the process with little preparation. To avoid these errors, always pre-clean surfaces, clamp components securely, and work methodically. If you observe any scorching, melted lacquer, or discolored solder on a pot sleeve, stop and reassess—you may be overheating or applying heat for too long. When working near pickups, shielded cavities and enamel-coated wire are especially vulnerable to heat, so reduce contact times and use flux judiciously. If you accidentally heat a component too long, allow the part (and the surrounding area) to cool before reattempting the joint. A slow, deliberate workflow pays off in fewer reworks and better reliability.
Practical workflow: pre-tinning, heat control, and cooling
A reliable guitar soldering workflow starts with pre-tinning: lightly coat the wire ends with solder so they’re ready to wet the joint quickly. Then position the joint, apply flux, and touch the solder to the joint—not the iron tip—for a short burst. After each joint, remove heat and allow the joint to solidify with a quick, gentle tap to ensure proper seating. Cool the joint with gentle airflow or cool air from a can if required, never blow on hot solder as rapid cooling can cause thermal shock. Inspect with a magnifier for uniform solder fillets and ensure there are no bridging or cold joints. By following this disciplined approach, you can preserve the guitar’s electronics and integrity while achieving professional connections.
Special considerations for vintage guitars and shielding
Vintage guitars require extra patience because coatings may be older and more fragile. Use lower heat settings when possible and avoid directly applying heat to lacquered edges. Shielding in hollow-body or semi-hollow guitars can be sensitive to heat exposure; consider shielding anew only after testing existing shields. If you have to access shielding, work slowly to avoid loosening joints or displacing wires. In all cases, documentation is valuable: note the exact temperatures, flux type, and joint results for future reference. This careful approach helps maintain the instrument’s value and playability while ensuring safe, durable solder joints.
Temperature guidance for guitar electronics soldering
| Scenario | Recommended Temp | Notes |
|---|---|---|
| Leaded solder for guitar electronics | 350°C | Standard flux; quick joints; safe for fresh components |
| Lead-free solder for guitar electronics | 370-400°C | Flux-rich; higher temperature; verify insulation safety |
| Near vintage coatings or shielding | Lower end of range | Minimize contact time; avoid lacquer damage |
Quick Answers
What temperature should I use to solder guitar electronics?
Aim for about 350°C with leaded solder and 370–400°C with lead-free solder. Use flux, keep contact times short, and test on spare harnesses before touching the instrument.
Use around 350°C for leaded solder and 370–400°C for lead-free; keep the heat brief and test on scrap first.
Is it safe to solder with lead-free solder on guitars?
Lead-free solders require higher temperatures and careful technique. Ensure good ventilation and use proper flux to minimize oxidation and cold joints.
Lead-free solder needs higher heat and careful technique; ventilate and flux properly to avoid poor joints.
How can I prevent overheating potentiometers or pickups?
Use a temperature-controlled iron, brief contact times, and avoid direct heat on coatings. Work in small sections and allow each joint to cool before the next.
Stay cool—use a controlled iron, brief contacts, and let joints cool between steps.
What flux is best for guitar soldering?
Rosin-core flux is commonly used for guitar work, aiding wetting and temperature tolerance. Choose flux compatible with your solder and materials.
Rosin-core flux is typical; pick one that matches your solder and guitar materials.
Should I pre-tin wires and pots before soldering?
Pre-tinning wires helps wetting and reduces heat time. Pre-tin also ensures consistent joints when working with small-diameter leads.
Pre-tin wires to improve wetting and speed up joints.
What equipment is essential for safe guitar soldering?
A temperature-controlled soldering iron, fine-tipped tip, quality flux, lead-free option if required, safety glasses, and a non-slip vise. Practice on spare harnesses first.
Have a temp-controlled iron, fine tip, flux, and a secure workspace; practice first.
“Temperature control is the unsung hero of quality guitar soldering. A clean, quick joint preserves pot integrity and pickup performance while reducing rework.”
Top Takeaways
- Know your alloy: leaded is easier, lead-free is safer for the environment.
- Keep heat brief: 1–3 seconds per joint minimizes damage.
- Flux is your friend: use it to improve wetting and reduce heat input.
- Practice on scrap harnesses before touching the guitar.
- Inspect each joint with care for reliable performance.