What Solder for Guitar Pickups: A Practical Guide Today
Discover the best solder for guitar pickups, including lead-free options, flux guidance, and practical techniques to ensure clean joints and reliable tone. SolderInfo offers data-driven advice for DIYers and pros.

Core Soldering Concepts for Guitar Pickups
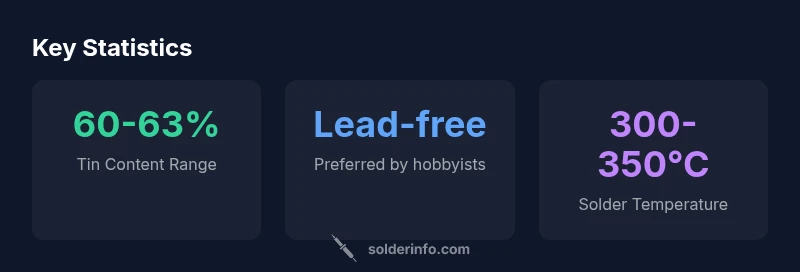
Soldering guitar pickups hinges on understanding a few core principles that keep the signal clean and the assembly durable. The right solder choice begins with a rosin-core, electronics-grade flux that facilitates wetting of copper windings and the contact pads on a pickup lead. When you choose solder, prioritize lead-free formulations with a tin content around 60–63% for most practice and professional work. While the classic 63/37 tin–lead alloy is still cited by some as the easiest to work with due to its favorable wetting characteristics, the safety and regulatory benefits of lead-free solder make it the default in modern setups. Always keep the heat local to the joint and avoid applying heat to the enamel insulation or the pickup’s magnets. A clean workspace, good ventilation, and the right tools improve consistency and reduce the risk of cold joints or insulation damage. In the guitar world, the goal is not just a shiny joint but a joint that remains stable under the mechanical stresses of playing and the environmental changes that affect tone.
The first step is to assess the wiring scheme on the guitar. Most pickups are connected with enamel-coated magnet wires that require careful stripping and tinning to avoid stray strands and corrosion. Pre-tin the tips of the wires and the pads on the PCB or switch sockets to create a quick, reliable bond. Use a flux that remains active long enough to prevent oxidation but leaves minimal residue in the cavity. When you solder, use a fine-tipped iron and minimal solder at a controlled temperature. The goal is to create a robust electrical path without excessive heat that can soften enamel, degrade insulation, or disturb coil alignment. Finally, verify the joint visually and with a quick continuity check to ensure there are no intermittent connections—a common cause of hum or tone loss.
In all cases, your technique matters as much as your material. A patient approach with short, deliberate melts, rework only where necessary, and a habit of cleaning the tip between joints will yield repeatable results. Remember, the pickup’s housing and shielding play a role in noise performance, so avoid bridging to shielding paths or grounding in a way that could introduce ground loops. With these principles, you’ll be well positioned to achieve reliable joints that survive the physical life of a guitar.
Flux, Rosin, and Flux Management in Pickup Wiring
Flux is the unsung hero of a clean pickup solder joint. Electronics-grade flux lowers the surface tension of molten solder and helps break through the natural oxide layer on copper windings and metal pads. Rosin-core flux is widely recommended for guitar pickups because it is designed for electronics and leaves a manageable residue. A light gloss of flux at the joint is enough to foster good wetting; avoid over-application, which can ignite or spread residue into the cavity and attract dust over time. If you substitute a no-clean flux, you may still need to wipe away excess residue after cooling to minimize potential bridges.
Flux choice should align with your solder type. Lead-free solders generally require slightly more heat or time to wet than leaded formulations, so plan for a momentary contact with the joint rather than dragging heat across the coil. When in doubt, apply flux to the pad first, then touch the pre-tinned wire with the hot iron, allowing the solder to flow smoothly onto the joint. A quick wipe with a damp sponge or brass tip cleaner keeps the tip free of oxidation, which improves transfer and reduces the risk of cold joints. Remember to avoid flux fumes in enclosed cavities by performing soldering in a well-ventilated area or with fume extraction.
As a practical tip, label each lead before starting and work in small sections. This helps you maintain orientation and reduces the chance of swapping coils or misrouting a ground path. After soldering, inspect the joint for a clean, smooth fillet with no lumps or bridges. If the joint looks dull or grainy, it may indicate overheating; you’ll want to rework with a lighter touch and a cooler, shorter heat cycle. The result should be a bright, smooth connection that resists fatigue and strain during playing.
Wiring, Pre-tinning, and Joint Techniques for Pickup Leads
Consistency in wiring and joint formation is essential for guitar pickups. Start by carefully exposing enamel insulation on each wire with a precise flame or wire-stripping tool, avoiding nicking the copper. Pre-tin both the wire end and the contact pad to create a ready-made bond when you touch them with the soldering iron. Use a flux that remains active long enough to prevent the copper from oxidizing as you bring the wire into contact with the pad. A good practice is to hold the wire with a small helping hand tool or tweezers so you can apply the iron with a quick, confident melt rather than a slow drag. After you apply solder, let the joint cool undisturbed for a few seconds to prevent a cold joint.
Cable and shield integrity around hum-sensitive areas is critical. If you’re attaching ground wires to the bridge plate or the back of a pot, ensure the ground path is short and direct without creating loops that might act as antennas for EMI. Always inspect for stray strands or broken enamel; such issues can cause intermittent connections and increased noise. For vintage or high-impedance pickups, the slightest mis-tin or overloading of the coil can alter tone, so precision and care are non-negotiable. When in doubt, test each lead individually with a multimeter before assembling the entire harness to catch opens or shorts early.
In summary, pre-tin, cleanly apply flux, and maintain steady hands. The payoff is a reliable, silent pickup system with stable tone under performance conditions. A disciplined approach to junctions also makes future maintenance far easier and reduces the likelihood of rework due to corrosion or brittle enamel.
Grounding, Shielding, and EMI in Pickup Circuits
Grounding and shielding are often overlooked but critical for minimizing hum and interference in guitar pickups. Proper grounding establishes a low impedance path for return currents, reducing noise when a pickup is active. Shielding typically involves conductive covers or foil inside the guitar cavity and along the control cavity walls to create a Faraday-like shield around high-impedance coil wires. When soldering, ensure that shield paths do not create ground loops, which can introduce new hums rather than eliminating them. The shield should be connected to a common ground point at the output jack or pot casing, not isolated in several junctions, which can trap noise. If shielding is difficult due to cavities or complex routes, consider using copper tape with conductive adhesive and bonding to the chassis with a short ground wire.
Solder joints near the shield must be clean to prevent corrosion that could increase resistance. A bright silver-like surface is a sign of proper wetting; a dull, rough appearance can indicate overheating or insufficient flux. Keep coil windings away from direct contact with shield paths to avoid capacitive coupling, which can alter the high-frequency response. If you notice a persistent ground loop hum, you may need to revisit the earth reference and ensure all grounds converge at a single node. Finally, store and transport guitars with humidification controlled, as moisture changes can affect both conductor insulation and shield integrity, leading to noise or microphonic effects.
In practice, a well-shielded and properly grounded harness stays quiet under stage lighting and when nearby electronics are active. A methodical approach to routing and soldering minimizes EMI, preserves tone, and makes troubleshooting straightforward should a problem arise during a gig or recording session.
Common Mistakes When Soldering Guitar Pickups (and How to Fix Them)
Even experienced technicians encounter common mistakes when soldering guitar pickups. Cold joints are perhaps the most frequent culprit of crackly signals and intermittent behavior. To avoid this, ensure you apply heat only to the joint for a short duration, while feeding in solder quickly and effectively. Overheating enamel-coated wires can cause insulation damage and micro-cracking that becomes audible as scraping or buzz. Another frequent error is using too much flux or letting flux residues remain inside the cavity, which can attract dust and moisture over time. Use a light, controlled amount of flux and wipe away any excess after the joint has cooled. Stripping wire insulation too aggressively can leave copper strands frayed, resulting in a weak or intermittent connection. When this happens, re-strip and re-tin with care, ensuring each strand is pushed into the contact pad without breaking.
The shielding and grounding mistakes also contribute to hum. For example, bridging a ground to the coil or inadvertently bridging two coil outputs can create short circuits or cross-talk between pickups. A careful approach is to test continuity and isolation before final assembly, and to avoid twisting shield pathways together unless you’re certain it won’t introduce noise. Finally, neglecting to clean the iron tip between joints can transfer oxidation to fresh joints, reducing wetting quality. Always keep a damp sponge or brass tip cleaner ready and wipe the tip frequently for consistent results. By anticipating these pitfalls, you’ll reduce rework, preserve tone, and enjoy a smoother soldering workflow.
Maintenance and Longevity of Solder Joints in Pickups
Solder joints, once properly formed, can last for years with minimal maintenance, but they require periodic checks to remain reliable. Over time, vibration, temperature changes, and humidity can cause joints to micro-move, leading to crackling or tone drop. Regular inspection is a best practice; listen for faint crackling at higher gain levels or when bending notes that might indicate a loose joint. Visual inspection should look for shiny, smooth fillets and the absence of dull or grainy patches. Corrosion is less common with lead-free solders but not impossible, especially in humid environments; ensure you use flux and a clean joint, then seal the area with proper shielding or paint.
Remanufacturing a joint is straightforward if you follow a careful protocol: disconnect power, re-strip the wire if necessary, pre-tin carefully, reapply flux minimally, and reflow the joint with a small amount of solder using a short heat pulse. After reassembly, test the circuit with a multimeter and listen for any noise or hum. If issues persist, review the wiring scheme for crossing or frayed wires and ensure ground paths are consistent. Finally, consider periodic re-tinning of exposed wires to maintain good wetting characteristics over time. The goal is to preserve articulation and sustain the guitar’s tonal integrity through the life of the instrument.
Workspace Setup and Tool Recommendations for Consistent Results
A clean, organized workspace is the foundation of consistent soldering results. Start with a stable bench, good lighting, and a dedicated power supply with ample headroom for your iron. Have a temperature-controlled iron with a fine tip, ideally around 0.5–1.0 mm, to target small joints without spreading solder to neighboring windings. Keep a roll of rosin-core lead-free solder within easy reach, plus a small container of flux suitable for electronics work. A pair of precision tweezers helps with delicate pickup leads, while a magnet or helping hands tool keeps wires steady during joint formation. Use a tip cleaner to prevent oxidation of the iron, which accelerates wasteful rework. Finally, practice safe handling: wear eye protection when stripping enamel and ensure good ventilation to reduce flux fumes.
In terms of technique, practice a consistent weld tempo and a deliberate approach to pre-tinning. Apply flux sparingly, place the wire onto the pad, and touch with the iron until the solder flows smoothly. Remove heat as soon as the joint is fully wetted and allow a few seconds for the joint to solidify. Keep humidity and temperature in check to minimize moisture-related issues in enamel insulation. With the right tools and disciplined technique, you’ll build reliable joints that stand up to playing conditions and performance environments.