USB Solder: A Practical Guide for Cables, PCBs, and Connectors
Master safe, effective usb soldering with preparation, flux selection, heat control, and joint inspection. This guide covers cables, USB connectors, and PCB work with practical tips and safety practices for hobbyists and pros.

You will learn safe, effective usb soldering: prep cables and pads, apply flux correctly, choose the right solder, control heat, and inspect joints for reliability. This guide covers USB cables, connectors, and PCB work with practical tips to prevent cold joints, bridges, and damage to sensitive components.
USB Soldering Fundamentals and Safety
USB soldering is a delicate skill that blends electrical reliability with careful handling of small components. In this guide, we focus on common USB applications—repairing cables, terminating USB connectors, and light PCB work. The key is precision and heat control. Rushing heat can damage traces, delaminate PCB layers, or melt insulation on sensitive wires. To build a solid habit, start with a clean, organized workspace, proper ESD protection, and a consistent technique. Throughout, usb solder best practices apply from preparation to final inspection, and they scale from hobbyists to professionals. By establishing a repeatable routine, you reduce rework and improve joint reliability across USB devices.
Essential Tools and Materials for USB Soldering
Having the right toolbox is critical when you’re doing usb solder work. The aim is to minimize heat transfer to nearby components while achieving a clean, mechanically sound joint. Start with a fine-tip soldering iron or station that offers precise temperature control in the 240-320°C range for lead-free solder. Use a 0.5-0.8 mm diameter rosin-core solder for most USB wire terminations. Rosin-core flux helps wet copper and pads, reducing the risk of cold joints. A magnifier or jeweler’s loupe makes tiny joints easier to inspect, especially on USB-C connectors where pin pitch is tight. An ESD-safe work surface, wrist strap, and anti-static tweezers protect sensitive USB controller lines and prevent static damage. Isopropyl alcohol and lint-free wipes are essential for cleaning prior to tinning and after desoldering. Debrief after each session with a quick visual check for bridging, stray strands, or damaged insulation. Optional tools like a desoldering braid, a heat sink clip for sensitive pads, or a small Helping hand can improve accuracy but aren’t mandatory for beginners. Remember: keep your workspace free of fluids and conductive surfaces to reduce the risk of shorts and electrostatic discharge. This is the core setup for safe, effective usb soldering.
Preparing Wires, Connectors, and PCB Pads
Before you apply heat to copper, you need clean, well-prepared surfaces. Strip USB wires to expose a short length of copper, typically 3-5 mm, and tin the ends lightly so they lay flat when positioned against a pad or connector terminal. Inspect connector pins for damage; USB-C sockets have many narrow pins, so be gentle during alignment. Thoroughly clean the PCB pads with isopropyl alcohol to remove oils or flux residues that can hinder solder wetting. If you’re repairing a USB cable, decide whether to replace the entire connector or segment and reterminate. When you bundle multiple wires, twist each conductor neatly to avoid stray strands that can short against adjacent tracks. Use a small length of heat shrink tubing to insulate each conductor after soldering. Place the wires in the correct orientation so they do not put mechanical stress on the USB connector or the PCB. For multi-pin USB-C, consider a pre-fitted breakout adapter or a sacrificial test jig to verify continuity before final assembly. Careful preparation reduces the chance of cold joints and ensures a reliable data and power connection.
Soldering Technique: Flux, Heat, and Joint Formation
Flux is the unsung hero of precise usb soldering. Apply a thin line of flux to pads and wires, especially on copper traces with tarnish. Tin the wire ends with a small amount of solder before placing them on the pad, then set the tip to the appropriate temperature. For USB work, a fine tip (0.5 mm) is ideal to target a single pad or a single connector pin without bridging nearby traces. Heat the pad and wire simultaneously with short, controlled touches; avoid keeping the tip on metal longer than 2-3 seconds. Feed solder to the joint, not the tip, to prevent a glob of excess solder. If you see a dull or grainy joint, reflow with a touch more flux and heat. For USB-C, ensure that the shield and ground connections are reestablished correctly; mis-wiring can degrade data integrity and power delivery. When you’re finished, quench the joint with mild airflow and inspect for a smooth, shiny fillet with no gaps. Cleaning flux residue with isopropyl alcohol is common practice, but ensure you don’t flood sensitive connectors with solvent.
Inspection, Testing, and Troubleshooting
A good usb solder joint should be smooth, concave, and fully bonded to the pad or pin. Use a magnifier to check for cold joints, whiskers, or bridging between adjacent pads. Test continuity from each data line and power rail to verify there are no shorts. Check insulation around exposed conductors; even tiny gaps can cause intermittent faults or electrocution risks in high-speed USB applications. If you see a dull joint or a faint silver line that isn’t fully adhered, reflow with minimal heat while applying fresh flux. In cases where a wire tore away from a pad, use solder wick to remove old solder, then re-tin and reattach with the correct amount of solder. For USB-C, multiple pins can present a challenge; test systematically with a multimeter to confirm that each channel behaves as expected, and re-check shield continuity. Document any issues and your solution so future repairs are faster and safer. Finally, re-test the entire USB chain, including data lines (D+, D-), power, and shield, to ensure reliable operation before putting the device back into service.
Advanced USB Soldering Scenarios: Shielding, USB-C, and Repairs
USB soldering in advanced scenarios often involves shielded cables and high-density connectors like USB-C. The shield must be bonded to the connector shell and ground to preserve EMI performance and signal integrity. When working with shielded cables, be careful not to nick the shielding braid, which can introduce noise. For USB-C, the pinout is dense; use a test jig or breakout board to verify each lane before final assembly. If a cable is damaged mid-run, assess whether replacing the connector or the entire cable yields a more reliable repair. In some cases, you may need to splice a shielded wire, which requires careful bonding of the shield to the connector shell and appropriate insulation. Consider using strain relief to reduce mechanical stress on solder joints when the cable will be flexed or manipulated. Finally, keep a log of tools, wires, and connectors used for usb solder projects for future reference.
Tools & Materials
- Soldering iron with adjustable temperature(0-350°C range; 30–60 W recommended for USB work)
- Lead-free solder (0.5–0.8 mm diameter)(Sn-Ag-Cu or similar alloy; rosin-core preferred)
- Rosin-core flux or flux pen(No-clean flux for easier cleanup)
- Isopropyl alcohol (70%+) and lint-free wipes(For cleaning pads before tinning and after soldering)
- Solder wick (desoldering braid)(Helpful for removing excess or bridging solder)
- Tweezers with fine tips(Place wires and small components precisely)
- Flush cutters(Trim wires cleanly without fraying)
- Heat shrink tubing or electrical tape(Insulate exposed conductors after soldering)
- ESD wrist strap(Ground yourself to protect sensitive USB components)
- Magnifying loupe(Helpful for tiny USB-PD or USB-C work)
- Helping hands or PCB holder(Stability during soldering if available)
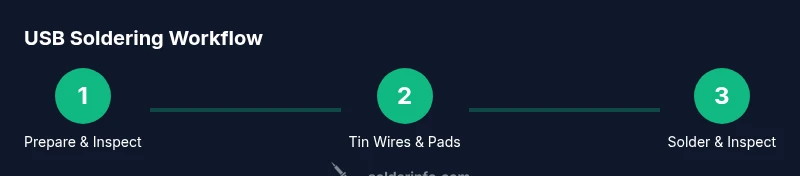
Steps
Estimated time: 35-50 minutes
- 1
Set up workspace and safety gear
Arrange a well-ventilated area, attach your ESD strap, and lay out tools within easy reach. Power the iron to the target temperature and pre-tin the solder tip to ensure clean heat transfer.
Tip: Test heat on a scrap pad before touching the USB wires to avoid damaging your parts. - 2
Inspect cables and connectors
Check USB cables for damaged insulation and exposed conductors. Verify USB connector pins and the PCB pads are clean and free of debris or corrosion.
Tip: Use a magnifier to spot hairline cracks or lifted pads before proceeding. - 3
Tin wires and pads
Lightly tin the wire ends and pads to improve wettability. Avoid over-tinning, which can cause solder globules and bridging.
Tip: Keep wire length short and aligned to reduce motion during soldering. - 4
Position wires and apply flux
Lay wires on the pads with minimal crossings, then apply a thin line of flux to promote wetting and reduce oxidation.
Tip: Flux helps prevent cold joints; don’t apply excessive flux. - 5
Apply heat and form joints
Contact the joint with a fine-tipped iron, feed solder gently, and remove heat as soon as the joint wets smoothly. Inspect fillet shape and ensure there are no bridges.
Tip: If a joint looks dull, reflow with a touch more flux and heat. - 6
Inspect and test
Check for shorts with a multimeter, test continuity on each data line, and verify insulation around joints. Clean flux residue and document the result.
Tip: Always re-test after any rework to confirm reliability.
Quick Answers
What is the best solder for USB cables?
For USB work, use lead-free solder with flux. Tin–silver–copper alloys are common and provide reliable wetting on copper traces and connector terminals.
Lead-free solder with flux is recommended for USB work to ensure clean wetting and reliable joints.
Can I use hot air for USB soldering?
You can, but most USB work is done with a fine-tip iron. Hot air is useful for densely packed USB-C connectors or when desoldering multiple pins, but requires careful temperature control.
Hot air can help with dense connectors, but for typical USB work a fine-tip iron is usually enough.
Is flux required for USB soldering?
Flux is highly recommended. Rosin-core flux or flux pens improve wetting and reduce oxidation, which helps avoid cold joints especially on small USB pads.
Yes, flux is important for achieving reliable joints on USB cables and connectors.
How can I prevent damage to USB PCB traces?
Use proper heat control, short contact times, and a heat sink if needed. Keep soldering sessions brief to avoid overheating copper traces.
Keep heat brief and controlled to protect traces and pads.
What safety precautions are essential for USB soldering?
Work in a well-ventilated area, wear eye protection, and use ESD protection. Avoid liquids near the work area and unplug equipment when not in use.
Ventilate, wear safety glasses, and use ESD protection.
Can I repair a broken USB-C cable with soldering?
Repairing USB-C cables can be risky due to high pin density and shielding. Replacement is often more reliable, but if you proceed, verify each lane and shield connection carefully.
Often better to replace the cable; if you repair it, test each lane and shield thoroughly.
Top Takeaways
- Prepare supplies and safety gear before starting
- Use lead-free solder and flux for reliable joints
- Control heat to avoid damaging USB traces and connectors
- Inspect joints with magnification and test continuity
- Document repairs for repeatable results