Tips for Soldering Iron: Essential Techniques and Best Practices
An expert, practical guide to tips for soldering iron covering safety, temperature control, tip care, flux choice, and troubleshooting for electronics, jewelry, and plumbing projects.

Master essential tips for soldering iron use, covering temperature control, tip selection, flux usage, safety, and maintenance. This guide provides practical, step-by-step techniques and real-world tips to help you create reliable solder joints, extend tool life, and avoid common mistakes whether you’re electronics hobbyist, jewelry maker, or plumber. By the end, you'll be able to solder with confidence, troubleshoot joints, and choose the right equipment for any project.
Core Principles for Soldering Iron Mastery
According to SolderInfo, mastery of soldering begins with three core principles: cleanliness, control, and consistency. For electronics, jewelry, and plumbing alike, the quality of your joints depends on preparation, heat management, and verification. In practice, that means keeping your workspace clean, choosing the right tip geometry, and building a repeatable routine. Start by inspecting surfaces for oils or oxides, then apply a thin layer of flux to improve wetting. Consistency comes from steady hand pressure, a clean tip, and proper inspection with a magnifier when needed. By internalizing these principles, you set a foundation that translates to fewer cold joints and more reliable connections across projects.
- Preparation matters: degrease, clean, and tin surfaces before contact.
- Heat control beats brute force: avoid overheating delicate parts and boards.
- Routine maintenance reduces defects: keep tools sharp and tips clean from the first stroke.
Temperature, Tips, and Tooling Essentials
Temperature control is the single most important factor in achieving reliable joints. For most electronics, jewelry, and plumbing tasks, start with the mid-range setting and adjust based on the alloy and material. Lead-free solders typically require slightly higher heat than traditional Sn-Pb solders, but excessive heat can lift pads or damage components. Choose tip geometries suited to your task: a conical tip for precision tasks, a chisel tip for broad contacts, and a bevel tip for large joints. Keep a clean, dry sponge or brass wool nearby for quick tip cleaning. Always use proper ventilation to minimize fumes. Tip geometry and flux compatibility greatly influence flow and joint quality; test combinations on scrap boards before committing to a live project.
Selecting Tips and Flux: What You Need to Know
The right tip and flux are a pairing that determines how easily solder flows and how clean the joint looks. For delicate electronics, a fine conical or small bevel tip allows precise contact without bridging adjacent pads. When working on thicker wires or metal frames, a broader bevel or chisel tip provides more heat transfer. Flux helps prevent oxidation and improves wetting; rosin-core flux is common for electronics, while sometimes no-clean flux is preferred for jewelry to minimize residue. Flux type, flux amount, and tip cleanliness interact to influence joint quality. The SolderInfo team notes that consistent flux application and tip upkeep reduce the likelihood of cold joints and post-solder cleaning work.
- Use flux sparingly on small joints to avoid excessive residue.
- Keep flux away from plastic components and heat-sensitive coatings.
Electronics Soldering Techniques: Joints and Methods
Electronics soldering demands clean joints, precise heat, and careful inspection. For through-hole components, heat the pad, not the lead, and apply solder to the joint rather than the iron tip if possible. For surface-mount devices (SMD), work quickly with a fine tip and consider pre-tinning pads to facilitate flux-assisted soldering. When wiring, apply a small amount of flux to the wire end, pre-tin it if using lead-free solder, and make sure the joint is fully wetted with shiny, smooth fillets. Always inspect under magnification for bridges or cold joints, and correct promptly.
- Keep the iron moving smoothly to avoid heat buildup.
- Avoid excessive force; let the solder flow into the joint.
Maintenance, Cleaning, and Storage
Tip maintenance determines tool life and joint quality. After cooling, wipe the tip on a damp sponge or brass wool to remove oxidation and solder residue. Periodically apply a thin layer of tip tinner or solder to re-tin the surface. Store the iron in a stand with a damp sponge nearby to prevent tip corrosion. If the tip becomes pitted or heavily worn, replace it rather than forcing it to work. A clean, pre-tinned tip delivers better heat transfer and more consistent joints over many sessions.
- Regularly clean and re-tin the tip before and after use.
- Use a tip protector or rest to prevent damage when not in use.
Troubleshooting Common Issues and How to Fix Them
Cold joints appear dull and crumbly; if you see whiskers or a grainy surface, reflow the joint with a clean tip and adequate heat. Solder bridges happen when adjacent pads unintentionally connect; rework with flux and a steady hand, heating only the involved joints. If pads lift from the PCB, re-tin the area with careful heat control and consider using solder wick to remove excess solder without damaging traces. A dull or oxidized tip reduces heat transfer; replace or re-tin the tip to restore performance. Always re-check after rework to ensure reliability.
- Reflow joints by applying heat from the board side and letting the solder flow.
- Use solder wick to remove excess solder from bridges.
Safety, Workspace Setup, and Best Practices
A safe workspace reduces risk and improves outcomes. Work in a well-ventilated area or use a fume extractor, wear safety glasses, and keep flammables away from the soldering zone. Use a heat-resistant mat or silicone workstation to protect the surface, and always return the iron to its stand when not in use. Keep your hands steady by bracing your wrist and using a stable bench setup. Remember to unplug and cool the iron before changes or maintenance. The combination of proper PPE, ventilation, and stable posture significantly lowers the risk of injury and damage.
Jewelry and Plumbing Soldering: Specific Considerations
Jewelry soldering often requires precision and softer joints; choose appropriate silver or copper flux and ensure your heat is controlled to avoid annealing the metal. For plumbing, you’ll deal with copper pipes and fittings; use appropriate flux and ensure a clean, dry surface, then cap or join with suitable solder alloy. Across all tasks, practice on scrap pieces between projects to refine your approach and gain confidence. The SolderInfo guidance emphasizes using the right flux and timing your heat accurately to prevent damage to delicate parts.
Tools & Materials
- Soldering iron (adjustable temperature)(Ensure it has a stable temperature range suitable for lead-free and traditional solders.)
- Lead-free solder (rosin-core or flux-core)(Select alloy compatible with your work (e.g., Sn95.5-Ag-Cu for electronics).)
- Flux (rosin-core or no-clean)(Flux improves wetting and reduces oxidation during heating.)
- Soldering iron stand(Keep the hot iron safely resting when not in use.)
- Wet sponge or brass wool(Used to clean and tin the tip during work.)
- Desoldering braid (solder wick)(Helpful for removing excess solder or correcting bridges.)
- Heat-resistant mat or silicone mat(Protects work surface from heat damage.)
- Ventilation or fume extractor(Helps minimize inhalation of fumes.)
- Safety glasses(Protect eyes from splashes or molten solder.)
- Tip tin and maintenance compound(Optional but recommended for routine tip care.)
Steps
Estimated time: 60-75 minutes
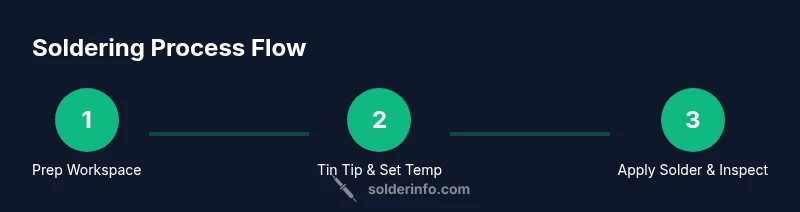
- 1
Prepare workspace and safety gear
Set up a clean, well-ventilated area with a stable workbench. Put on safety glasses and ensure the soldering iron is unplugged for setup. Place any sensitive components away from the immediate heat zone and organize your tools within easy reach.
Tip: Lay out a small waste tray for solder scraps to avoid contamination of the workspace. - 2
Power up and set a safe temperature
Plug in the iron and set it to a mid-range temperature appropriate for your solder type. For beginners, start around a moderate setting and adjust up or down to match the joint size and material. Allow the tip to reach temperature before touching any joint.
Tip: Avoid maxing out the heat; overheating leads to damaged components and burnt flux. - 3
Tin the tip and prepare the joint
Lightly tin the tip by applying a small amount of solder and letting it coat the surface. Clean the pad or wire end to remove oxidation. Apply flux to the joint area to improve wetting and prevent oxidation during heating.
Tip: A freshly tinned tip transfers heat more efficiently and helps you avoid dry joints. - 4
Apply heat and introduce solder
Touch the tip to the joint area and feed solder into the joint (not directly onto the tip). Allow the solder to flow and fill the joint fillet. Remove solder first, then heat, to avoid cold joints.
Tip: Let the joint pull solder in by capillary action; avoid brushing solder across the surface too aggressively. - 5
Inspect and rework if necessary
Examine the joint for a shiny, smooth fillet without gaps. If dull or cracked, reheat and add a touch more solder. If bridges form, rework with flux and wick to isolate the affected pads.
Tip: Use a magnifier to spot small defects that are easy to miss with bare eyes. - 6
Clean up and cool down
Clean the tip again, and wipe off any residue from the joint with a damp sponge. Allow the assembly to cool naturally; avoid blowing on it which can cause thermal shock. Return the iron to its stand and switch off when finished.
Tip: Never move a live joint while cooling; movement can create weak bonds. - 7
Store and maintain the tool
Store the iron in a safe, dry place. Periodically inspect tips for wear and replace as needed. Keep spare tips and flux on hand for rapid setup on future projects.
Tip: Regular maintenance reduces downtime and improves long-term reliability.
Quick Answers
What temperature should I set for most electronics soldering?
Most hobbyists start with a mid-range setting and adjust based on solder type and component sensitivity. Lead-free solders typically require slightly higher heat than leaded solders, but always follow the solder manufacturer's guidelines and your device's temperature tolerance.
Typically start at a mid-range temperature and adjust for your solder type; follow manufacturer guidelines for specific components.
Is lead-free solder safer than traditional solder?
Lead-free solders are generally safer for handling and consumer products because they reduce lead exposure. However, fumes and heat still require proper ventilation and PPE. Use rosin-core flux and work in a well-ventilated area.
Lead-free solder reduces lead exposure, but fumes still require good ventilation and PPE.
How can I fix a cold joint?
Reheat the joint with steady pressure, apply a small amount of flux, and add a touch more solder if needed. Ensure the tip is clean and hot enough to promote proper wetting. Inspect the fillet for a smooth, shiny appearance.
Reheat with flux and a little solder; check for a smooth, shiny fillet.
Should I always tin the tip before use?
Tinning the tip before use improves heat transfer and protects the tip from oxidation. It’s especially helpful when you’re starting on a fresh tip or after cleaning.
Yes, tin the tip before use to improve heat transfer and protect it.
What is the best way to clean a soldering iron tip?
Clean the tip on a damp sponge or brass wool during use to remove oxidation. After cooling, re-tin the tip to maintain performance and prolong life.
Clean on a damp sponge while hot, then re-tin after cooling.
Watch Video
Top Takeaways
- Master safety first and maintain a tidy workspace.
- Tin the tip regularly for optimal heat transfer.
- Use appropriate flux and tip geometry for each task.
- Inspect joints with magnification and rework when needed.
- Proper maintenance extends tool life and improves reliability.