How to Solder Batteries Together: Safe Methods for DIY Projects
A safety-focused guide to joining batteries for DIY projects. Learn when soldering is appropriate, safer alternatives like spot-welding, and best practices to prevent shorts and fires.

Learn safe, practical ways to join batteries for DIY projects, with emphasis on avoiding direct heat on active cells. Direct soldering of Li-ion cells is risky and not recommended; instead, use spot-welding or pre-tabbed cells with insulated connectors. This quick answer outlines when soldering is acceptable, safer alternatives, and essential safety practices to prevent shorts and fires.
Why safe soldering of batteries matters
According to SolderInfo, safety must guide any battery work. Directly heating cells can degrade separators, vent gases, and cause swelling or thermal runaway. This risk is especially high with lithium-ion and lithium-polymer cells used in consumer electronics and many hobby projects. Even small mistakes—like touching two terminals with a hot soldering iron or using damaged cells—can lead to shorts, burns, or fires. Understanding these risks helps you choose safer methods and protect yourself and your equipment. In the following sections, we’ll outline safer approaches, explain when soldering is appropriate, and share practical, step-by-step guidance for DIY enthusiasts.
What you can safely do when joining batteries
There are contexts where gentle joining actions are acceptable, but direct heat on active cells should be avoided. For Li-ion packs, the recommended approach is to use pre-tabbed cells and nickel strips with a spot-welder, followed by proper insulation. For older chemistries or non-rechargeable cells, limited soldering may be possible if the heat is controlled and short duration; however, always check manufacturer guidance. Alternatively, use purpose-built battery connectors, or battery holders that maintain correct polarity and reduce the chance of short circuits. In all cases, design the pack layout on paper first to plan series vs. parallel connections, orientation, and cooling needs. Safety first: work in a well-ventilated area away from flammable materials, wear eye protection, and keep a fire extinguisher handy.
Soldering vs. spot-welding: chemistry considerations
Direct soldering of most modern cells—especially Li-ion and LiPo—is discouraged because the heat from a soldering iron can damage the cell's internal structure. Heat can break down separators, cause gas generation, and, in worst cases, lead to venting or thermal runaway. Nickel strips and tab welding equipment distribute heat more evenly and reduce stress on the cell's terminals. Coin cells or simple alkaline batteries are sometimes more forgiving but still require caution. If you must make a connection, keep heat exposure to a minimum, use a heat sink, and never apply solder to a live cell for more than a moment. The SolderInfo Analysis, 2026, notes that heat management is the single most important factor in successful safe joins.
Safer alternatives to direct soldering
Emphasize connector-based joins: use nickel strips with a spot-welder to attach cells, then connect strips with insulated connectors or M/F adapters. Pre-tabbed cells come with metal tabs already welded to the cell terminals, reducing heat transfer. For hobby projects, battery holders and modular packs provide a safe, repeatable arrangement without heating the cells. When soldering is unavoidable, consider soldering small, non-rechargeable cells or cells that are explicitly rated for soldering, and minimize heat with a heat sink and short, controlled contact times. Always re-inspect insulation after connections and ensure all exposed metal is covered with heat-shrink tubing or electrical tape.
Practical setup and safety basics
This work demands a clean, organized workspace. Use a non-conductive mat, clamp batteries firmly, and keep tools within arm’s reach. PPE is essential: safety goggles, heat-resistant gloves, and a respirator or good ventilation if fumes are present. Keep liquids away from the workspace, and have a fire extinguisher rated for electrical fires nearby. Use a multimeter to verify polarity and continuity before applying any load, and test your pack with a low-current source before any high-energy use. Document the pack configuration, including series/parallel counts and the exact cell types used, so future maintenance is safer and quicker.
Tools, materials, and setup for safe battery work
A safe project starts with proper tools and a clear plan. You’ll need protective gear (goggles, gloves), a quality multimeter, insulated work surface, non-conductive tools, heat sinks, and the correct connectors for your chosen join method. For Li-ion-focused projects, have a spot-welder or tabbing system on hand, plus nickel strips sized for your pack. Heat-shrink tubing, electrical tape, and cable ties help keep joints insulated and components secured. Keep a dedicated soldering iron only if your pack type explicitly supports soldering, and never solder on a live cell. A well-stocked kit minimizes improvisation errors and improves safety.
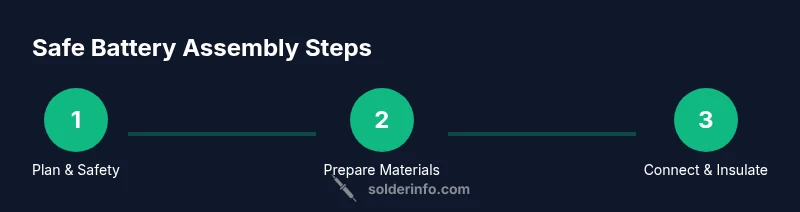
Step-by-step safe assembly overview
Begin by planning the pack layout on paper, then verify battery types and polarity. Prepare all components and ensure a safe, ventilated space. Attach nickel strips or connectors to each cell with the chosen method, insulate all exposed metals, and connect cells in the intended series/parallel configuration. Finally, seal all joints, perform a low-load test, and document the configuration for future maintenance.
Testing and validation after assembly
After completing connections, perform a series of checks: verify correct polarity with a multimeter, check for shorts between any two terminals, and confirm continuity along the expected path. Apply a very small charge or discharge current to observe any abnormal heating, swelling, or smoke; if any symptom appears, disconnect immediately and inspect joints. Keep monitoring during initial use and store the pack in a fire-safe location.
Long-term safety, maintenance, and storage
Store battery packs in a cool, dry place away from flammable materials and direct sunlight. Regularly inspect cables, insulation, and connectors for wear. Avoid dropping packs or bending connectors, and never leave charging packs unattended for extended periods. Document usage patterns and battery health to anticipate replacement needs and prevent unexpected failures.
Tools & Materials
- Safety goggles(Impact-resistant with side shields)
- Heat-resistant gloves(Cotton or silicone, rated for heat)
- Ventilation/Extractor(Well-ventilated area or fume extractor)
- Nickel strips or copper bus bars(Pre-cut to pack length)
- Soldering iron(Only if explicitly appropriate; minimize heat)
- Rosin-core solder(For soldering on non-live cells (rare))
- Spot-welder (optional)(Preferred for Li-ion tab connections)
- Heat-shrink tubing(Insulate exposed conductors)
- Electrical tape(Extra insulation for joints)
- Wire cutters/strippers(Trim and prepare connectors)
- Multimeter(Check polarity and continuity)
- Non-conductive mat(Prevent shorts on work surface)
- Fire-safe storage bag(Store assembled packs safely)
Steps
Estimated time: 60-120 minutes
- 1
Identify battery type and configuration
Identify the cell chemistry (Li-ion, NiMH, etc.) and determine whether you need a series or parallel configuration. Confirm all cells are in good condition and compatible for your intended use.
Tip: Avoid attempting to solder Li-ion cells directly; plan for safer joining methods. - 2
Prepare workspace and PPE
Set up a clean, ventilated workspace with an insulating mat. Put on safety goggles and heat-resistant gloves before handling any cells or tools.
Tip: Keep a fire extinguisher rated for electrical fires nearby. - 3
Inspect cells for damage and voltage
Visually inspect each cell for swelling, dents, or leaks. Measure individual cell voltages to identify outliers before assembly.
Tip: Discard any damaged cells; never mix healthy and compromised cells in a pack. - 4
Plan wiring layout and polarity
Draw the intended series/parallel layout on paper, labeling positive and negative terminals to avoid reverse connections.
Tip: Double-check polarity against your device's requirements. - 5
Prepare connectors and strips
Cut nickel strips or bus bars to match the intended connections and prepare the contact areas on each cell.
Tip: Keep heat away from the cell when trimming and prepping strips. - 6
Attach connectors safely
Attach nickel strips to cells using a spot-welder or other approved method. If soldering is used, limit heat and avoid direct contact with live cells.
Tip: Use a heat sink and minimize contact time when soldering. - 7
Insulate and secure joints
Cover all exposed metal with heat-shrink tubing or electrical tape. Secure cables to prevent movement that could cause shorts.
Tip: Verify insulation after each step before proceeding. - 8
Test continuity and polarity
With a multimeter, verify there are no shorts between any two terminals and that the expected path shows proper continuity.
Tip: Test with a low-current source before heavy load testing. - 9
Initial low-load validation
Charge/discharge at a gentle rate to observe for unexpected heat, swelling, or odor during the first cycle.
Tip: If anything unusual appears, stop and inspect joints. - 10
Documentation and storage
Document the exact cell types, counts, and configuration. Store the pack in a fire-safe container away from heat sources.
Tip: Keep a maintenance log for future replacements.
Quick Answers
Is it safe to solder batteries together?
Direct soldering of Li-ion cells is generally unsafe due to heat damage risk. Safer methods include spot-welding or using pre-tabbed cells with connectors. Always follow manufacturer guidance and prioritize ventilation and fire safety.
Soldering batteries, especially Li-ion ones, is risky. Safer options like spot-welding or connectors are recommended.
What batteries can be soldered safely?
Some non-rechargeable or older chemistries can tolerate careful soldering, but most modern rechargeable cells should not be soldered directly. Always verify the manufacturer's recommendations and use heat-minimizing methods.
Only certain non-rechargeable cells are safe to solder; for most packs, use safer joining methods.
What are safer alternatives to soldering?
Safer alternatives include spot-welding nickel strips, using pre-tabbed cells, and employing modular battery holders or connectors designed for safe, repeatable joins. These minimize heat exposure and risk of shorts.
Spot-welding and connectors are the safer routes for battery packs.
How do I test a battery pack after assembly?
Check for shorts with a multimeter, verify correct polarity, and test with a low-load source before full use. If you notice heat, swelling, or fumes, disconnect immediately and inspect.
Test with a multimeter first, then a gentle load. Stop if anything looks off.
What safety gear should I use?
Wear safety goggles and heat-resistant gloves. Ensure good ventilation and have a fire extinguisher ready. Keep flammables away from the workspace.
Protective goggles and gloves are essential; ventilate the area well.
Watch Video
Top Takeaways
- Prioritize safety over speed when joining batteries.
- Avoid direct soldering of Li-ion cells; use safer methods like spot-welding.
- Plan layout and polarity before making any connections.
- Insulate all joints and test thoroughly before use.
- Document configuration and store packs safely.