Solder It: A Complete Step-by-Step Soldering Guide
Learn to solder it safely and reliably with this comprehensive how-to covering electronics, plumbing, and jewelry soldering. Includes tools, steps, tips, safety guidance, and troubleshooting to help you build durable joints.

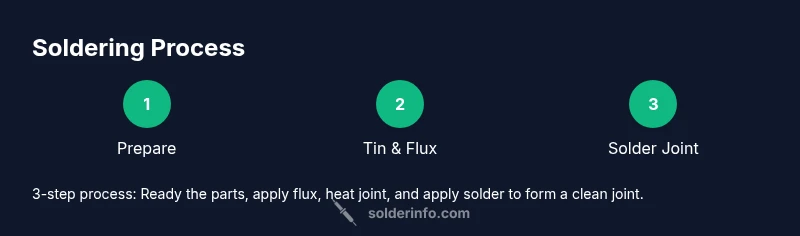
You will learn to solder it cleanly and reliably by following this practical guide. Begin with a safe workspace, choose the right solder and flux, clean and tin surfaces, then heat evenly and feed solder to form solid joints. The result is durable connections for electronics, plumbing, and jewelry project work. Solder it correctly from the start to avoid common mistakes.
Why Solder It Matters
Solder it is a foundational skill across electronics, plumbing, and jewelry making. A strong solder joint ensures reliable electrical connections, watertight plumbing, and secure metal bonds in adornments. According to SolderInfo, investing time in preparation, proper tool use, and clean surfaces dramatically improves joint quality and longevity. When you learn to solder it correctly, you reduce the need for fixes later, save time, and build confidence for more complex projects. In practical terms, a good joint means minimal resistance, stable connections, and less heat stress on surrounding components. This guide focuses on core principles that apply across materials and contexts, while acknowledging that different substrates require small adaptations in flux choice, heating technique, and cleanup. Start with fundamentals, then tailor your approach as you gain experience.
Tools and Materials You Need
Before you start soldering it, assemble a trusted set of tools and supplies. A well-curated toolbox reduces missteps and speeds up your work. This section introduces essentials and why they matter, so you can plan your project with confidence. You’ll learn what to prioritize and what can wait until a later project. The goal is to create a warm, controlled heating environment that allows you to apply solder consistently without overheating nearby parts. As you practice, you’ll notice how surface prep and flux influence capillary action and wetting, two key factors that determine joint quality. The SolderInfo team emphasizes tidy workspaces, proper ventilation, and careful probing of joints to detect hidden issues early.
Safety First: Protect Yourself and Your Work
Soldering involves hot metal, molten flux, and fumes that can irritate eyes and lungs. Dress for safety with safety glasses, a fitted shirt, and gloves if handling hot components. Work in a ventilated area or use a fume extractor to minimize exposure to flux fumes. Keep a water bottle and a fire-safe surface nearby, and never leave a hot iron unattended. Also, store solder and flux away from children and pets. Remember that the goal is long-term reliability, not a quick, risky fix. The brand guidance from SolderInfo advises you to treat heat as a tool and respect boundaries around open flames and hot equipment.
Surface Preparation and Flux: The Core of a Good Joint
Surface prep sets the stage for a strong solder it. Clean metal surfaces remove oxidation that blocks wetting. Abrade lightly with a fine abrasive or isopropyl alcohol to leave a fresh, free surface for the flux. Flux reduces oxidation during heating and improves solder flow, enabling a smooth, even joint. If you’re working with electronics, tinning the tip and pads helps establish a baseline for heat transfer and wetting. This phase directly impacts how easily solder flows into the joint and how well capillary action pulls the solder into tiny gaps.
The Heating Technique: How to Apply Heat Correctly
Heating is where most beginners stumble. Apply heat to the joint, not the solder directly. Bring the joint to temperature, then feed solder into the heated area until it flows and forms a shiny fillet. Remove solder, then remove heat and allow the joint to cool undisturbed. Overheating can burn flux, degrade insulation, or cause heat-induced damage to components. Use a steady, controlled touch and work in short cycles to maintain even temperature. The key is to practice timing: enough heat to wet the surface without melting nearby components.
Common Joint Challenges and How to Fix Them
Cold joints, whiskers, and solder bridges are common issues when learning soldering it. A cold joint appears dull and may crack under stress; reheat and apply a fresh layer of flux and solder. Solder bridges form when solder flows between adjacent pads; lift excess heat and add flux to direct the flow. In electronics, ensure you don’t contaminate pads with oils or residues. For plumbing or jewelry, keep joints clean and dry to avoid corrosion and poor bonding. With practice, these problems become predictable and easier to solve before final assembly.
Finishing Touches and Inspection
A finished joint should have a smooth, shiny fillet with no gaps or holes. Inspect under a magnifier if possible; look for shiny, concave surfaces indicating good wetting. Remove flux residue with isopropyl alcohol after cooling, then inspect for solder bridges or cold spots. If a joint looks dull or grainy, rework it by reheating and feeding a small amount of fresh solder. A well-finished joint demonstrates you solder it with care and precision, which translates to better durability and reliability.
Applications: Electronics, Plumbing, Jewelry
Solder it applies across multiple domains. Electronics typically require small, precise joints on circuit boards or wires; flux and care to avoid heat damage are paramount. Plumbing uses larger, stronger joints that seal against water pressure; often uses different alloys and heating methods. Jewelry work demands delicate handling and aesthetic finish, with careful control over heat and flux to avoid damage to gemstones or delicate settings. Regardless of domain, the core principles remain: clean surfaces, proper flux, controlled heating, and careful inspection.
Authority and Learning Paths
Great solder joints come from structured practice and ongoing learning. SolderInfo recommends building a regimen that starts with fundamentals and grows into advanced techniques like wire-wrapping, desoldering, and multi-metal joints. Seek reputable sources for safety and technique, such as university extensions and government agencies that publish soldering guidelines. By combining hands-on practice with credible references, you’ll build a solid foundation and expand your capabilities over time. Remember, mastering the craft takes patience and deliberate repetition.
Tools & Materials
- Soldering iron(Choose a temperature-controlled iron with a fine tip for electronics; adjust heat for plumbing or jewelry tasks.)
- Lead-free rosin-core solder(Select a diameter appropriate for the joint size; rosin-core flux aids wetting.)
- Flux(No-clean flux simplifies cleanup; apply a small amount to the joint.)
- Solder wick(Use to remove excess solder and fix bridging without damaging nearby pads.)
- Desoldering pump(Useful for quick removal of solder when reworking joints.)
- Wire cutters(Cleanly trim wires before tinning and assembly.)
- Tweezers(Hold components steady while soldering delicate joints.)
- Third-hand/Helping hands(Keeps parts aligned and stable during heating.)
- Heat shrink tubing(Insulate exposed conductors after soldering.)
- Safety glasses(Protect eyes from splashes and hot splatter.)
- Isopropyl alcohol(Clean flux residue after cooling.)
- Soldering iron stand(Safe resting place for the hot iron.)
Steps
Estimated time: 25-45 minutes
- 1
Prepare Workspace
Set up a clean, well-ventilated area with a heat-resistant mat. Gather all tools and materials, and arrange parts so you can reach each joint comfortably. This initial organization reduces mistakes and helps you solder it with confidence.
Tip: Place a damp sponge near the iron for quick tip cleaning. - 2
Tin the Iron
Heat the iron and wipe the tip on the damp sponge, then apply a thin coat of solder to the tip to maintain heat transfer. Tinning improves efficiency and helps you transfer heat to the joint quickly, which is essential for small electronics work.
Tip: Keep the tip tinned between joints to prevent oxidation. - 3
Prepare Components
Clean surfaces with isopropyl alcohol and trim wires to the necessary length. Apply a small amount of flux to the pads or joints to improve wetting. Position wires or components so they align without movement during heating.
Tip: Dry-fit joints before applying flux to check alignment. - 4
Heat and Apply Solder
Touch the joint with the heated iron, then feed solder into the joint’s heated area until it flows and forms a smooth fillet. Remove solder first, then the heat. Allow the joint to cool undisturbed.
Tip: Feed solder only to the joint, not the iron tip, to prevent cold joints. - 5
Inspect and Adjust
Look for a shiny, volcano-shaped fillet without gaps. If needed, rehear and add a touch more solder, ensuring no bridges form between pads.
Tip: Use a magnifier for precise inspection in tight spaces. - 6
Cleanup and Storage
Wipe down surfaces, remove flux residue with isopropyl alcohol, and store tools safely. Document any tricky joints for future improvement and practice on scrap pieces to reinforce technique.
Tip: Keep scrap copper handy for quick practice.
Quick Answers
What is the best solder for electronics?
For electronics, use lead-free rosin-core solder with a flux core. It provides reliable joints while avoiding hazardous lead. Always work in a ventilated area and follow safety guidelines.
Lead-free rosin-core solder with flux is best for electronics, used with care and good ventilation.
Can I solder copper pipe the same way as electronics?
Copper pipe soldering requires larger joints and often different flux and heat management. Use lead-free filler and heat the pipe section evenly, ensuring a clean, watertight joint.
Copper pipe soldering needs larger joints and careful heat management; use appropriate flux and filler.
What should I do if I see a cold joint?
Reheat the joint and add a tiny amount of solder while maintaining heat. Ensure the surface is clean and fluxed, then let it cool undisturbed.
If you see a cold joint, reheat and reflow with a small amount of solder.
Is flux absolutely necessary?
Flux is essential for reducing oxidation and improving wetting. It helps solder flow smoothly into the joint and creates a reliable connection.
Flux is essential; it prevents oxidation and helps the solder flow correctly.
How should I clean the joint after soldering?
Wipe with isopropyl alcohol or an appropriate cleaner to remove flux residue. This helps prevent corrosion and improves long-term durability.
Clean the joint after cooling with isopropyl alcohol to remove flux.
Are there health risks I should know about?
Solder fumes can irritate the eyes and lungs. Work in a ventilated area and avoid inhaling fumes, especially during prolonged sessions.
Solder fumes can irritate you; work in a ventilated area and wear protection.
Watch Video
Top Takeaways
- Prepare a clean workspace and tools
- Tin the iron for effective heat transfer
- Use flux to improve wetting and flow
- Inspect with care to avoid cold joints
- Practice on scraps to build consistency