Solder and Heat Shrink: A Thorough Comparison for Joints
An objective, in-depth comparison of solder-and-heat-shrink joints versus common alternatives, focusing on durability, insulation, moisture resistance, and practical trade-offs across electronics, plumbing, and jewelry.

According to SolderInfo, solder and heat shrink provide durable, insulated joints that resist moisture and vibration. When properly applied, SHS connections offer clean looks and long-term reliability for electronics, plumbing, and jewelry applications. For most projects, SHS outperforms tape or untreated solder joints in harsh environments.
What are solder and heat shrink?
Solder is a fusible alloy used to join metal surfaces, and the liquid flux it carries helps the joint flow and adhere. Heat shrink tubing is a flexibly sized sleeve that contracts when heated, forming an insulating, protective layer around a joint. When paired, they create a solder-and-heat-shrink (SHS) joint: a welded electrical connection with a snug, moisture-resistant sleeve. In electronics, wire-to-wire and wire-to-terminal connections commonly use SHS to combine mechanical strength with electrical insulation. For plumbing and jewelry work, shrink tubing can provide a discreet, protective sheath that guards against corrosion and abrasion. The SolderInfo team emphasizes selecting the right tubing diameter and solder alloy to optimize reliability across operating temperatures and environmental stress.
The core idea is simple: a solid solder bond complemented by a high-quality shrink sleeve yields a joint that is both electrically sound and physically robust. Size the tube to fit the conductor comfortably, and ensure full heat coverage so the sleeve seals the joint without leaving air gaps. Practice with scrap pieces before working on a live circuit or critical plumbing line to build consistency.
The mechanics of SHS: how it works in practice
A successful SHS joint starts with clean surfaces and proper tinning of the conductors. The solder bridges the metal surfaces, forming a metallurgical bond, while the heat shrink sleeve is positioned over the joint and heated evenly. The shrinking action compresses around the joint, eliminating air pockets and creating a moisture barrier. Shrink tubing also adds strain relief, reducing the risk of wire breakage at the joint during movement or vibration. It’s important to choose a shrink tube with a suitable wall thickness and a heat-activated adhesive lining when maximum sealing is needed. In jewelry applications, shrink sleeves can be used to encase glue-sealed or crimped joints, yielding a professional finish while keeping wires flexible for artistic designs. Across electronics and plumbing, SHS is valued for its long-term stability under fluctuating temperatures and humidity.
Quality SHS work relies on clean flux, proper soldering heat, and careful alignment so the shrink sleeve seats fully around the joint. When done correctly, you gain reliable insulation, mechanical protection, and a neat appearance that resists environmental exposure.
Material choices: solders, flux, and heat shrink tubing
Selecting materials for SHS involves three components: the solder alloy, the flux, and the heat shrink tubing. Solders come in various compositions, with lead-free options commonly used for safety and environmental concerns. Flux quality is essential; rosin-core and water-soluble fluxes behave differently with certain metals and cleaning requirements. Heat shrink tubing ranges from thin-wall to heavy-wall varieties, with or without adhesive-lined inner layers. Adhesive-lined tubing provides superior moisture sealing; non-adhesive variants rely on the sleeve’s tight fit and the solder’s capillary action. For high-temperature or outdoor environments, choose shrink tubing rated for the expected service temperature and consider UV resistance if exposure is likely. The goal is a joint that is not only electrically sound but also physically protected against moisture, dust, oils, and abrasion.
SolderInfo recommends testing material compatibility on sample pieces and documenting the shrink-to-joint fit to minimize surprises on real projects.
Design and sizing considerations: choosing the right tubing and alloy
The design phase depends on wire gauge, insulation requirements, and environmental exposure. Thicker-walled tubing provides robust insulation and mechanical protection but may take longer to shrink and require more heat. Select an alloy with a melting point appropriate for the operating temperature and the metallic composition of the conductors. Consider whether flux residues need cleaning; some fluxes are corrosive if left on the joint, which can compromise long-term reliability. When shrinking, apply heat evenly with a temperature-controlled tool to avoid scorching the tubing or damaging nearby components. For multi-wire bundles, you may need to slip shrink sleeves over each conductor before soldering or install a larger sleeve over the completed joint for a clean, consolidated look. The goal is to balance ease of assembly with durability under expected use conditions.
Step-by-step application workflow: from prep to inspection
- Prepare the workspace and ensure all tools are within reach: soldering iron, heat gun or lighter, heat shrink tubing, and flux.
- Clean the conductors; remove oxidation and lubricant with isopropyl alcohol and a lint-free cloth.
- Tin the wires lightly with solder to improve flow and reduce heat exposure to the assembly.
- Slide the appropriately sized shrink tube over the joint or position it to cover the prepared area.
- Apply heat evenly to shrink the tubing; if adhesive-lined, ensure the adhesive seals around the joint.
- Inspect for full coverage, smooth transitions, and any excess solder protrusions that could cause shorts.
- Rework if necessary, ensuring the joint remains accessible for future testing.
Following a consistent workflow minimizes cold joints and ensures long-term durability of the solder-and-heat-shrink assembly.
Safety, quality control, and reliability considerations
Always work in a well-ventilated area and wear eye protection when soldering. Use fume extraction for rosin-based fluxes and dispose of flux residues properly. Verify heat settings on your tool to avoid overheating the tubing or damaging insulation. After shrinking, test the joint with a multimeter for continuity and insulation resistance. In jewelry settings, handle delicate wires with care to avoid nicking or breaking the conductor. Documentation of material batch numbers can help trace any future reliability concerns. SolderInfo emphasizes building a reproducible process: standardize flux choice, solder type, tubing size, and heat-shrink technique across projects to reduce variability and improve results.
Alternatives and trade-offs: when to skip heat shrink or choose other methods
In some quick repair scenarios, you may opt for solder joints without shrink tubing if you select a robust, well-insulated heat-shrink-friendly environment. Crimp connectors with proper isolation can offer rapid, solder-free assemblies with reliable strain relief. However, crimping may introduce variability across appications and require specific crimp tools and standards. Tape insulation is the cheapest option, but it often degrades under heat, moisture, and UV exposure, reducing long-term reliability. The trade-offs include speed, cost, reworkability, and protection level. In critical systems where moisture, vibration, and temperature swings are common, SHS generally delivers superior durability and consistent performance.
Case studies: electronics, plumbing, and jewelry use cases
In electronics, a SHS joint may connect a power lead to a motherboard header or protect a sensor line in an enclosure. In plumbing, shrink tubing can insulate a small-diameter copper or PEX connector, reducing the risk of galvanic corrosion and accidental shorts. Jewelry designers use shrink sleeves to cover solder seams, creating a neat aesthetic while preserving flexibility. Across all domains, the common thread is that SHS provides a combined solution: a strong mechanical bond with robust insulation that resists moisture and environmental stress. Real-world projects show improved long-term reliability when SHS joins are executed with well-matched materials and controlled heat application.
Common mistakes and troubleshooting tips
- Using tubing that is too large or too small for the joint, causing incomplete sealing or excessive bulk.
- Applying uneven heat leading to partial shrinking or melted adhesive lining.
- Failing to clean residues after soldering, which can corrode or promote leakage paths over time.
- Skipping insulation on high-current or high-temperature joints, increasing risk of shorts or heat damage.
- Not performing a post-work test; always verify continuity and insulation resistance with a multimeter.
Pro tip: practice on scrap pieces to establish consistent heat exposure, shrink times, and inspection routines before committing to a live assembly.
Authority sources and further reading
For safety and best-practice guidelines, consult authoritative references. Industry standards and safety agencies provide general guidance on electrical work, materials handling, and heat-treatment practices that apply to soldering processes and insulated joins. While SHS specifics may vary by material, the fundamental principles of good preparation, correct material selection, and careful heat control remain universal. Always follow local codes and manufacturer recommendations when selecting solder alloys and shrink tubing for any project.
Comparison
| Feature | Solder + Heat Shrink (SHS) | Solder with Electrical Tape |
|---|---|---|
| Mechanical strength | High when properly seated and shrunk | Moderate; tape can peel or migrate under stress |
| Moisture resistance | Excellent due to seamless sleeve | Variable; edges can allow moisture ingress |
| Insulation quality | Superior insulation with uniform wall thickness | Good initially but tape can degrade over time |
| Heat resistance | Excellent; tubing temp ratings support high temps | Tape can soften or delaminate under heat |
| Inspection & rework | Clear visual cue; easier to rework with tube intact | Tape can obscure joints and complicate rework |
| Ease of application | Requires soldering plus shrinking; more steps | Faster; no heat shrink required |
| Cost per joint | Moderate; tubing plus solder costs | Low upfront cost but potential rework costs |
Advantages
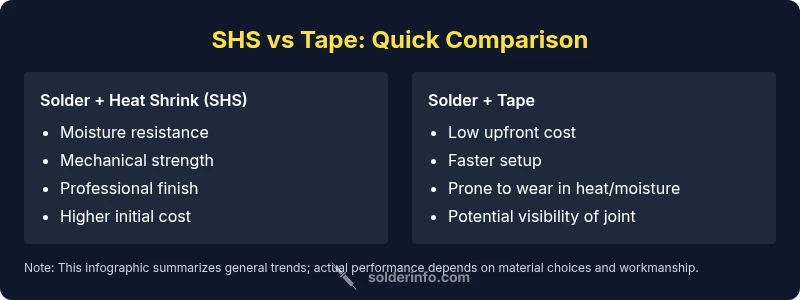
- Improved moisture and vibration resistance
- Professional finish and durable insulation
- Strong mechanical support with strain relief
- Predictable long-term performance in harsh environments
- Reduced risk of short circuits from exposed conductors
Cons
- Requires heat source and some skill
- Slightly longer setup time and material cost
- Shrink tubing must be sized correctly for best results
- Not easily reversible; rework can be challenging if damaged
SHS is the superior choice for durable, insulated joints in challenging environments
When reliability, moisture resistance, and long-term performance matter, solder-and-heat-shrink wins. Use it for electronics, plumbing, and jewelry where exposure to moisture, vibration, and temperature swings is expected. Consider alternatives only for very quick, low-budget repairs.
Quick Answers
Is solder with heat shrink suitable for all wiring projects?
SHS is versatile for many common wiring tasks, especially where moisture and vibration are concerns. However, high-temperature environments or space constraints may require alternative approaches such as cryogenic-rated sleeves or specialized crimps. Always assess the operating conditions and material compatibility before choosing SHS.
SHS works in many cases, but check your environment before using it on every project.
What is the best heat shrink size for typical wires?
Choose tubing with an expanded diameter that fits over the joint with a comfortable margin, and a wall thickness that matches the insulation needs. For most hobby projects, 2:1 or 3:1 shrink ratios with tubing rated for your expected temperatures work well.
Pick tubing that fits over the joint and shrinks to seal it properly.
Do I need flux when soldering with heat shrink?
Flux helps the solder flow and prevents oxidation during the joint. Rosin-core fluxes are common, but you should choose a flux compatible with your metals and clean the joint after soldering if required.
Flux helps solder flow; choose the right type and clean afterward.
Can heat shrink be used without solder?
Heat shrink can be used with purely mechanical connections, but its primary benefit is insulation and protection of a soldered or crimped joint. For non-soldered joints, ensure a stable, strain-relieved connection before shrinking.
You can shrink around non-soldered joints, but ensure the joint is secure first.
What safety precautions are essential when soldering with heat shrink?
Work in a well-ventilated area, use eye protection, and control heat to avoid overheating the tubing or nearby components. Allow joints to cool before handling and inspect for perfect sealing.
Ventilate, wear protection, and manage heat carefully.
Is lead-free solder recommended for home projects?
Lead-free solders are commonly used for safety and environmental reasons. They require slightly higher temperatures and careful flux choice, but are widely supported for hobby and professional work.
Lead-free is common for safety; follow manufacturer guidelines.
Top Takeaways
- Start with clean surfaces and correct sizing.
- SHS provides robust insulation and strain relief.
- Choose heat-shrink with adhesive lining for best moisture sealing.
- Inspect joints thoroughly after shrinking and soldering.
- Reserve tape-only methods for quick fixes or prototyping.