Shiny vs Dull Solder: Visual Cues for Reliable Joints
Explore the nuances of shiny vs dull solder, how surface appearance relates to joint quality, and practical steps to achieve reliable soldering across electronics, plumbing, and jewelry.

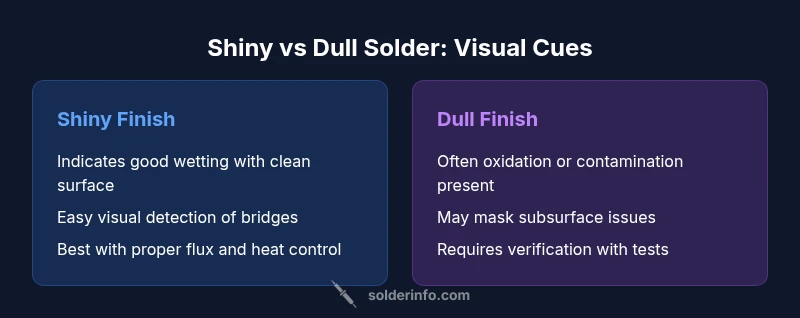
Shiny solder typically signals good wetting and clean surfaces, while dull finishes can indicate oxidation or insufficient flux. However, shine alone does not prove joint strength. Reliability hinges on proper flux, heat control, surface preparation, and the absence of gaps or voids. In practice, aim for a smooth, bright joint and verify with basic electrical and mechanical checks.
The Visual Debate: What 'shiny vs dull solder' Really Signifies
In the world of soldering, many hobbyists and professionals rely on surface appearance as a quick proxy for joint health. The phrase shiny vs dull solder describes two ends of a spectrum: bright, reflective joints versus more matte, grayish finishes. While shinier joints often correlate with good wetting and clean surfaces, the visual cue is not a definitive measure of electrical continuity or mechanical strength. The SolderInfo team notes that surface brightness should be interpreted alongside flux coverage, heat control, and surface preparation. Learners should use shine as a helpful guide, not a sole diagnostic. In practical terms, you want a joint that looks bright when you tilt it under light, with no visible gaps, bridges, or excess solder that could trap air. Remember that alloy composition and oxidized films can alter how a joint looks without necessarily indicating failure or success. The goal is a visually bright, smooth, and well-wetted interface that a multimeter can confirm is electrically sound, and that appears sturdy to the touch when probed.
Defining Shininess: Wetting, Flux, and Alloy Influence
Shininess is a byproduct of several interrelated factors: surface cleanliness, flux activity, solder alloy, and the heat applied during reflow or hand-soldering. Wetting describes how well molten solder spreads across the surface of the metal. If the surface is clean and flux is doing its job, solder should flatten into a thin film with minimal beading resistance, producing a bright, reflective finish. Conversely, oxides, oils, or contaminants form barriers that resist spreading, causing dull patches or a matte appearance. The alloy composition matters too: some solders are naturally more reflective after solidification, while others form oxides that dull quickly when exposed to air. For novices, achieving a bright finish often means ensuring copper or pad surfaces are impeccably clean, applying a fresh rosin or water-soluble flux, and maintaining appropriate heat without overheating the joint. The shiny appearance is a good sign, but it should be validated with a functional test and visual inspection for smoothness and absence of gaps.
When Shininess Correlates with Quality (and When It Doesn’t)
A bright joint can indicate that the solder wetting was effective and that the flux flushed away oxide from the joint interface. This usually means a film of solder that has evenly coated the pad and lead, reducing the likelihood of cold joints and bridging. However, shininess can be misleading in several cases. A joint might look bright on the outside but harbor subsurface voids, poor grain structure, or incomplete wetting at the root. Some high-reliability alloys naturally form a duller finish yet still provide excellent electrical connectivity and mechanical strength. In contrast, a shiny surface can occur on a joint with a thin or imperfect bond if the surface has been cleaned aggressively or reflowed in a way that masks underlying flaws. The key takeaway is that shine is a visual indicator that should be corroborated by testing, pull or torque checks, and continuity measurements to ensure the joint meets the required specifications.
The Role of Flux and Surface Preparation
Flux serves two critical roles: it cleans the metal surface by dissolving oxides and it protects the molten solder from re-oxidation during heating. When flux works effectively, the molten solder flows more readily and forms a continuous film that appears shiny. Effective fluxing also lowers surface tension and improves wetting, which reduces the risk of hot spots and void formation. Surface preparation cannot be overstated: remove solder mask residues, oil, or grease; scrub copper pads with appropriate cleaner; and ensure parts are mated properly before tinning. If you see dull patches after cleaning, re-apply flux and rework the joint, ensuring the pad and lead are properly tinned. Additionally, the choice of flux—rosin-core, water-soluble, or no-clean—will influence how the joint looks after cooling, so select a flux suitable for the material and the environment.
Per-application Differences: Electronics, Plumbing, Jewelry
Different soldering domains have distinct finish expectations. In electronics, shininess is appealing but not sufficient; the joint must support electrical continuity and withstand thermal cycling. In plumbing, joints are expected to be water-tight and corrosion-resistant, and the finish may be more forgiving of a slightly dull appearance if the joint seals effectively. Jewelry soldering emphasizes aesthetic appearance but also structural integrity, with many alloys forming mirror-like surfaces after polishing. No single rule fits all; evaluate shininess in the context of the application, the material being joined, and the required reliability. Always follow domain-specific standards: electronics often emphasizes oxidation-free joints and clean flux residue removal; plumbing prioritizes leak tests and corrosion resistance; jewelry focuses on jewelry-quality finishes and compatibility with the metal.
Practical Techniques to Achieve the Desired Finish
To reliably achieve a visually bright, high-quality solder finish, you should: (1) prepare surfaces meticulously—degrease, scrub, and dry; (2) choose compatible flux and solder alloys for the task; (3) heat the joint evenly to a proper reflow temperature without overheating; (4) apply solder to the joint path rather than to the iron tip, allowing capillary action to spread the alloy; (5) inspect under good lighting and rework any dull patches or gaps; (6) clean away flux residues after cooling, as residues can dull the appearance over time. For delicate electronics, consider using heat sinks, temperature-controlled irons, and flux pens designed for the smallest pads. The visual goal is a bright, smooth finish that confirms good wetting, but always validate with functional tests to ensure reliability across operating conditions.
How to Inspect for Reliable Joints Beyond Shine
Beyond surface shine, there are several practical checks to confirm joint quality. Visually inspect for consistent fillets and absence of gaps around pads. Perform a pull test for mechanical integrity on prototyping boards, and measure electrical continuity with a multimeter to ensure the joint has low resistance. Check for cold joints by gently wiggling components to see if the solder remains attached or shows micro-cracks. For critical applications, use microsectioning or non-destructive testing to assess cross-sectional quality, or employ X-ray in manufacturing settings to detect voids. Finally, document your results and compare to known-good references so future work can reproduce the desired finish consistently.
Troubleshooting Shine vs Dull: Quick Fixes
If you encounter dull solder, start with surface prep: re-clean with solvent, abrade lightly if needed, and reflow with fresh flux. Rework under controlled temperature, avoiding overheating that can burn flux or degrade components. If beading occurs, re-tin the pad and check for contaminants on the surface. Conversely, if joints appear overly shiny but exhibit gaps or weak adhesion, you may be seeing a lack of proper solder flow or insufficient flux. Address flux distribution, ensure components are properly aligned, and rework the joint with an adequate amount of heat and flux. In both cases, practice consistent technique and verify with post-assembly tests to confirm reliability.
Comparison
| Feature | Shiny finish | Dull finish |
|---|---|---|
| Indicates wetting/flux success | Common sign of proper wetting | Often indicates oxide or poor wetting |
| Susceptibility to hidden defects | Lower when joints are high-quality | Higher if dull due to oxidation |
| Ease of visual inspection | Usually easy to assess with light | May obscure defects |
| Reliability cues | Generally reliable with proper cleaning | Requires testing to confirm |
| Recommended handling | Ensure flux application and heat control | Revisit surface prep and flux |
Advantages
- Bright, well-wetted joints are easy to visually verify
- Bright finishes help spot solder bridges and gaps quickly
- Smooth, shiny finishes reduce risk of micro-voids and improve reliability
- Encourage consistent fluxing and heat control
Cons
- Shiny appearance can mask subsurface voids or porosity
- Some sound joints may appear dull due to oxide layers or alloy choice
- Over-cleaning or aggressive flux removal can reveal hidden defects
Prioritize joint integrity over shine; practice good wetting and cleaning to achieve reliable joints.
A shiny finish is a helpful cue when supported by proper flux and heat control. If a joint looks dull, verify with electrical tests and mechanical checks. The overall reliability comes from wetting, cleanliness, and proper material compatibility, not shine alone.
Quick Answers
Does shiny solder always mean a strong electrical joint?
Not always. Shine indicates wetting but does not guarantee there are no hidden voids or cracks. Always test continuity and resistance and inspect for gaps or voids.
Shiny alone isn’t a guarantee—test the joint with a multimeter and visual inspection for gaps.
What causes dull solder to appear after finishing?
Dullness usually results from oxide buildup, flux residue, or aging of the joint surface. It can also happen if the surface wasn’t properly cleaned or if the alloy choice promotes a matte finish.
Dull look is often oxide or flux-related; clean and rework if needed.
How can I improve shininess without risking joint quality?
Improve shine by ensuring clean surfaces, appropriate flux, and controlled heat. Avoid overheating, which can burn flux or damage components, and rework if the joint looks dull or shows gaps.
Use proper flux and controlled heat to get a clean, bright finish.
Is shininess relevant for plumbing solder differently than electronics?
In plumbing, the seal and corrosion resistance matter more than a mirror shine. In electronics, shine helps with inspection but should be corroborated with tests for continuity and reliability.
Plumbing cares about seals; electronics care about reliability plus shine.
Should I reflow or rework joints that look dull?
Yes, rework dull joints to remove oxide and ensure proper wetting. Reflow with fresh flux, clean surfaces, and correct heat, then re-check the joint.
If it looks dull, rework with clean surfaces and proper flux.
Top Takeaways
- Prioritize wetting and flux quality over shine.
- Aim for a smooth, bright joint with no gaps.
- Test joints with electrical and mechanical checks.
- Consider material and application-specific finish expectations.
- Regular cleaning and proper heat control reduce dull surfaces.