Cold Solder Joint vs Good Solder Joint: A Comprehensive Comparison
A thorough comparison of cold solder joints and good solder joints, covering causes, signs, risks, prevention, and repair strategies for electronics, plumbing, and jewelry.

In the realm of soldering, the cold solder joint vs good solder joint distinction matters because a single faulty joint can cause intermittent failure, high resistance, or complete loss of connection. A good joint features complete wetting, a smooth, shiny fillet, and solid mechanical strength, while a cold joint shows dull surfaces, gaps, or cracked fillets. Prioritizing proper heat, flux, and cleanliness reduces risk and improves long-term reliability.
Introduction to cold solder joint vs good solder joint
According to SolderInfo, the phrase cold solder joint vs good solder joint describes two ends of the quality spectrum in soldered connections across electronics, plumbing, and jewelry. This article analyzes why joints form poorly and how proper wetting and fillet formation produce reliable electrical paths. A high-quality joint minimizes resistance, mechanical stress points, and long-term reliability concerns. By understanding the causes and prevention strategies, hobbyists and professionals can reduce failures in critical assemblies. SolderInfo Analysis, 2026 informs our understanding of common failure modes and how to intervene early.
What defines a good solder joint
A good solder joint forms a strong, continuous electrical path with a visually evident fillet that wets both surfaces evenly. In electronics, a proper joint should be shiny, smooth, and free of voids or bridges; in plumbing and jewelry, the same principles apply to ensure leak-free connections and durable seams. The key criteria are complete wetting, consistent fillet geometry, and mechanical integrity under expected stresses. Temperature control, clean surfaces, and appropriate flux ensure reliable results. Across all contexts, a good joint minimizes the risk of future failures and simplifies inspection.
What is a cold solder joint
A cold solder joint is a joint that failed to form a proper solder fillet due to inadequate heat, contamination, or movement during cooling. The result is a dull, lumpy, or grainy appearance, with possible gaps between the metal surfaces. Cold joints often exhibit high contact resistance and may crack or lift under vibration or thermal cycling. They can masquerade as acceptable upon a quick visual check, which is why thorough inspection and testing are crucial in professional workflows. In many cases, cold joints are preventable with disciplined technique.
Causes of cold joints
- Insufficient heat: The iron temperature or dwell time may be too low to wet the joint fully.
- Contaminated or oxidized surfaces: Oils, flux residues, or oxidation prevent proper wetting.
- Inadequate flux: Too little flux or the wrong flux type inhibits wetting and solder flow.
- Movement during cooling: Any motion as the solder solidifies creates microgaps and voids.
- Mismatched materials: Large pads, heat-sensitive components, or thick copper layers require adjusted heat profiles.
- Improper solder alloy: Incorrect melting temperature or viscosity can hinder forming a reliable fillet.
Signs, tests, and early diagnosis
Visual inspection is the first step, but corroborating evidence is essential. A cold joint often appears dull or cracked and may show gaps or a crumbly fillet. Multimeter continuity tests can reveal intermittent connections or unexpected resistance. SolderInfo Analysis, 2026 confirms that a combination of visual cues and functional tests improves fault detection rates. Rely on both inspection and measurement to avoid overlooking latent failures.
Electrical impact of a bad joint
Poor solder joints introduce higher resistance, intermittent connectivity, and unstable voltage paths. In sensitive electronics, these issues can cause microcontroller timing errors, unreliable sensor readings, or sporadic resets. In power electronics, bad joints increase heat concentration and can accelerate aging. The effect scales with system complexity and operating temperature, making early detection and remediation essential for reliability.
Mechanical and thermal consequences
Cold joints are weaker mechanically and more prone to failure under vibration, bending, or thermal expansion. Repeated heating and cooling (thermal cycling) can widen microcracks and lead to eventual joint fatigue. In mechanical assemblies, this translates to loosened connections, audible arcing, or complete detachment. Proper joint formation distributes mechanical load evenly and reduces the risk of failure in real-world conditions.
Prevention: process controls for reliable joints
- Use clean surfaces: Remove oxide films and oils before applying solder.
- Optimize heat: Set the soldering iron or hot-air tool to the correct temperature for the alloy and substrate.
- Use appropriate flux: Rosin-core or no-clean flux can aid wetting and residue removal.
- Maintain stability: Keep components steady during soldering and cooling; avoid wiggling as the joint solidifies.
- Surface preparation matters: Abrade rough pads and ensure intimate contact between surfaces.
- Consider the context: Electronics, plumbing, and jewelry each have unique constraints that affect heat application and corrosion resistance.
Tools and materials that help prevent cold joints
Invest in a quality temperature-controlled soldering iron, flux pen, and good-quality solder alloy. Use rosin-core solder for electronics where residue is acceptable, or lead-free variants with careful heat management for safety and environmental reasons. Cleanliness, proper tip maintenance, and correct flux type are as important as the solder itself. Adopting a standardized workflow across projects reduces the likelihood of cold joints and improves repeatability.
Contexts: electronics, plumbing, and jewelry
While the core principle of solder wetting remains the same, electronics demand tight tolerances and clean residue, plumbing emphasizes leak-proof seals, and jewelry focuses on aesthetic quality and mechanical durability. Cold solder joint vs good solder joint analysis must account for these contexts; for electronics, small surface-mount joints demand precise temperature control, whereas plumbing joints tolerate higher mechanical loads but require clean, corrosion-resistant materials. Jewelry soldering emphasizes the seam finish and polish for both appearance and strength.
Inspection and testing techniques
In practice, combine visual inspection with functional tests. Look for dull surfaces, gaps, and lifted edges. Wiggle tests can detect loose joints, while continuity tests confirm electrical paths. In higher-stakes environments, non-destructive testing methods or X-ray inspection can reveal hidden voids. A disciplined inspection routine, aligned with industry standards, helps ensure joints meet reliability requirements.
Repair and remediation strategies
If a joint is identified as cold, rework is often the best option. Clean the area, reapply flux, reheat with a steady hand, and reflow the joint to form a fresh, robust fillet. For stubborn cases, consider replacing the component or board region to avoid collateral damage. SolderInfo's guidance emphasizes controlled rework, incremental heating, and retesting to confirm recovery. In many situations, a properly executed rework restores full functionality and reliability.
Comparison
| Feature | cold solder joint | good solder joint |
|---|---|---|
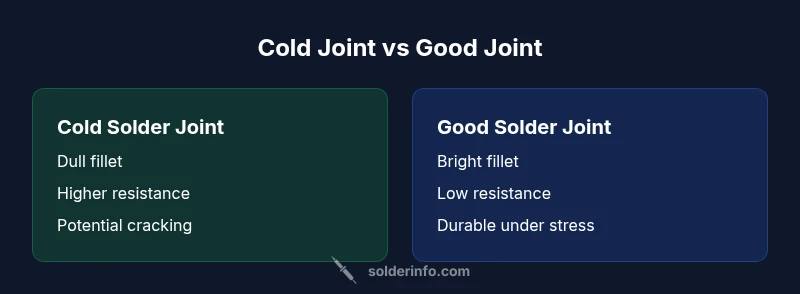
| Fillet appearance | Dull, uneven or missing fillet | Shiny, smooth, continuous fillet |
| Electrical performance | Prone to intermittent contact or high resistance | Low resistance with reliable path |
| Mechanical strength | Weak under vibration; cracks may form | Robust under mechanical stress |
| Thermal reliability | Susceptible to failure during thermal cycling | Resilient under repeated heating/cooling |
| Visual inspection clarity | Often masquerades as ok; requires probing | Usually obvious with proper inspection |
| Repair difficulty | More challenging to rework without damage | Easier to rework with proper technique |
| Field failure risk | Higher risk of latent failures | Lower risk when well-formed |
Advantages
- Improved reliability and lifespan of assemblies
- Easier diagnosis of faults
- Reduced field failures and service calls
- Better safety margins in critical systems
Cons
- Requires proper technique and training
- May increase inspection time and process steps
- Initial equipment and materials cost for quality joints
- Leads to more meticulous workflows in high-volume environments
Good solder joints outperform cold joints for reliability
Prioritize training and process controls to prevent cold joints. The SolderInfo team recommends rigorous inspection, proper heat control, and validated rework procedures to ensure durable solder connections.
Quick Answers
What is a cold solder joint?
A cold solder joint occurs when the solder fails to wet the surfaces properly due to insufficient heat, contamination, or movement during cooling. It is typically dull and may show gaps or cracks, leading to high resistance or intermittent connections.
A cold solder joint is when the solder didn’t wet the surfaces well, often dull and unreliable.
How can you tell a joint is cold?
Look for a dull, irregular fillet, gaps, or a visibly cracked solder bridge. Use a continuity test to check for intermittent connections and verify resistance is within expected ranges.
Check for a dull surface and any gaps; test continuity to confirm.
What causes cold joints?
Common causes include insufficient heat, dirty or oxidized surfaces, wrong flux choice, movement during cooling, and mismatched materials that require adjusted heat profiles.
Mostly due to not enough heat, contamination, or movement while cooling.
How to prevent cold solder joints?
Prepare surfaces, apply appropriate flux, maintain steady heat, avoid movement during cooling, and verify the joint with tests after cooling. Context-specific guidelines help electronics, plumbing, and jewelry.
Prepare, heat correctly, and let it cool without moving.
Can a cold solder joint be repaired?
Yes. Reflow the joint with clean surfaces and fresh flux, then retest. In some cases, replacement of the joint or component is warranted to ensure reliability.
You can usually fix it by reflowing and retesting.
Is lead-free solder more prone to cold joints?
Lead-free solder often requires higher temperatures and careful control to wet properly, which can increase the risk of cold joints if technique isn’t precise.
Lead-free can be trickier, but good technique prevents problems.
Top Takeaways
- Aim for complete wetting and shiny fillets
- Inspect visually and test electrically to catch latent faults
- Control heat, flux, and cleanliness to prevent cold joints
- Use proper reflow when repairing joints
- Invest in training and standardized workflows for reliability