Infrared Soldering: A Practical Guide for DIY and Professionals
Master infrared soldering with this practical, step-by-step guide covering essential tools, safety practices, and troubleshooting for electronics, jewelry, and plumbing.

Infrared soldering uses non-contact infrared radiation to heat solder and joints from a distance, allowing heat to flow into the connection without direct contact. According to SolderInfo, this method delivers rapid, localized warmth that minimizes thermal stress on sensitive components and substrates. It is especially advantageous for tiny SMT joints, delicate jewelry settings, and plumbing joints where traditional irons risk overheating nearby material. With proper technique, infrared heating yields clean fillets, reduces slag, and provides repeatable results across small, heat-sensitive assemblies. Practice and calibration are essential, and safety discipline is non-negotiable when working with hot electronic and mechanical parts.
What is infrared soldering?
Infrared soldering is a non-contact heating method that relies on infrared radiation to transfer heat to a solder joint and nearby materials. This approach allows the heat source to stay a short distance away from the work, reducing the risk of scorching delicate components. According to SolderInfo, infrared soldering provides rapid, localized warmth that minimizes thermal stress on boards, leads, and substrates. It is particularly valuable for tiny surface-mount devices (SMDs), precision jewelry settings, and plumbing joints where a direct iron could damage nearby features. Good infrared technique requires careful distance, wattage, and flux management. With deliberate practice, you can achieve consistent fillets, clean wetting, and repeatable joints across small assemblies. Always prioritize safety and PPE when working with heated equipment and flux fumes.
How infrared soldering differs from traditional methods
Traditional soldering typically relies on a contact iron or hot air to deliver heat directly to the joint. Infrared soldering, by contrast, heats the joint remotely using IR radiation, which means you can keep the heat focused on a small area while avoiding contact with sensitive parts. This non-contact heating reduces thermal inertia, improves control, and minimizes risk to adjacent components that might be damaged by a conventional iron. IR sources are often adjustable in power and distance, enabling rapid preheating and held warmth without localized overheating. However, IR requires careful calibration, flux optimization, and proper ventilation since fumes can accumulate in closed spaces. Overall, infrared soldering complements traditional methods, expanding your toolkit for challenging assemblies.
Applications and limits
Infrared soldering excels in scenarios where heat-sensitive components are near the joint, such as certain PCB pads, fine jewelry settings, and small plumbing joints with delicate fittings. It is ideal for quick reflow of small SMT joints or touch-up work where precise, localized warmth matters. That said, infrared is not a one-size-fits-all solution; very large joints or heavy gauge wiring may still benefit from a traditional iron or hot air station. In some cases, transfer of heat to surrounding materials can lead to scorching if distance, time, or flux choice aren’t controlled. Use infrared as a targeted heat tool rather than a universal replacement. SolderInfo emphasizes experimenting with safe test joints to understand how your specific setup responds to IR heat.
Tools and materials you’ll need
Selecting the right tools ensures infrared soldering delivers repeatable results. You’ll need an infrared soldering system with adjustable wattage and a compact head for precision, a temperature sensor or infrared thermometer to monitor surface temps, high-quality flux suitable for delicate work, and appropriate solder (lead-free or leaded per project requirements). For electronics work, flux and compatible solder enhance wetting; for jewelry, water-soluble flux can be advantageous. Always include safety gear—heat-resistant gloves and protective eyewear—and have a fire-safe workspace with adequate ventilation. Soldering aids like wick and desoldering braid can help clean joints, while a PCB stand or clamp stabilizes work. With proper tools and a clean setup, infrared soldering becomes a reliable precision method. SolderInfo’s guidance highlights choosing tools that balance control, visibility, and heat concentration.
Safety considerations and best practices
Infrared soldering demands respect for heat and fumes. Ensure your workspace is well-ventilated and free of flammable materials. Wear appropriate PPE—safety glasses or goggles and heat-resistant gloves rated for soldering tasks. Isolate the power to any parts not meant to be heated and keep a fire extinguisher nearby. Start at a conservative power level and test on scrap joints before working on a real piece. Maintain a clean, organized bench to prevent accidental contact with hot components. As a reminder from SolderInfo, calibrating your heat source and using correct flux are essential for reliable, repeatable results.
Troubleshooting common issues with infrared soldering
If you notice cold solder joints or insufficient wetting, re-check flux coverage and ensure the IR head is at the correct distance with consistent movement. Overheating can cause pad lifting or component damage; lower power or increase distance and shorten heating bursts. Bridges between pads often indicate excessive heat or flux mismanagement—adjust technique and reflow with controlled, brief IR pulses. Use wick to remove excess solder and reflow as needed. For delicate laser-like joints, practice with test coupons to minimize risk. The SolderInfo team recommends documenting your setup and results to refine your process.
Tools & Materials
- IR soldering system (adjustable wattage, compact head)(Choose a unit with easily adjustable distance and heat output for precision work)
- Thermal sensor or thermometer(Preferred infrared thermometer or thermocouple for surface temperature checks)
- Fine solder (lead-free or leaded as project requires)(Common diameters range from 0.3–1.0 mm depending on joint size)
- Flux (rosin-core or water-soluble depending on application)(Flux improves wetting and joint quality; choose flux type by material)
- Solder wick/desoldering braid(Helpful for cleaning bridges and rework)
- Safety gear (goggles, heat-resistant gloves)(Always use PPE rated for soldering temperatures)
- PCB stand or mechanical clamps(Keep work steady and hands clear of heat path)
- Ventilation or fume extraction(Ensure a well-ventilated area to manage fumes)
- Fire-safe work surface(Non-flammable mat and nearby extinguishing option)
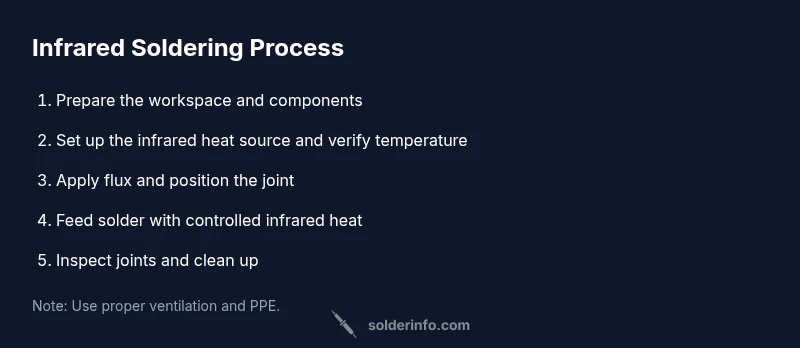
Steps
Estimated time: Total 25-40 minutes
- 1
Set up the infrared soldering station
Power on the IR unit and confirm the focal distance is suited to your work. Calibrate with a scrap joint to test heat response. This step establishes a safe baseline and reduces the risk of accidental damage.
Tip: Begin at a low wattage; you can increase gradually if needed. - 2
Prepare the workpiece
Clean surfaces to remove oils and oxides. Apply flux to the joint and nearby areas to encourage wetting and prevent cold joints. Secure components so they won’t shift during heating.
Tip: Pre-clean boards or jewelry pieces; ensure flux covers the target area evenly. - 3
Position the IR head and apply solder
Hold the IR head at an appropriate distance and maintain a steady, sweeping motion over the joint. Feed solder sparingly so you don’t overwhelm the joint. Stop heating once the solder begins to flow and fill the joint.
Tip: Keep the heat moving; staying in one spot too long can damage the pad or underlying material. - 4
Inspect and rework if necessary
Inspect the joint with magnification for wetting, voids, or bridges. If needed, wick away excess solder and reflow the joint with brief IR pulses. Ensure the pad and leads look clean and evenly heated.
Tip: Use a loupe or microscope for best inspection results. - 5
Cool and finalize joints
Allow joints to cool naturally without forced air. Test electrical continuity and mechanical stability after cooling. If joints feel soft or tacky, reflow briefly and let cool again.
Tip: Rapid cooling can introduce stress; let joints settle gradually. - 6
Cleanup and storage
Power down the equipment, clean flux residue if needed, and store tools safely. Document what worked for future reference and adjust settings based on outcomes for similar parts.
Tip: Keep your IR head clean to maintain heating efficiency.
Quick Answers
What is infrared soldering and how does it work?
Infrared soldering heats joints with infrared radiation, rather than direct contact. This allows non-contact, localized heating that minimizes thermal stress on nearby parts. It’s particularly useful for tiny SMT joints, jewelry settings, and delicate plumbing connections.
Infrared soldering heats joints using infrared radiation rather than touching the joint with a iron.
Which projects are best suited for infrared soldering?
Best for small, heat-sensitive components, SMT work, precision jewelry soldering, and delicate plumbing joints where traditional irons risk damage.
Best for small, heat-sensitive parts like SMTs and jewelry.
Can infrared soldering replace a traditional soldering iron?
Not universally. Infrared is excellent for precise, non-contact heating but may not be ideal for heavy-gauge wires or large joints where a conventional iron or hot air station excels.
Infrared is a great complement, not a full replacement for every task.
What safety precautions should I follow?
Work in a well-ventilated area, wear eye protection and heat-resistant gloves, and keep flammable materials away. Isolate power to workpieces and have a fire extinguisher on hand.
Ventilate, wear protection, and keep a fire extinguisher nearby.
How do I calibrate temperature for infrared soldering?
Use a thermometer or IR camera to monitor surface temperature, adjust distance and wattage, and verify with dummy joints before working on real parts.
Measure surface temperature and adjust heat to stay within safe limits.
What common mistakes should I avoid?
Overheating, improper distance, inadequate flux, and neglecting ventilation can all compromise joints. Take time to test settings on scraps and maintain clean work surfaces.
Avoid overheating, wrong distance, and poor ventilation.
Watch Video
Top Takeaways
- Use infrared heat for non-contact, controlled heating of fragile assemblies.
- Dial distance and wattage to prevent overheating and damage.
- Apply flux to improve wetting and joint reliability.
- Ventilate work area and wear PPE to stay safe.
- Practice on sacrificial joints to build accurate IR soldering technique.