How to Solder Electronics: A Practical Beginner's Guide
Learn how to solder electronics with a clear, step-by-step approach. This guide covers essential tools, flux selection, heat control, safety, and troubleshooting to help you create reliable joints for PCB work, prototyping, and jewelry.

You will learn how to solder electronics safely and reliably, from choosing the right solder and flux to mastering iron temperature and joint inspection. This guide covers essential tools, surface prep, technique, tips to avoid cold joints, and a troubleshooting checklist you can apply to projects ranging from PCB work to jewelry soldering.
Fundamentals of Soldering Electronics
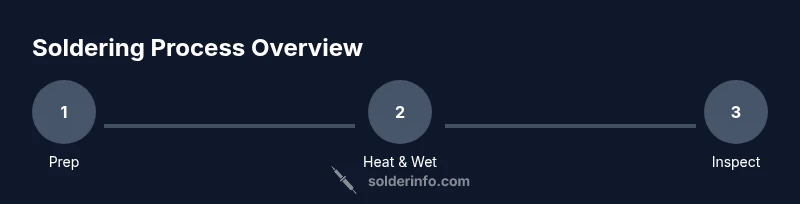
Soldering electronics is the process of joining metal surfaces with a filler metal that has a lower melting point than the parts being joined. In practice, you heat the joint with a soldering iron, apply solder so it flows smoothly onto the pad and component lead, and then let it cool to form a strong electrical and mechanical connection. The key concepts are wetting (the solder spreading), tinning (pre-coating the tip with metal) and proper flux use to remove oxides and promote clean joints. According to SolderInfo, mastering these fundamentals reduces rework and increases joint reliability across hobby projects, electronics prototyping, and jewelry soldering alike. When you learn how to solder electronics, you also learn to manage heat, inspect joints, and troubleshoot common imperfections such as grainy, dull, or bridging joints. This foundation sets the stage for successful projects that last.
Why the Right Tools Matter
Your toolkit defines how well you can execute a clean solder joint. A good iron with a controllable temperature range, a fine-tipped probe, rosin flux, lead-free solder, and a suitable desoldering option are the core starting lineup. The right tools reduce the risk of overheating delicate components, pitting copper pads, or creating unintended shorts. Soldering is a precision skill: even small shifts in angle or pressure can affect the joint quality. In addition, ventilation is essential to minimize flux fumes and keep your workspace comfortable for longer sessions. Investing in a stable work surface, an adjustable stand, and a damp sponge or brass tip cleaner helps you work more efficiently and with less fatigue.
Flux, Solder Types, and Compatibility
Flux is the unseen helper that makes soldering easier by cleaning metal surfaces and improving wetting. In electronics, rosin-based flux is common and generally safe for delicate components when used sparingly. Solder types come in lead-free variants (usually tin-silver-copper blends) or traditional tin-lead mixes, each with its own melting behavior and heat requirements. Before you start, decide whether to use lead-free solder due to regulatory considerations or a leaded option for easier wetting. The crucial point is to ensure compatibility among solder, flux, and components, and to avoid corrosive flux on sensitive boards. Always check the manufacturer recommendations for any specific parts you’re assembling.
Preparing Surfaces and Components
Surface preparation matters as much as technique. Wipe pads and component leads with isopropyl alcohol to remove oils and oxides. If pads show oxidation, a light abrasion with a clean eraser or fine abrasive can help restore the surface. Ensure components are oriented correctly and held steady during soldering. A tidy workspace reduces the chance of accidental shorts. If you’re working on a PCB, inspect pads for lifted copper or damaged insulation prior to applying heat. Consistency in surface prep is a major determinant of joint quality.
Prepping the Iron and Tinning the Tip
A well-tinned soldering iron tip conducts heat efficiently and prevents delays in heat transfer. Before starting, heat the iron to the working temperature and apply a small amount of solder to the tip, then wipe it clean on a damp sponge or brass shavings. This step leaves a thin, conductive layer that improves heat transfer to the joint and reduces the time the iron spends on the pad. Regularly re-tin the tip during long sessions to maintain performance and extend tip life.
Temperature Control, Flux, and Wetting
Temperature control is essential for clean joints without damaging components. Work with a moderate heat and use flux to promote wetting, which helps solder flow smoothly from the lead to the pad. Apply flux sparingly to the joint, heat the joint, and feed solder to the joint rather than directly onto the iron. The goal is a shiny, concave fillet that indicates proper wetting and a strong mechanical and electrical connection. If you see a dull, grainy, or cracked joint, reheat and reflow with fresh flux to achieve proper flow.
Common Mistakes and How to Avoid Them
Common issues include cold joints, solder bridges, overheated pads, and tombstoning of small components. To avoid these problems, keep the tip clean and properly tinned, use flux wisely, and heat the joint rather than the lead. Use a steady hand and minimal movement while the solder cools; avoid moving parts during the quench to prevent joints from weakening. If you see a bridge, rework with desoldering braid or a dedicated desoldering pump and re-Solder the joints after cleaning.
Working with Different Materials: PCB, Wire, and Jewelry
Soldering electronics often involves PCB pads, enamel-coated wires, and sometimes jewelry components. For PCBs, pads should be clean and free of oxidation; for wires, strip insulation accurately and tin the end before insertion. In jewelry work, you’ll typically use small solder blocks and precise heat control to avoid melting stones or delicate settings. Each material has its own quirks, so adapt your technique accordingly: use flux specifically designed for the material in question, and choose a compatible solder alloy to prevent brittle joints.
Inspection, Testing, and Troubleshooting
After soldering, inspect joints for a smooth, shiny surface with a clean fillet and no visible gaps. Use a magnifier to check wetting and ensure there is no bridging. For testing, perform a continuity check and resistance test where applicable, and power the circuit briefly to ensure expected behavior. If a joint fails, rework with fresh flux, reheat gradually, and apply solder in small increments. Keeping a methodical approach helps you catch issues before final assembly.
Safety First: Ventilation, ESD, and Personal Protection
Soldering generates fumes, and some fluxes contain substances that can irritate the eyes and lungs. Work in a well-ventilated area or with a fume extractor. Wear safety glasses to protect your eyes, and be mindful of hot surfaces, especially iron tips and freshly soldered joints. Use ESD-safe practices when handling sensitive electronics and store solder and flux away from heat sources. A disciplined approach to safety keeps you productive and reduces the risk of injury.
Quick Reference: A Beginner’s Checkpoint
Keep practicing with small, scrap boards to build confidence before tackling complex assemblies. Focus on clean joints, steady heat, and careful component placement. With consistent practice, you’ll recognize the signs of a good joint and develop speed without sacrificing quality. The key is repetition and mindful technique, not speed alone.
Tools & Materials
- Soldering iron (adjustable temp preferred)(Fine-tip for precision work)
- Lead-free solder (or tin-lead, if allowed)(Sn63-Pb37 common; lead-free alloys are standard)
- Rosin-based flux or flux pen(Use sparingly and avoid corrosive flux)
- Desoldering braid or desoldering pump(For removing excess solder)
- Sponge or brass tip cleaner(Keeps tip clean and transfers heat efficiently)
- Tweezers and helping hands / third-hand(Helpful for small components)
- Isopropyl alcohol (at least 70%)(For cleaning pads and flux residue)
- Multimeter or continuity tester(Useful for circuit testing)
- Safety gear (glasses, ventilated area)(Protect your eyes and lungs)
- Small wires and components for practice(Practice scraps before real work)
Steps
Estimated time: 60-90 minutes
- 1
Set up workspace
Clear the bench, arrange tools within easy reach, and establish ventilation. Lay out a scrap board for practice before handling real parts. Verify power is off for safety, especially when testing later.
Tip: Position the iron so the hot tip cannot slide toward flammable materials. - 2
Select solder and flux
Choose a compatible solder alloy and rosin-based flux suitable for electronics. Keep a consistent supply to avoid mid-project substitutions that can affect joint quality.
Tip: Label flux types and keep dedicated flux pens for different alloys. - 3
Prepare surfaces
Wipe pads and leads with isopropyl alcohol. Remove oxidation from pads with a gentle touch of abrasive if needed. Ensure components are dry and oriented correctly before heating.
Tip: Do not over-clean; light abrasion is enough to restore conductivity. - 4
Tin the tip
Heat the iron and apply a small amount of solder to the tip, then wipe clean. This coats the tip for better heat transfer and reduces the time needed to wet the joint.
Tip: Keep the tip tinned but avoid building up excess solder on the tip. - 5
Apply flux to joints
Apply flux sparingly to the joint area. Flux helps solder flow and reduces oxidation, but excessive flux can cause bridging.
Tip: Use flux only where needed to keep joints clean. - 6
Position components and tack
Place components on pads and apply a small tack of solder at one end to hold in place. This lets you reflow the other side without shifting parts.
Tip: Tack one leg first; adjust alignment before finishing the joint. - 7
Melt solder and form joint
Touch the heated joint with the tip and feed solder to the joint—not directly onto the iron. Remove heat as the joint fills, then let it cool undisturbed.
Tip: Feed solder smoothly; avoid excessive heat that can lift pads. - 8
Inspect and rework
Examine the fillet for a shiny, smooth appearance. If dull or cracked, reheat and reflow with fresh flux. Remove bridges with desoldering braid and re-solder carefully.
Tip: Use a magnifier for best results. - 9
Clean flux residue
Wipe away flux residues with isopropyl alcohol; some fluxes leave a sticky film if not cleaned. Ensure the board is completely dry before testing.
Tip: Do not leave flux residue on sensitive boards. - 10
Test the circuit
Power the circuit in a controlled manner and check for shorts, opens, and expected functionality. Measure continuity and resistance where applicable to verify joints.
Tip: Test on a breadboard or power supply with current limiting.
Quick Answers
What is soldering?
Soldering is a joining method that uses a filler metal to fuse two conductive surfaces, typically with heat from a soldering iron. It creates electrical connections and mechanical stability for electronics projects.
Soldering is a process that uses heat to join metals with a filler metal, forming an electrical connection.
What flux should I use for electronics?
For electronics, use rosin-based flux for clean joints and flux pens for controlled application. Avoid acidic flux on electronics, and always use flux compatible with your solder type.
Use rosin-based flux for electronics and apply it sparingly.
Why do I get cold joints?
Cold joints happen when the solder doesn't melt and flow properly. Ensure adequate heat, clean surfaces, and proper flux, and avoid moving parts while the joint cools.
A cold joint occurs when the solder doesn't flow; reheat and reflow until it shines.
Can I solder while the board is powered?
Generally, avoid soldering with power on. Disconnect power, discharge capacitors if safe, and validate continuity. Soldering a live circuit can cause shorts or component damage.
Never solder on a live circuit unless it's a sanctioned hot-soldering procedure.
What temperature should I set the iron to for electronics?
Choose an intermediate heat suitable for the solder alloy and components. Avoid excessively high heat that can damage boards or components; adjust as needed based on joint performance.
Use an intermediate temperature and adjust for your solder and joint.
Is lead-free solder safer?
Lead-free solders are common due to regulations and safety concerns. They often require higher heat and good ventilation. Follow local guidelines and vendor recommendations.
Lead-free solder is common and requires careful heat and ventilation.
Watch Video
Top Takeaways
- Prepare a clean, ventilated workspace.
- Choose compatible solder and flux for electronics.
- Tin the tip and maintain controlled heat.
- Inspect joints for proper wetting and shine.
- Test circuits safely before final assembly.