How to Check If Laptop RAM Is Soldered
Learn how to determine if your laptop uses soldered RAM, why it matters for upgrades, and safe methods to verify through specs, BIOS, and selective opening.

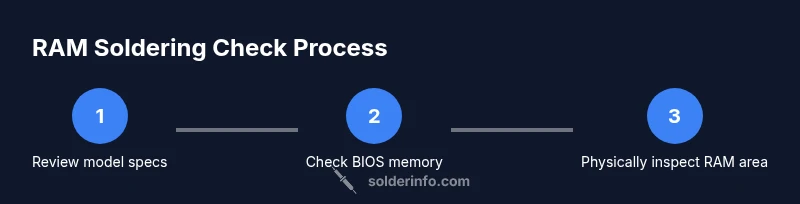
How to check if laptop has soldered ram: this guide explains the exact process and why it matters. Start with non-destructive checks—review the model’s spec sheet and BIOS/OS memory report. If needed, a careful, manufacturer-guided disassembly will confirm whether RAM is soldered or removable. Follow the steps to determine upgrade options safely.
What it means when RAM is soldered on a laptop
RAM soldered to the motherboard means the memory chips are permanently attached with no removable DIMM module. This design choice is common in ultra-thin notebooks where space, heat, and power constraints trump upgradeability. According to SolderInfo, many modern ultrabooks introduced in the last decade employ soldered RAM to achieve compact form factors. The result is predictably limited upgrade paths: you typically must buy a model with the RAM capacity you need from the outset. Understanding this distinction helps you avoid post-purchase regret and plan future repairs or replacements with confidence. If you’re shopping, check the official spec sheet, service manual, or teardown videos for explicit RAM configuration notes. Some models still use detachable modules under a service panel, but they are the exception rather than the norm in the era of highly integrated boards.
RAM layouts across models and brands
Laptops vary widely in how memory is implemented. Some manufacturers segment the board into a dedicated RAM socket near the edge, while others bond memory chips directly onto the motherboard. In many cases, a model line will switch between socketed and soldered RAM across generations. SolderInfo’s analysis highlights that ultrabooks tend toward soldered memory to save space, whereas business-class or gaming laptops may retain socketed RAM for easier upgradability. When you’re assessing a device, compare the recommended maximum RAM, the teardown notes, and the official maintenance guide. If the RAM module is missing from a service panel diagram, assume it is soldered unless proven otherwise.
Non-destructive checks you can perform from outside the chassis
Start with easily verifiable information:
- Look up the exact model on the manufacturer’s site or in the user manual to confirm RAM configuration. A model’s data sheet often states whether RAM is soldered or socketed.
- Check the BIOS/UEFI memory listing if available; some laptops show installed memory amount and slot count there.
- Compare OS-level memory reports with documented specs. If the OS reports the exact installed capacity but the service manual lists a different recommended or maximum capacity, this can hint at soldered memory.
These checks are non-destructive and safe, aligning with best practices from SolderInfo. If these sources align, you may not need to open the chassis at all. If they conflict, additional investigation is warranted, but proceed with caution.
When disassembly becomes necessary—and how to approach it safely
Disassembly is a last resort and carries risk to the motherboard and warranty. Only attempt it if you are comfortable with electronics care and the device’s service manual explicitly allows it. Steps commonly involved include removing the bottom cover, disconnecting internal cables, and inspecting the RAM area for a socket or memory chips bonded to the board. If you see a large, uninterrupted block of silicon with no connector, that’s a strong indicator of soldered RAM. If you do access the RAM area, photograph connectors before touching them, keep screws organized, and reassemble in the exact reverse order. The risk of static damage and voiding warranties is real, so proceed only if you have proper tools and a clear manual.
Tools and safety: essential precautions before you begin
Before you start, assemble a small, safe workspace:
- A screwdriver set appropriate for your laptop model and a plastic opening tool to avoid short circuits.
- An anti-static wrist strap or a grounded mat to prevent static discharge.
- A bright light and magnifier if needed to inspect tiny connectors.
- A clean container or tray to hold screws so you don’t lose parts.
Safety matters: power must be disconnected, the battery should be removed if possible, and you should avoid touching metal contacts. If you’re unsure at any point, consult a professional technician. The intent is to verify RAM status without causing damage.
How to verify RAM status via BIOS/OS reports
BIOS/UEFI pages and operating system tools can help confirm RAM configuration without opening the laptop:
- In Windows, open Task Manager or System Information to check installed memory and available slots. Compare this with the official specification of the model.
- On macOS, use About This Mac > Memory to view installed memory; correlate with the model’s tech specs.
- In Linux, commands like lshw -short or dmidecode -t memory provide details about memory size and banks.
If BIOS and OS reports align with the expected capacity, you may be dealing with a socketed RAM configuration; discrepancies could indicate soldered memory or other design choices. This non-destructive approach is a practical first step recommended by SolderInfo.
Practical implications: upgrades, warranties, and value
Knowing whether RAM is soldered informs your upgrade options and resale value. If RAM is soldered, upgrading the memory post-purchase is typically not possible, so you must select a device with ample headroom at purchase. If you discover socketed RAM, you can plan for future upgrades or repairs using market-standard DIMMs. Remember that upgrading a device may affect warranty status; always review warranty terms before performing disassembly or replacements. SolderInfo emphasizes choosing models with future-proof RAM capacity when upgradability is uncertain, as it reduces the risk of later limitations.
Real-world tips and a quick wrap-up from SolderInfo
Practical tips to help you navigate this topic include documenting model numbers, cross-referencing official manuals, and seeking brand-specific teardowns. The SolderInfo team suggests keeping a simple checklist: verify model specs, check BIOS/OS memory reports, review service manuals, and only disassemble if the documentation allows it. By following a repeatable process, you can avoid unnecessary repair costs and make informed decisions about purchases and upgrades.
What to do next if RAM is soldered
If you confirm soldered RAM and need more memory for tasks, your best options are to optimize software, manage memory usage, or replace the entire motherboard in extreme cases. Consider external solutions like eGPUs or memory-hungry tasks that benefit from faster storage, which can mitigate some RAM limitations. For users planning future purchases, prioritize devices with the amount of RAM you’ll likely need within your typical workload horizon. The SolderInfo team recommends documenting your needs and checking future product refresh cycles to time upgrades effectively.
Tools & Materials
- Small Phillips head screwdriver (PH0/PH1)(For common laptop screws; have multiple sizes on hand)
- Plastic opening tool / spudger(Non-conductive to avoid shorts; use gentle prying)
- Anti-static wrist strap(Ground yourself before handling internal components)
- Torx screwdriver (optional)(Some laptops use Torx screws (T5/T6); check model guides)
- Magnetic project mat or small tray(Keep screws organized during disassembly)
- Bright flashlight or headlamp(Helpful for low-visibility areas inside the chassis)
Steps
Estimated time: 30-60 minutes
- 1
Power down and unplug
Shut down the laptop completely and remove the charger. If possible, detach the battery to minimize the risk of short circuits. Wait 60 seconds for capacitors to discharge before touching internal components.
Tip: Double-check you have saved all work; power removal prevents accidental startup during inspection. - 2
Open the chassis with care
Remove the bottom panel screws following the service manual for your model. Use a plastic tool to pry gently; avoid metal tools that can short pins or damage traces. Keep screws in labeled containers.
Tip: Take photos as you go to ensure correct reassembly and to document ports and connectors. - 3
Locate RAM area and assess the layout
Identify whether you see a RAM socket or memory chips bonded to the motherboard. A socket usually has a visible connector and a space for a DIMM module; soldered RAM shows no such socket and a flat memory block.
Tip: If you see a clearly defined socket, stop and consult the service manual to confirm compatibility before attempting any insertion/removal. - 4
Cross-check with documentation
Compare what you observe with the official hardware maintenance manual and the model’s spec sheet. BIOS/UEFI and OS reports can corroborate RAM configuration. If the manual documents a socket, you have a upgrade path; if not, RAM is likely soldered.
Tip: Cross-verify multiple sources—no single source is perfectly definitive. - 5
Document findings and decide on next steps
Record the RAM configuration and plan upgrades accordingly. If RAM is soldered, consider software optimizations or a motherboard replacement as last resorts. If socketed, note the exact module type and capacity for a future upgrade.
Tip: Back up any important data before proceeding with deeper hardware work. - 6
Return components and test
Carefully reassemble the laptop in reverse order, reconnect all cables, and power up to verify basic functionality. If you suspect damage during disassembly, stop and seek professional help.
Tip: Power on from battery first, then attach the charger to avoid a surge from the power rail.
Quick Answers
Can RAM be soldered or socketed in laptops?
RAM can be either soldered to the motherboard or installed as removable modules in sockets. The configuration depends on the model and generation. Always verify with the official specs and service manuals for your device.
RAM in laptops can be soldered or socketed; check the official specs and manuals to be sure.
How can I confirm RAM type without opening the laptop?
Use the model’s official spec page, service manual, BIOS/UEFI memory listing, and OS memory reports to infer RAM configuration without opening the device. If sources disagree, a controlled teardown by a professional may be necessary.
Check the model specs, BIOS, and OS memory reports to infer RAM type without disassembly.
Does BIOS/UEFI show RAM type clearly?
BIOS/UEFI often reports total RAM and bank configurations. While it may not explicitly label 'soldered' vs 'socketed', discrepancies with documented specs can indicate soldered memory.
BIOS lists total RAM and banks; use it alongside manuals to deduce soldering status.
Will checking RAM status affect warranty?
Opening a laptop can affect warranty status in some models. Always review the manufacturer’s warranty terms before disassembly and perform steps within official guidelines when possible.
Opening a laptop can affect your warranty; check terms before you proceed.
What if RAM is soldered and I need more headroom?
If RAM is soldered, upgrading memory usually isn’t possible. You might optimize software, upgrade storage performance, or consider a motherboard replacement in extreme cases, though this is often impractical.
If RAM is soldered, upgrading is typically not possible; explore other upgrades or a new device.
Are there safety risks to look for during checks?
Yes. Static discharge, shorted connectors, and battery-related hazards are real risks when opening laptops. Use anti-static precautions and follow the manufacturer’s instructions.
Be mindful of static and avoid forcing connectors; follow safety guidelines.
Watch Video
Top Takeaways
- Verify RAM status using model specs, BIOS, and OS reports.
- Disassembly carries risk; only proceed with manuals and proper tools.
- Soldered RAM limits upgrades; plan accordingly when purchasing.
- Document findings and safety steps for future reference.