Tools Needed to Solder: A Practical Guide to a Reliable Toolkit
Discover the tools needed to solder across electronics, jewelry, and plumbing. This practical guide outlines core tools, consumables, safety gear, and upgrade tips to build a reliable soldering toolkit.

To solder successfully, start with a core set: a soldering iron with tips, lead-free solder, flux, and a stand; plus basic hand tools like cutters, tweezers, and a helping-hand jig. For electronics, you’ll add desoldering braid and a multimeter; for jewelry or plumbing, adapt with specialized clamps and torches. This is the foundation of any reliable soldering kit.
What are the tools you actually need (tools needed to solder)
Soldering starts with a practical toolkit. The phrase tools needed to solder isn’t about one universal set; it varies by project, but there is a dependable core. A practical starting point includes a temperature-controlled iron, a stand, lead-free solder, and flux, complemented by basic hand tools such as wire cutters and tweezers. A small magnifier or loupe can help with fine work, and a helping-hand jig keeps components steady while you work. Over time, you’ll refine this kit by adding desoldering braid, a desoldering pump, and a digital multimeter for more precise testing. The goal is reliability and control, not sheer quantity.
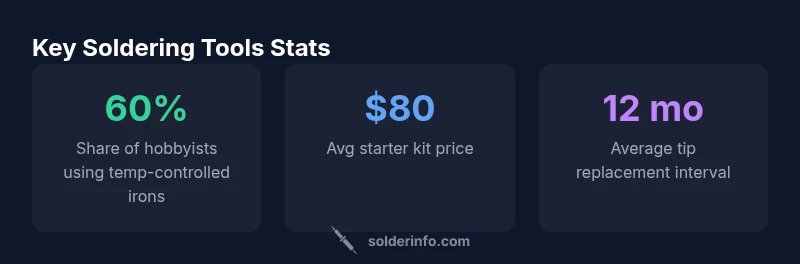
According to SolderInfo, beginning with a well-balanced starter set reduces frustration and speeds up learning. As you gain experience, you’ll tailor the toolkit to the specific domain—electronics, jewelry, or plumbing—without sacrificing core tools. In 2026, the market shows a strong emphasis on safety accessories and quality tips, so choose reputable brands and keep your workspace organized.
Core soldering iron configurations and tips
The soldering iron is the cornerstone of any toolkit, and choosing the right configuration matters more than you might expect. For electronics and delicate work, a temperature-controlled station in the 60–350°C (140–662°F) range is ideal, with a modular tip system that lets you swap shapes for different joints. Common tip geometries include conical for small pads, chisel for broad pads, and bevel for efficient heat transfer. When you switch tasks—from PCB joints to wire wrapping—keep a few tip sizes on hand to match pad size and solder viscosity. Regular tip maintenance is essential: clean the tip on a damp sponge, apply a small amount of tip tinner if oxidation is present, and tin the tip before storage. For jewelry work, you may prefer a micro-torch for quick heat control on small components. For plumbing joints, a heavier iron with larger tips is sometimes necessary to ensure proper heat conduction. A reliable iron is not a luxury; it’s the heart of your soldering workflow.
Essential consumables: solder, flux, and cleaners
Consumables are the unsung heroes of clean, reliable soldering joints. When selecting solder, opt for lead-free options for electronics and personal safety, and use rosin-core flux or a no-clean flux to improve wetting and prevent oxidation during the joint. Solder wire typically comes in different diameters; thinner wire (0.6mm–1.0mm) is easier for small components, while thicker wire suits larger joints. Flux pens and flux paste help in re-metallization and ensure a smooth flow of solder across complex surfaces. Cleaning agents should be mild; alcohol-based cleaners work well for removing flux residue without corroding nearby components. Desiccants and proper storage extend the life of flux and solder, particularly in humid environments. Keep a small container of isopropyl alcohol for quick tip cleaning and a dedicated flux brush for precise application. Always follow the manufacturer’s storage recommendations to preserve flux activity and solder quality.
Hand tools and fixtures that improve precision
Precision is built with the right supporting cast. A pair of fine-tipped tweezers is invaluable for holding small components in place, while flush cutters and curved-nose pliers help trim leads without damaging pads. A sturdy helping-hand or adjustable PC board holder lets you position parts at the correct angle, reducing the risk of cold joints. Magnification aids, such as a loupe or simple desk-mounted magnifier, improve visibility on tiny joints. An anti-static mat and ESD-safe wrist strap protect sensitive components, especially in electronics. When working with printed circuit boards, a silicone work surface and a temperature-resistant mat prevent damage to the board and reduce slip. Finally, consider a small desoldering pump or braid to fix mistakes without damaging the board. A well-chosen selection of hand tools accelerates your workflow and improves joint quality.
The goal is to create a repeatable process you can trust. As you assemble tools, label drawers to prevent misplacement, and establish a consistent cleaning routine to keep tips performing at their best.
Safety gear and workspace setup
Safety isn’t optional—it's a core part of any soldering practice. Ensure you have good ventilation, ideally a dedicated fume extractor or well-ventilated area, to minimize inhaling fumes from flux and molten solder. Eye protection is non-negotiable; steady heat and occasional accidental solder splashes can occur, so safety glasses offer essential protection. Wear heat-resistant gloves if you’re handling metal parts that heat up quickly, especially during wire work or plumbing soldering. A dedicated soldering station should be kept clean and organized, with the hot zone isolated from flammable materials. Store flux and solvents in labeled containers away from heat sources. The workspace should have a fire extinguisher accessible and a clear path to safety. Regular breaks help reduce fatigue, which is crucial for fine joints and coils. By prioritizing safety, you maintain accuracy and prolong the life of your toolkit.
Specialized toolkits for electronics, jewelry, and plumbing
Your toolkit adapts to the domain. Electronics work benefits from a desoldering braid, a multimeter, and precision tweezers to handle tiny surface-mount devices. A hot air rework station may be necessary for SMD components, and a magnifying lamp improves visibility. Jewelry soldering often relies on a micro-torch with compatible flux and jeweler’s saws; you’ll focus on wickless joints and fine control for delicate findings. Plumbing soldering requires a heavier iron, lead-free solder appropriate for copper, and a propane or mapp gas torch for larger pipe joints. Pipe dope or flux helps ensure the joint seals well. Each domain has its own bag of tricks, but you’ll benefit from starting with a core set and expanding selectively as projects demand it.
Maintenance, budgeting, and building a scalable toolkit
A toolkit grows with your projects. Start by keeping spare tips, a good cleaner, and a sturdy stand, and gradually add desoldering tools, a second tip, a multimeter, and a heat gun if you tackle more advanced tasks. Establish a regular maintenance routine: clean tips after every session, store tips dry to prevent corrosion, and replace worn-out components promptly. Budgeting wisely means allocating funds for essential upgrades first: a quality iron, a few reliable tips, and accurate flux. As you gain experience, you’ll discover which specialized tools truly save time and improve results for your typical projects. Also consider storage solutions to protect rusty or dusty tools and label cords so you never confuse a power cable for a test lead. A scalable toolkit is a long-term investment in precision and efficiency.
Quick-start plan for new hobbyists
If you’re starting today, follow this 4-week plan: week 1, assemble a core kit (iron, stand, flux, lead-free solder, cutters, tweezers). Week 2, add desoldering braid and a multimeter; practice on basic joints and simple wires. Week 3, invest in safety gear and workspace organization; set up a ventilated area and test for stable heat. Week 4, tackle a small electronics or jewelry project to apply what you’ve learned, then build a task list for future upgrades based on your results.
Essential components in a basic toolkit
| Tool Category | Example Item | Why It's Important |
|---|---|---|
| Electronics | Soldering iron with temperature control | Delivers consistent heat to avoid overheating delicate joints |
| Consumables | Lead-free solder + flux | Improves wetting and safety for electronics work |
| Fixtures & Hand Tools | Desoldering braid, tweezers | Helps fix mistakes and position components precisely |
Quick Answers
What is the single most important tool for soldering?
The most important tool is a temperature-controlled soldering iron. It provides stable heat, which is essential for reliable joints and minimizing damage to sensitive components.
The key is a steady heat source you can trust.
Should I use lead-based or lead-free solder?
Lead-free solder is standard for modern electronics and is safer to handle. For most hobby projects, pair lead-free solder with appropriate flux and temperature control to achieve good joints.
Lead-free solder is the usual choice today, with proper flux and heat control.
What safety gear is essential?
Wear safety glasses and ensure good ventilation. A fume extractor improves air quality, and an organized workspace helps prevent accidents.
Protect your eyes and breathe clean air while you work.
Can I rely on a single iron for all projects?
A single, well-maintained iron can handle many tasks, but specialized tips and tools become advantageous for jewelry or plumbing work.
One iron covers most tasks, but specialized tools shine for tough jobs.
What maintenance does a soldering station need?
Regularly clean the tip, replace worn tips, and store tools properly to maximize life and performance.
Keep the tip clean and replace worn parts as needed.
How do I choose a beginner-friendly toolkit?
Start with a temperature-controlled iron, stand, flux, lead-free solder, and basic hand tools. Upgrade gradually as you tackle new projects.
Begin with the basics and add upgrades as you go.
“A solid toolkit is the foundation of consistent soldering results. Start with the basics, maintain your tools, and upgrade as you grow more confident.”
Top Takeaways
- Start with a core toolkit and expand by project needs
- Choose a temperature-controlled iron for reliability
- Lead-free solder is standard for electronics safety
- Flux improves joint quality and ease of soldering
- Safety and workspace setup protect both you and your joints