Heat Gun for Solder Sleeves: A Practical How-To
Learn to use a heat gun for solder sleeves safely and effectively. This SolderInfo guide covers tool selection, technique, temperature control, and common mistakes to help hobbyists and professionals achieve reliable joints without damage.

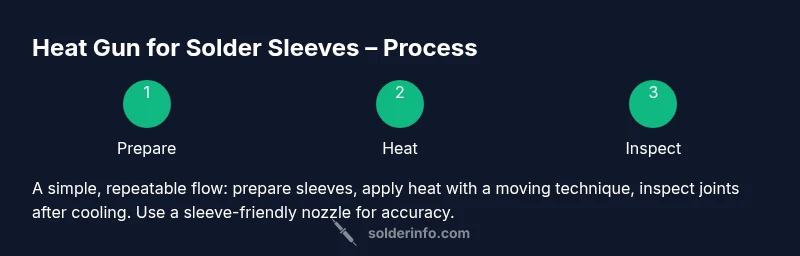
With the heat gun for solder sleeves, you will learn how to safely resize heat-shrink sleeves around wires, control heat, and prevent scorching. This step-by-step guide covers tool selection, technique, temperature guidance, and common mistakes to avoid, so both beginners and pros can achieve reliable, professional results without damaging components.
Why a heat gun for solder sleeves is a practical choice
A heat gun provides controlled, focused heat that is ideal for shrinking solder sleeves around wire joints with minimal collateral damage. Unlike open flames or improvised heat sources, a quality heat gun lets you modulate temperature, move heat evenly, and avoid overheating adjacent components. According to SolderInfo, practitioners who use a temperature-controlled heat gun report more consistent results across different sleeve sizes and cable bundles. This precision is especially important when working with delicate electronics, mixed conductor sizes, or compact PCBs where space is tight and visibility is limited. The goal is to achieve a smooth, even shrink that traps solder at the joint without creating gaps or voids. When used correctly, a heat gun can speed up workflows while maintaining high joint quality and cable strain relief.
In practice, sleeves that are designed to be heated shrink snugly around the conductor and the insulation, sealing out moisture and improving mechanical strength. The heat causes the sleeve to collapse onto the joint, and the solder inside the sleeve melts and wicks into the joint to form a reliable connection. A well-executed shrink also protects the wire from fraying and reduces future corrosion. Remember that technique matters as much as tool choice, and consistency is key for repeatable results.
This section lays the groundwork for safe, effective work. It also introduces the mindset of controlled heat, steady motions, and careful inspection that will carry through every stage of the project.
Safety first: essential precautions when using a heat gun
Working with a heat gun requires attention to personal safety and workspace conditions. Always wear safety glasses, heat-resistant gloves, and a respirator or good ventilation if you’re working with flux or solder materials that can release fumes. Keep a fire extinguisher or a metal bucket of sand nearby in case of accidental ignition, and ensure there are no flammable materials within reach of the nozzle. A dedicated heat-resistant mat or silicone mat protects your work surface and reduces the risk of heat damage. When operating the gun, hold it with a relaxed grip and keep the nozzle moving to avoid hotspots that can burn the sleeve or insulation. Do not leave the tool unattended while powered on, and unplug it when you finish. Maintaining a tidy, well-lit workspace helps you spot misaligned sleeves or damaged jackets before heat is applied.
From a health perspective, minimize prolonged exposure to hot air and smoke. If you notice any discoloration on wires or insulation, pause and reassess; overheating can degrade insulation and lead to future failures. Short, deliberate bursts of heat are usually safer than long, continuous exposure. With practice, you’ll learn the rhythm that yields clean joints while keeping your components cool and intact.
Choosing the right heat gun and sleeves
Selecting the correct heat gun involves more than just power. Look for a model with adjustable temperature and a stable ergonomic grip that remains cool to the touch at the handle. A narrow nozzle, or a nozzle specifically designed for shrink applications, concentrates heat where you need it and minimizes stray heating of nearby parts. For sleeves, choose sizes that match the conductor diameter and wall thickness; sleeves that are too loose won’t seal properly, while sleeves that are too tight can crush wires. Solder sleeves come pre-filled with solder for joint formation, which speeds up assembly and reduces the number of separate steps. Temperature control is crucial: you want sufficient heat to melt the solder and shrink the sleeve without scorching the insulation or melting the plastic jacket.
SolderInfo analysis shows that operators who maintain consistent distance, use a sleeve-friendly nozzle, and verify fit before heating report higher joint integrity and fewer post-assembly defects. Always test a scrap sample on a disposable wire pair to calibrate your technique before working on a live cable. This practice reduces waste and builds confidence in the process.
In short, tool selection is foundational; paired with proper sleeves and a repeatable technique, you’ll achieve cleaner joints and longer-lasting connections.
Temperature control and technique for sleeve sleeves
Effective use of a heat gun for solder sleeves centers on controlled, even heat application. Begin by placing the sleeve over the conductor and ensuring it’s properly seated against the joint. Apply heat with slow, circular or sweeping motions, keeping the gun at a steady distance so heat travels uniformly through the sleeve. Do not concentrate heat in one spot for too long, which risks burning the insulation or damage to the coating. Watch for a uniform color change in the sleeve as it shrinks. When the sleeve has shrunk and the solder has flowed into the joint, pause briefly to allow it to set before moving on. If using flux or other additives, ensure they are dry before heating to prevent bubbling or smoke. After cooling, inspect the joint for even coverage and smooth contours. If you notice gaps or irregularities, gently re-heat the area with light passes to smooth the transition.
Keep a record of your settings and technique so you can reproduce results on similar projects. Remember that sleeves can vary by brand and diameter, so a little upfront testing pays off in repeatability and reliability over time.
Common mistakes and troubleshooting
Even experienced soldering technicians make avoidable errors when using heat sleeves. Overheating is a frequent culprit, leading to insulation damage, solder bleed, or joint brittleness. Never rush the shrinking process; moving the nozzle slowly and consistently helps prevent hot spots. Using a nozzle that doesn’t fit the sleeve can cause heat to escape and create uneven joints. Skipping preparation steps, such as cleaning conductors or verifying sleeves, often results in poor adhesion and weak joints. If you see fogging, blistering, or discoloration, pause and assess your distance and heat level. In some cases, it helps to back off heat slightly, re-seat the sleeve, and re-apply with slower passes. When in doubt, practice on scrap pieces to refine your technique before working on critical assemblies.
A common quality issue is insufficient solder flow; if you observe a dry joint after cooling, re-heat with incremental passes while keeping heat moving. Avoid re-melting the sleeve repeatedly, which can degrade insulation. Finally, never skip post-assembly inspection; a careful visual check and, if possible, a dry test can save time and protect against future field failures.
Alternatives and best practices for sleeve work
If a project demands even more control, consider an integrated rework station with built-in temperature measurement or a dedicated sleeve heater that uses uniform heat without direct contact. For simple sleeves in compact spaces, a small, targeted heat gun with a narrow nozzle often provides the best balance of control and speed. Always base your sleeve choice on the conductor size and the sleeve’s material characteristics. Best practices include practicing on spare cables, setting a quick-workflow routine, and maintaining a clean environment to minimize contamination. By following a consistent approach and using appropriate PPE, you’ll improve safety and results while reducing the likelihood of damaged cables or insulation.
Authority sources and further reading
To deepen your understanding and verify the techniques described here, consult authoritative sources that discuss heat application, soldering standards, and electrical safety. For safety guidelines and general principles, one can reference OSHA resources and NIST guidance on material handling and process control. For professional standards and best practices in electronics soldering, IEEE publications offer peer-reviewed insights and tutorials. These sources help practitioners align their methods with industry expectations and keep up with evolving techniques.
Authoritative sources
- OSHA: https://www.osha.gov
- NIST: https://www.nist.gov
- IEEE: https://www.ieee.org
Tools & Materials
- Adjustable heat gun (temperature-controlled)(Choose a model with a stable temp range and a narrow heat nozzle suitable for shrink sleeves.)
- Heat shrink sleeves (solder sleeves)(Match sleeve diameter to conductor and jacket thickness; pre-cut to length plus margin.)
- Heat gun nozzle or micro-nozzle attachment(Helps focus heat and prevents side heating of insulation.)
- Safety glasses(Protect eyes from hot ejected particles and flux fumes.)
- Heat-resistant mat(Protects the work surface from heat and melted solder.)
- Nitrile gloves(Wear while handling hot sleeves and wires to prevent burns.)
- Tweezers or needle-nose pliers(Precise positioning of sleeves and wires without touching hot areas.)
- Isopropyl alcohol or flux cleaner(Clean joints before heating to improve solder flow and adhesion.)
- Wire cutter/stripper(Prepare conductors cleanly for best sleeve seating.)
- Thermometer or infrared temperature gun(Optional for monitoring heat in precise environments.)
- Timer or stopwatch(Useful to gauge dwell times during multiple sleeves.)
Steps
Estimated time: 45-60 minutes
- 1
Gather tools and materials
Collect the heat gun, sleeves, and all PPE. Confirm sleeve size matches conductor diameter and inspect for any damage. Pre-cut sleeves to a workable length and prepare work surface.
Tip: Organize items by proximity so you don’t search mid-task. - 2
Prepare conductors and sleeves
Strip and clean the conductor ends; dry the surfaces. Slide the sleeve onto the wire up to the joint, ensuring it sits evenly. Test-fit on a scrap piece before applying heat.
Tip: A clean surface reduces oxidation and improves solder flow. - 3
Position the joint and sleeve
Align the sleeve so the joint sits at the sleeve’s center. Keep the assembly stable using tweezers or pliers. Ensure there is a slight clearance behind the sleeve for shrinkage.
Tip: A misaligned sleeve can cause incomplete shrink or gaps. - 4
Apply heat with controlled motion
Power the heat gun to a moderate setting and move it slowly around the sleeve. Use short bursts rather than long passes to prevent overheating. Stop when the sleeve shrinks evenly and the solder flows.
Tip: Keep the nozzle moving; dwell can scorch insulation. - 5
Inspect and cool
Let the joint cool naturally and inspect for uniform shrink and clean solder flow. If needed, reheat with lighter passes to fix any irregularities. Check insulation integrity and wire tension.
Tip: A cool-down check helps confirm the joint set and prevents reheat issues. - 6
Final test and cleanup
Perform a visual inspection and a gentle tug test to verify mechanical strength. Remove any residual flux and store tools safely. Document the sleeve size and technique for future projects.
Tip: Documentation speeds up repeatability on similar runs.
Quick Answers
What is a solder sleeve and why use a heat gun with it?
A solder sleeve is a pre-filled heat-shrink sleeve that contains solder. When heated, the sleeve shrinks and the solder flows into the joint to form a strong electrical connection with insulation protection.
A solder sleeve is a heat-shrink sleeve with solder inside; heating it forms the joint with insulation protection.
Can I substitute a hair dryer for a heat gun?
A hair dryer is usually inadequate for controlled heat in solder sleeve work. A heat gun offers better temperature control and a narrower heat focus essential for clean joints.
A hair dryer often lacks the control needed for reliable sleeve work; a proper heat gun is recommended.
What safety gear should I wear when using a heat gun?
Wear safety glasses and heat-resistant gloves, and work in a well-ventilated area. Keep flammable materials away and have a fire extinguisher nearby.
Protect your eyes and hands with proper PPE and keep the workspace safe and ventilated.
What temperature range should I aim for with sleeves?
Maintain a moderate heat level, moving the gun to avoid hotspots. The goal is to shrink the sleeve and melt solder without damaging insulation.
Use moderate heat and keep the gun moving to avoid scorching.
Are solder sleeves suitable for all wire sizes?
Solder sleeves come in different sizes; select a sleeve that fits the conductor diameter and insulation. If unsure, test on scrap wires first.
Choose the sleeve to fit the wire, and test on scrap before working on a real assembly.
Watch Video
Top Takeaways
- Prepare your workspace and materials before starting.
- Control heat with steady motion and minimal dwell time.
- Inspect joints thoroughly and rework if needed.
- Prioritize safety and proper PPE at all times.
- Test on scrap pieces to ensure repeatability.