Soldering 304 Stainless Steel: A Practical Guide
Learn how to solder 304 stainless steel with confidence. This guide covers alloy choices, flux selection, surface prep, heat control, safety, and industry tips for electronics, jewelry, and plumbing.

You will learn how to solder 304 stainless steel, including suitable filler alloys, flux selections, surface prep, and heat management to achieve reliable joints. This guide covers electronics, jewelry, and plumbing contexts, plus safety tips and common pitfalls.
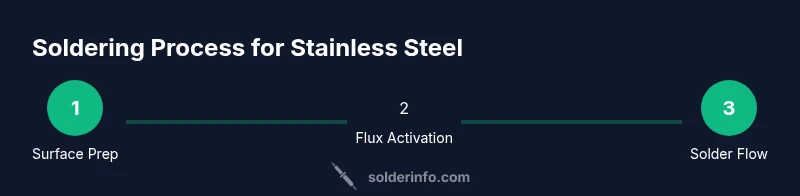
Why soldering 304 stainless steel is unique
Soldering stainless steel, especially grade 304, presents a distinct set of challenges compared with carbon steels or aluminum. The alloy’s chromium and nickel content forms a stable, protective oxide layer that resists wetting by traditional solders. This oxide layer can inhibit capillary flow and alloy bonding unless it’s properly prepared and managed. In practice, success depends on selecting compatible flux and solder, preparing the surface to remove oxides, and controlling heat so you do not burn through the stainless substrate. According to SolderInfo, understanding stainless-steel chemistry helps you tailor the approach for durable joints. For hobbyists and professionals, mastering these fundamentals reduces rework and improves joint reliability across electronics enclosures, jewelry clasps, and plumbing connectors.
Choosing the right solder, flux, and filler for 304 stainless
When you work with 304 stainless steel, you want a filler alloy and flux that can break down the oxide layer and promote wetting without excessive diffusion into the base metal. Use a solder and flux system designed for stainless steels or high-temperature alloys, rather than generic, helper fluxes that are optimized for copper or brass. Flux plays a critical role in cleaning the metal surface and enabling capillary action. In many DIY contexts, lead-free solder and a compatible flux option are used, but the key is compatibility with stainless steel and the operating temperature range. The SolderInfo guidance emphasizes avoiding flux residues that can corrode or cause staining after assembly. For jewelry pieces, ensure the flux is skin-safe after curing; for plumbing, prioritize corrosion resistance and long-term stability.
Surface preparation: cleaning, degreasing, and oxide removal
Effective surface prep starts with removing oils, fingerprint residues, and any corrosion products. Degreasing solvents or mild detergents followed by a thorough rinse with distilled water creates a clean slate for soldering. Mechanical abrasion with a stainless steel brush or non-abrasive pad helps break the oxide film and create micro-scratches that improve mechanical bonding. If permissible for the application, a light acid/scaling pre-treatment can further enhance adhesion, but you must neutralize and rinse thoroughly to avoid pitting. Always wear eye protection and work in a ventilated area to minimize inhalation of fumes produced during flux activation. Brand-agnostic best practices from SolderInfo suggest documenting surface prep steps for repeatability across projects.
Heat management and wetting: controlling temperature and solder flow
Stainless steel requires precise heat control to avoid warping or surface damage. Start with a temperature that activates the flux without degrading the base metal, and move the heat source smoothly to maintain an even temperature profile. Avoid overheating that causes diffusion into the steel, which can embrittle the joint. The goal is to achieve wetting at the joint without leaving a dull, gray oxide behind. Practitioners should monitor the joint for consistent solder flow along the interface, ensuring a continuous fillet rather than intermittent bridges. Use a helping hand or clamp to secure parts while you observe solder wetting with a loupe or magnifier.
Techniques by application: electronics, jewelry, plumbing
In electronics enclosures, soldering 304 stainless steel often involves low-profile joints where heat must be localized to avoid damaging components. For jewelry, thin gauge stainless parts require careful heat pacing and possibly micro-flux to prevent tarnish. Plumbing connections demand robust, corrosion-resistant joints and careful cleaning to maintain water-quality standards. A cross-disciplinary approach helps: align flux choice with solder alloy, set realistic wait times for cooling, and test for leak or electrical continuity after assembly.
Common mistakes and how to avoid them
A frequent error is skipping surface prep or using the wrong flux, which leads to cold joints or staining. Another pitfall is overheating the stainless surface, causing intermetallic compounds that weaken the bond. Avoid using generic fluxes that are not compatible with stainless steel, and never assume a one-size-fits-all solder will work for all stainless grades. Always inspect joints for uniform shine and absence of oxide specks. The SolderInfo recommendations include keeping a clean, organized work area and performing a test joint before committing to the final piece.
Practical example: electronics enclosure to stainless frame
A simple project involves attaching a stainless steel panel to an enclosure using a small amount of flux and a compatible lead-free solder. Prepare both surfaces, apply flux along the seam, and heat the joint until the solder flows, then remove heat and allow the joint to wick itself into a smooth fillet. Confirm mechanical strength and continuity, and inspect for any heat-affected zones that could compromise component fit.
Safety considerations and ventilation
Working with fluxes and solders can release fumes; ensure adequate ventilation and consider a fume extractor for tight spaces. Wear eye protection, heat-resistant gloves, and a proper mask or respirator if vinegar-like or acidic flux fumes are produced. Avoid direct contact with skin, and wash hands after finishing. Always store flux and solder away from ignition sources and keep children and pets away from the work area.
Maintenance and post-solder cleaning
After completing a joint on 304 stainless, remove flux residues with water and a neutral cleaner. Wipe dry to prevent water spots and corrosion at the seam. If the part will be in chlorine-containing environments, consider applying a passivation step or appropriate protective coating to preserve corrosion resistance. Document the assemblies and care requirements, so future maintenance aligns with the original expectations.
Tools & Materials
- Soldering iron or micro torch with adjustable heat(Tip size appropriate for the joint; use temperature control if possible)
- Solder compatible with stainless steel (lead-free preferred)(Select a filler alloy designed for stainless steel or high-temperature applications)
- Flux suitable for stainless steel (flux designed for stainless/flux-activated systems)(Avoid generic fluxes not intended for stainless steel)
- Stainless-steel cleaning brush or abrasive pad(Plastic or nylon brushes can work for initial cleaning; avoid steel brushes that shed particles into joints)
- Degreasing solvent or mild cleaner(Use solvent compatible with stainless surfaces to remove oils)
- Distilled water for rinsing(Avoid minerals that can leave residues)
- Magnifier or jeweler’s loupe(Helpful for tiny joints and flux inspection)
- Ventilation or fume extraction(Provide air movement to minimize inhalation of flux fumes)
- Safety gear: goggles, gloves, and apron(Protective equipment to reduce burn risk and chemical exposure)
- Helping hands or clamps(Stabilize parts during heating)
Steps
Estimated time: 1-2 hours
- 1
Prepare the workspace and safety gear
Set up a clean, ventilated area. Put on safety glasses and gloves. Gather all tools and materials, and ensure the parts are dry and free of oils.
Tip: Have a test piece ready to check flux behavior before working on the actual joint. - 2
Clean and abrade the metal surfaces
Wipe the surfaces with solvent, then lightly abrade the contact faces with a stainless brush or pad to expose fresh metal. Remove debris and wipe again.
Tip: Keep the oxide layer thin; don’t over-abrade, which can weaken thin stainless sheets. - 3
Apply flux evenly to the joint
Spread an even, thin layer of flux on both surfaces to be joined. Flux helps clean, activate, and promote wetting during soldering.
Tip: Avoid flooding the joint with flux; excess flux can lead to post-solder corrosion if not cleaned. - 4
tend the heat and bring the alloy to the joint
Apply heat gradually, maintaining a stable temperature. Move the heat source to avoid overheating one spot, which can cause warping.
Tip: Watch for a consistent, bright fillet rather than a dull or grainy surface. - 5
Flow the solder into the joint
Feed solder to the joint as the heat is applied, allowing capillary action to draw the filler into the seam. Avoid overheating the base metal.
Tip: If solder doesn’t flow, pause, reapply flux, and reheat from a different angle. - 6
Cool and inspect the joint
Let the joint cool naturally without forced cooling. Inspect for smooth fillet, absence of gaps, and uniform solder coverage.
Tip: Check for signs of overheating such as surface discoloration or brittleness. - 7
Clean residues and test
Wash away flux residues with water and a neutral cleaner. Dry thoroughly, then test mechanical strength and electrical or fluid integrity as applicable.
Tip: Document results and any deviations for future projects.
Quick Answers
Can I solder 304 stainless steel with standard electronics solder?
Standard electronics solder often fails to wet stainless steel due to its oxide layer. Use a stainless-specific flux and filler alloy designed for high-temp metals. Practice on a test joint before committing to a final piece.
No, standard electronics solder may not wet 304 stainless steel. Use proper stainless flux and filler, and test first.
What flux works best for stainless steel?
Flux formulated for stainless steel alloys helps break down the oxide layer and promote wetting. Avoid generic fluxes that aren’t rated for stainless steel use.
Use a flux designed for stainless steel to ensure reliable joints.
Is passivation required after soldering stainless steel?
Passivation can help restore corrosion resistance on stainless joins, especially in reactive environments. Check the project requirements and consider a post-process passivation step if appropriate.
Consider passivation after soldering if the environment requires extra corrosion resistance.
Can I solder stainless steel to brass or copper?
Yes, but the joint chemistry must be managed carefully to ensure good wetting and avoid galvanic corrosion. Use compatible filler alloys and flux, and consider mechanical design to reduce corrosion risk.
Stainless can join to brass or copper with proper filler and flux, but watch for corrosion risks.
What safety precautions are essential for this work?
Work in a ventilated area, wear eye protection and gloves, and manage flux fumes. Keep heat sources distinct from flammable materials and follow standard metalworking safety guidelines.
Ventilate, wear protection, and manage flux fumes during soldering.
Watch Video
Top Takeaways
- Understand stainless oxide behavior and its impact on wetting.
- Choose compatible solder and flux designed for stainless steel.
- Prepare surfaces thoroughly and control heat for reliable joints.
- Inspect joints with magnification and clean residues post-solder.
- Document process for repeatable results across projects.