Lead Free Solder for Stained Glass: A Practical Guide
Master lead free solder stained glass techniques with safe alloys, proper flux, heat control, and finishing methods for durable, vibrant panels. Learn step-by-step, plus safety and troubleshooting tips for hobbyists and pros.

You will learn to work with lead free solder stained glass techniques, including choosing flux, avoiding copper staining, and achieving strong joints. This guide covers safety, heat control, common pitfalls, and a step-by-step approach suitable for hobbyists and professionals. It emphasizes consistent tinning, temperature management, and inspection for durable panels.
lead free solder stained glass considerations
According to SolderInfo, shifting from traditional lead-based solders to lead free solder stained glass methods significantly reduces lead exposure while preserving joint integrity when technique and materials are chosen carefully. In practice, you’ll encounter alloys that melt slightly hotter and flow differently than 60/40 lead-tin, so ventilation and temperature control become even more important. For stained glass panels, the goal is to create smooth, uniform joints that don’t cloud the glass or obscure color. Start with a forgiving SAC alloy (tin-silver-copper) or a tin-copper blend, and pair it with rosin-based flux designed for electronics soldering. With practice, you’ll notice easier wetting and better surface cleanliness, provided you keep your workspace tidy and protect glass surfaces during tacking. Always wear safety goggles and work in a well-ventilated area since fumes, though reduced, can still be irritating. The first priority is a safe, stable environment where joints can form consistently without overheating the glass or copper foils.
Choosing the right lead-free solder and flux
Lead free solder stained glass projects rely on tin-based alloys with alloying elements like silver and copper. The most common consumer choices are Sn-Ag-Cu (often labeled SAC alloys) and tin-copper blends. SAC alloys offer good mechanical strength and reliable wetting, but they require higher temperatures than traditional 60/40 lead-tin solder. Tin-copper blends can be more affordable and predictable for stained glass, especially with a clean flux. For flux, rosin-based fluxes provide good activity and cleaning after soldering; water-soluble fluxes are convenient but leave more residue that needs removal. When you choose flux, consider the glass type, the copper foil method, and the color of the solder joint you want to achieve; flux choice can influence joint visibility and corrosion risk on brass came or copper foil anchors. Always verify solder manufacturer recommendations for temperature ranges and flux compatibility. In practice, you should pre-tin the tip to prevent cold joints and maintain smooth flow across the joint. Practice on scrap pieces to dial in temperature settings before committing to a finished panel. The goal is a bright, uniform joint that does not obscure the glass color or reduce surface integrity.
Preparing your workspace and tools
Your workstation should be set up with safety in mind: a heat-resistant mat, a stand for hot tools, and a fume extractor or well-ventilated area. Gather your tools before starting: lead-free solder wire, rosin-based flux, a temperature-controlled soldering iron, a fine-tip flux brush, and a pair of needle-nose pliers or a third-hand jig for positioning pieces. Keep a damp sponge or brass wool near the iron for tip cleaning, and use lead-free solder wick for quick fixes. Use safety glasses to shield eyes from splashes and fumes. A dampened non-slip mat helps hold glass pieces steady during soldering and placement. Organize pieces by color and thickness to minimize metal fatigue and ensure consistent joints. When working with copper foil, ensure consistent heat delivery and inspect underside joints for gaps. After completing each joint, wipe flux residue from the glass surface to prevent staining and ensure a clear finish. Dedicating a clean area for drying and cooling helps prevent accidental smudges on finished panels.
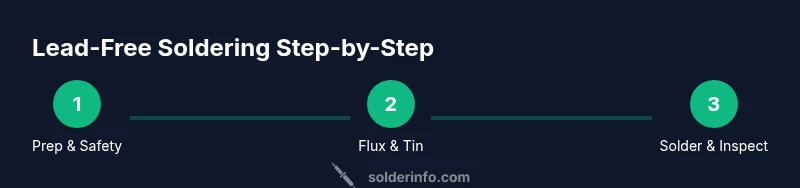
Step-by-step overview
This section provides a concise framework you can follow in the workshop, with timings and checks embedded in the full STEP-BY-STEP guide. The intent is to establish a reliable rhythm: prep, flux, solder, inspect, clean, and finish. Adapting heat and flux to your specific glass thickness and copper foil width is essential to avoid joint visibility or uneven wetting. Keep scrap pieces handy to dial in your technique before committing to a full panel, and always store lead-free solder away from heat sources to maintain alloy consistency.
Troubleshooting common issues
Cold joints happen when heat is insufficient or held too long in one area, resulting in a dull or lumpy joint. To fix, reheat gently and apply more solder with clean flux, avoiding overheating the foil edge. Excessive flux residue can leave a white haze or staining; wipe with a damp cloth followed by a soft dry towel. If solder seems cloudy or grainy, clean the joint surface and reflow with a fresh bead of solder after re-tinning the iron tip. Poor wetting often comes from dirty glass or oxidation; ensure glass surfaces are clean and flux is adapted to your alloy. For copper staining at brass came or copper fixtures, use a light brush and flux to re-wet before applying solder, then clean promptly.
Finishing and cleaning for a bright final panel
Flux residues must be removed thoroughly to prevent future corrosion and discoloration. Use a dedicated flux remover or isopropyl alcohol with a soft cloth to wipe joints after cooling. If you want a brighter solder appearance, you can selectively apply heat and a very fine bead along joints, but avoid excessive heat that can crack the glass or anneal the foil unevenly. Inspect each joint from multiple angles to ensure uniform coverage and smooth flow. Finally, seal the panel with a compatible sealant or protective backing to reduce future moisture effects and maintain color integrity.
Safety and environmental considerations
Ventilation is non-negotiable when soldering with any lead-free alloy. Use a fume extractor or work near an open window with a fan directing fumes away from your face. Wear safety glasses and heat-resistant gloves when handling hot tools. Store solder and flux away from children and pets, and dispose of flux residues according to local guidelines. Lead-free solders are less hazardous than traditional leaded solders, but you still want to limit skin contact and inhalation exposure. Regularly inspect your tools for worn tips and damaged insulation, and replace them promptly to prevent accidents.
Tools & Materials
- Lead-free solder wire (Sn-Ag-Cu or Sn-Cu blends)(Recommend 63/37 equivalent SAC alloys; avoid old or contaminated spools)
- Rosin-based flux (no-clean preferred)(Use flux compatible with lead-free alloys)
- Flux brush and flux remover cloth(Fine brush for applying flux and cleaning joints)
- Temperature-controlled soldering iron(Tip size 1-2 mm for detail work)
- Soldering iron stand and heat-insulated mat(Safety baseline for hot tools)
- Sponge or brass wool for tip cleaning(Keep tip clean and tinned)
- Solder wick (desoldering braid)(For joint corrections)
- Third-hand tool or helping hands(Position pieces precisely)
- Safety glasses and gloves(Eye protection + heat protection)
- Ventilation (fume extractor or well-ventilated area)(Reduce airborne particulates)
- Glass cleaning supplies (isopropyl alcohol, lint-free cloth)(Clean flux residues after soldering)
Steps
Estimated time: 60-90 minutes
- 1
Prepare workspace and safety gear
Set up a well-ventilated area with a fume extractor or fan. Place a heat-resistant mat, soldering iron stand, and a damp sponge within easy reach. Don safety glasses and heat-resistant gloves, and organize glass pieces and copper foil or foil-free join options before starting.
Tip: Check that your iron wattage matches the alloy you plan to use; too high a temperature can burn flux and damage glass. - 2
Cut and position glass pieces
Arrange the cut glass pieces on a stable workspace. If using copper foil, wrap edges and press pieces together with a third-hand tool. Double-check joints for gaps and ensure each piece sits flush to prevent misalignment during soldering.
Tip: Dry-fit the panel first to confirm joint angles and ensure uniform joint widths. - 3
Flux and preheat the joint
Apply a thin, even layer of rosin flux where the joints will meet. Preheat the iron to the recommended temperature for your chosen lead-free alloy and gently warm the joint area to improve wetting before applying solder.
Tip: Keep flux away from glass surfaces to minimize staining; wipe excess flux with a cloth after soldering. - 4
Apply lead-free solder
Touch the tip to the joint and feed solder gradually, forming a smooth, continuous bead. Move the iron along the joint rather than pausing in one spot to avoid heat buildup. Focus on even distribution and avoid creating bridges.
Tip: Keep the tip tinned and clean; use minimal flux once the joint wets well. - 5
Maintain heat and check wetting
If the solder balls or beads unevenly, reflow the joint with light pressure and continue feeding solder. Check from multiple angles to confirm complete wetting and even bead thickness along the joint.
Tip: Do not overheat the glass; lift the iron as soon as you see bright, smooth wetting. - 6
Cool and inspect joints
Allow joints to cool undisturbed for a few minutes. Inspect for dull or cracked beads, gaps, or cold joints. If needed, reflow or add a small second bead to fill gaps.
Tip: Cool slowly to prevent micro-cracking; avoid blowing on joints to speed cooling. - 7
Clean flux residues and verify finish
Wipe away flux residues with isopropyl alcohol and a lint-free cloth. Inspect the entire panel for uniform shine and absence of staining around joints. If staining is visible, consider a light polish or cleaning pass with appropriate cleaners.
Tip: Work in a clean, well-lit area to catch tiny inconsistencies early. - 8
Document and prepare for display
Label each panel with materials used and dates; store in a dry environment to protect the glass. Pack away tools, wash hands, and dispose of waste flux according to local guidelines.
Tip: Take high-resolution photos to track technique improvements over time.
Quick Answers
Is lead-free solder safe for stained glass compared to traditional leaded solder?
Lead-free solder reduces lead exposure and is generally safer for indoor environments. It can require different heat settings and flux choices, but with proper technique you can achieve strong, visually clean joints.
Lead-free solder reduces lead exposure and is generally safer indoors, though it needs different heat and flux choices for strong joints.
What flux is best for lead-free solder stained glass projects?
Rosin-based fluxes are a common, effective choice for lead-free solders in glass projects. They provide good wetting and are easy to clean after soldering. Avoid acidic fluxes that can damage metal corners or glass surfaces.
Rosin-based fluxes are a solid choice for lead-free soldering in glass projects; they wet well and are easy to clean.
Can I reuse scraps or offcuts when soldering stained glass with lead-free solder?
Yes, scraps can be used for practice joints or small filler pieces. Keep track of different alloys and don’t mix scrap lots; inconsistent alloys can affect joint strength and color response.
You can reuse scraps for practice, but avoid mixing different alloys in a single project.
Do I need a temperature-controlled iron for lead-free solder stained glass?
A temperature-controlled iron is highly recommended. Lead-free alloys melt at higher temperatures and require stable heat to prevent cold joints and tailing.
A temperature-controlled iron helps you maintain consistent heat for lead-free solders.
Can I use traditional leaded solder in modern stained glass projects?
Leaded solders are increasingly restricted in many regions. If allowed, consider safety and disposal implications. For most hobbyists, lead-free solders are the recommended option.
Leaded solder use is restricted in many places; lead-free is usually the safer, recommended option.
What is the best way to clean and finish lead-free solder joints on glass?
After soldering, wipe flux residues with isopropyl alcohol and a lint-free cloth. Ensure joints are cool before cleaning to avoid smearing or staining the glass surface.
Wipe flux residues after cooling with isopropyl alcohol for a clean finish.
Watch Video
Top Takeaways
- Choose appropriate lead-free alloys to balance melt temperature and wetting.
- Maintain clean joints with consistent flux application and tip cleanliness.
- Ventilate workspace and wear protective gear to reduce exposure and hazards.
- Inspect joints from multiple angles for uniform appearance and strength.
- Finish panel with careful cleaning to prevent staining and maximize longevity.