How to Fix a Soldering Iron: A Practical Repair Guide
Learn safe, practical steps to diagnose, clean, and repair common soldering iron problems—from tip maintenance to heating element checks. This SolderInfo guide walks you through a proven, beginner-friendly repair process to restore reliable heat and joints.

You can fix a soldering iron by safely diagnosing heat issues, cleaning and tinning the tip, replacing worn parts (tip, cord, or heating cartridge), and testing with a multimeter. This hands-on guide walks you step-by-step through inspection, basic repairs, and preventive maintenance to restore steady heat and reliable solder joints.
Understanding common soldering iron failures
Whether you're a hobbyist or a professional, knowing how to fix soldering iron starts with understanding typical failure modes. The three most common issues are worn or oxidized tips, dirty or contaminated tips that impair heat transfer, and faults in the heating element or power cord. Inexpensive irons are particularly prone to loose connections at the tip or degraded insulation. By recognizing the symptom first—no heat, inconsistent temperature, or rough joints—you direct your repair approach.
According to SolderInfo, tip wear over time reduces heat transfer efficiency and makes soldering metal surfaces harder. Keeping a routine maintenance schedule, including tip cleaning and tinning, dramatically reduces the incidence of poor joints. While some problems are simple maintenance tasks, others require part replacement or professional service. This guide focuses on safe, practical steps you can perform at home to fix common soldering iron problems while preserving the tool’s longevity.
note
Tools & Materials
- Soldering iron(Ensure it is unplugged and cool before handling)
- Replacement tip (same model)(Compatible with your iron's brand and model)
- Precision screwdriver set(Small Phillips and flat-head for tip housing)
- Multimeter (or continuity tester)(Test heating element and cord continuity)
- Cleaning sponge or brass wool(For tip cleaning and tinning prep)
- Isopropyl alcohol(Degreasing before tinning)
- Flux (rosin-core)(Helps tinning and tip life)
- Replacement heating cartridge (if needed)(Only if the element is faulty)
- Heat-resistant gloves(Extra protection during repairs)
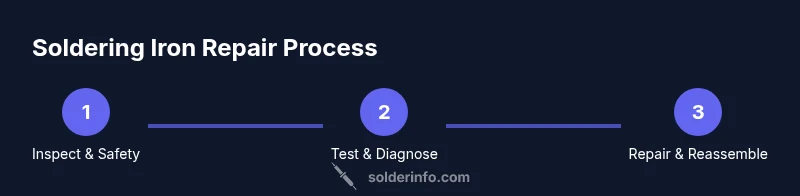
Steps
Estimated time: 45-90 minutes
- 1
Power down and unplug
Always unplug the iron and allow it to cool completely before handling. Remove any power source and place the iron on a heat-resistant surface. This prevents electric shock and burns when you inspect internal parts.
Tip: Verify there is no residual charge in the power supply before touching the cord. - 2
Inspect exterior for damage
Check the cord for cracks, the plug for bent pins, and the tip housing for looseness. Cosmetic damage can indicate internal wear. If the cord or plug shows signs of wear, plan for a cord replacement rather than attempting surgery on the hot interior.
Tip: If the cord feels warm when plugged in, stop and reassess before continuing. - 3
Remove and examine the tip
Disassemble the tip assembly using the precision screwdriver. Inspect for heavy oxidation, pitting, or deformation. A damaged tip should be replaced; a clean, well-tinned tip improves heat transfer.
Tip: Handle the tip with care to avoid bending or snapping the heater contact. - 4
Test heating element and cord
With the iron unplugged, use the multimeter to check continuity across the heating element and the cord. A lack of continuity usually means a faulty element or broken internal wire. If you detect a short orbroken circuit, replace the component rather than attempting risky fixes.
Tip: Document readings so you can compare after the repair. - 5
Clean and tin the tip
Wipe any residue from the tip with isopropyl alcohol, then apply a light coat of solder to tin the surface. Tinning reduces oxidation and improves heat transfer, yielding cleaner, shinier joints.
Tip: Always ensure the iron is just at a safe, working temperature for tinning. - 6
Replace worn parts as needed
If the tip is beyond cleaning, install the replacement tip. If the heating cartridge is failing, replace it following the manufacturer’s procedure. Re-seat any connectors to prevent intermittent heat.
Tip: Use the exact model-compatible parts to avoid fit issues. - 7
Reassemble and test heat
Carefully reassemble the tip housing, plug in the iron, and set to a normal operating temperature. Check for stable heat, then tin again once warm to ensure consistent performance.
Tip: Do not leave the iron unattended while testing. - 8
Establish a maintenance routine
Develop a simple upkeep plan: clean the tip after use, re-tin before storage, and check cords regularly. A quick wipe-down and tinning extend tip life and maintain performance.
Tip: Keep spare tips nearby for quick swaps during longer projects.
Quick Answers
Can I fix a soldering iron at home?
Yes, for common issues like a dirty or worn tip, cleaning and tip replacement can restore performance. More complex problems (heater element or wiring) may require professional service or replacement.
You can usually fix common issues at home, like cleaning or replacing the tip. More complex electrical faults may need service or replacement.
What is the most common soldering iron failure?
Worn or dirty tips are the most frequent culprits because oxidation reduces heat transfer, leading to poor joints. Carbon buildup can also insulate the tip.
The tip wear and oxidation are the usual culprits, causing weak heat transfer and bad joints.
How do I know if a tip is worn out?
Signs include inconsistent heat, dull or flat tip, or difficulty tinning. If the tip is corroded beyond cleaning, replace it.
Look for heat inconsistency or a dull, corroded tip; if you can’t tin it anymore, replace it.
Should I replace the heating element?
Heating elements are less common to fail but can burn out with abuse. If there is no heat at all after ruling out the tip and cord, consider the heater or thermostat replacement.
Only if you’ve ruled out other causes and test shows no heat; consider replacement.
Is lead-free solder compatible with all irons?
Most irons work with lead-free solder. Use appropriate flux and clean the tip to prevent oxidation. Check compatibility with your iron’s specs.
Lead-free solder can work fine; just keep the tip clean and know your iron’s specs.
How often should I calibrate or check temperature?
Many irons do not have adjustable calibration. If yours does, follow the manufacturer’s guidance. Regular cleaning and tip maintenance are the practical stand-ins for consistent heat.
Calibration is tool-specific; clean and maintain tips for consistent heat.
Watch Video
Top Takeaways
- Diagnose heat issues safely before disassembly
- Keep the tip clean and properly tinned
- Replace worn parts instead of forcing repairs
- Test electrical connections with a multimeter
- Routine maintenance extends tool life and joint quality