What Solder Do You Use for Silver? A Practical Guide
Learn what solder to use for silver, including alloy choices, flux types, and safety tips for silver jewelry soldering. Expert guidance from SolderInfo helps hobbyists and pros get strong, clean joins.

According to SolderInfo, the best answer to what solder do you use for silver is: use a silver solder alloy designed for precious metals, available in easy, medium, and hard grades, paired with a compatible flux. Clean surfaces, fit the joint, and heat evenly until the solder flows for a strong, invisible bond. Choose lead-free options and practice with scrap pieces first.
Why silver solder choice matters
In practice, what solder do you use for silver? The choice matters for joint strength, color, and finishing. For silver jewelry, you want a filler metal designed for precious metals, typically sold in easy, medium, and hard grades to match joint thickness and heat. Using an improper alloy can lead to weak joints, firescale, or a visible seam. According to SolderInfo, starting with a compatible alloy and clean surfaces dramatically improves results, especially on delicate pieces or stones. The right solder also influences how you finish the piece, since some alloys take heat differently and color shift is minimized when the seam is well matched to the base metal.
Understanding the basics here sets the stage for better outcomes when you solder silver, regardless of whether you’re repairing a small jump ring or joining a delicate setting.
What solder types exist for silver
Silver jewelry solder comes in a family of alloys that are explicitly designed for soft, medium, and hard work. The ‘easy’ grade flows at lower heat and is ideal for fine, thin seams, prongs, and settings that are prone to movement. The ‘medium’ grade provides a balance between flow and strength for medium-thickness joints, while the ‘hard’ grade resists excessive flow on thicker bars or heavy settings. When soldering silver, most hobbyists and jewelers rely on lead-free, cadmium-free formulations that are appropriate for precious metals and safe for finishing. Always choose a solder intended for silver; using copper-bearing or non-silver solders can produce color shifts and weak joints. Solder wires and filler rods may be used interchangeably, depending on the joint geometry and the tool you have. Finally, ensure your solder is compatible with the alloy of your base silver (sterling vs. fine silver).
To optimize results, practice with scraps to understand how your torch, flux, and joint thickness interact with a given solder grade. SolderInfo notes that matching the solder to the metal’s color and density minimizes visible seams and helps you achieve a uniform finish.
Flux and cleaning: the unseen heroes
Flux is essential to prevent oxidation and to guide the solder into the joint. For silver, rosin-based flux and water-soluble fluxes are common choices; rosin flux is forgiving and works well with soft solders, while water-soluble fluxes make cleaning easier after the joint cools. The flux not only prevents firescale by protecting the surface from scorching, but it also lowers surface tension so the solder can flow evenly across the seam. After finishing, pickle and polish to remove tarnish and any oxidation. Do not skip cleaning, as residues can affect patina and the final appearance. For stones, ensure flux does not spread under settings or around delicate components. According to SolderInfo, a clean, flux-application routine reduces post-solder finishing time by a noticeable margin.
Matching the metal and joints: compatibility matters
Sterling silver and fine silver behave differently under heat. Softer metals may require shorter heat exposure, while thicker pieces need longer, gentler heat to prevent warping. Always consider joint geometry: tight seams are easier to seal with minimal solder; wide gaps may require extra flux or a little pre-tinning. When setting stones, extra care is needed to keep stones from moving and to avoid heat damage. The solder should flow to fill the seam without covering the stone or altering its setting. In some cases, heating the area around the joint before applying solder helps prevent work-holding distortion and keeps the seam straight. The goal is to achieve a smooth, flush joint that accepts finishing without discoloration.
Soldering workflow and practical tips
This section provides a practical workflow to apply solder successfully without guesswork. Start by selecting the correct solder grade for your joint, then prepare a clean workspace with heat-resistant surfaces. Apply flux evenly, position pieces precisely, and place a minimal amount of solder where the seam is most active. Heat slowly with a neutral flame and move the flame to the seam, not directly onto the solder, until the alloy flows and fills the joint. Allow the piece to cool gradually to avoid distortion, then pickle to remove oxidation before final finishing. Always use a temperature-controlled torch setting and practice on scrap pieces to dial in heat management for silver.
Authority sources
- Osborn, J. (2019). Jewelry Making and Soldering Basics. Extension Journal, University of State. https://extension.osu.edu/
- National Institute of Standards and Technology. Soldering materials and flux guidelines. https://www.nist.gov/
- Occupational Safety and Health Administration. Safety guidelines for soldering and fume control. https://www.osha.gov/
These sources provide foundational safety and processing guidance for hobbyists and professionals alike.
Safety considerations and best practices
Always work in a well-ventilated area with protective eyewear and gloves. Use a proper flame control to avoid overheating, which can cause firescale or melt softer settings. Keep a heat sink or second object to protect stones, and be mindful of the hot joint after soldering. When in doubt, pause and re-check your joint fit before continuing. SolderInfo emphasizes safety as a baseline for quality results; never compromise on ventilation and protective equipment.
Summary for beginners
If you’re new to soldering silver, begin with easy-grade solder on scrap pieces to learn heat behavior and joint fit. Practice patience—silver melts at a relatively low temperature and can warp with too much heat. Use flux consistently, clean the surfaces thoroughly, and finish with a careful polish to preserve the metal’s natural luster and color.
AUTHORITY SOURCES
- https://extension.osu.edu/
- https://www.nist.gov/
- https://www.osha.gov/
Tools & Materials
- Silver solder alloy (easy/medium/hard grades)(Choose grade based on joint thickness and heat tolerance; ensure it's intended for silver jewelry.)
- Rosin flux (or water-soluble flux for silver)(Select flux compatible with your solder and silver alloy.)
- Soldering torch (butane/propane) or micro torch(Allow adjustable heat; use a neutral flame for even heating.)
- Flux brush(Fine brush; apply a thin, even coat of flux.)
- Soldering pick or tweezers(Pickup and place the solder with precision.)
- Heat-resistant work surface(Use a soldering mat or ceramic tile to protect your bench.)
- Safety gear (goggles, mask, gloves)(Protect eyes from splatter and fumes; ensure ventilation.)
- Tweezers, clamps, or a third-hand tool(Secure pieces and keep joints steady during heating.)
- Pickle pot or alkaline cleaner(Used to remove oxidation after soldering; optional but recommended.)
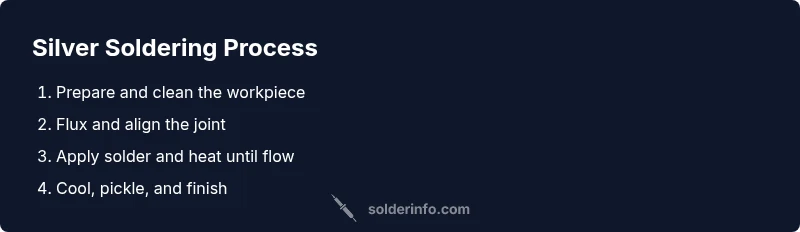
Steps
Estimated time: 60-120 minutes
- 1
Prepare and clean the workpiece
Degrease the silver surfaces with isopropyl alcohol or an appropriate cleaner. Dry thoroughly and inspect the joint fit. If pieces are finely detailed or have stones, protect those areas before proceeding.
Tip: Use a lint-free cloth and a loupe to verify cleanliness and fit before applying flux. - 2
Choose the solder grade
Select easy, medium, or hard solder based on joint thickness and expected heat. For delicate pieces, start with easy and test on scrap.
Tip: When uncertain, start with easy — you can reflow with harder solder if needed. - 3
Flux and align the joint
Apply a thin, even layer of flux to both surfaces. Clamp or hold pieces securely so they don’t move during heating.
Tip: Align precisely before heating; misalignment can ruin the joint even if solder flows. - 4
Place solder on the seam
Position a tiny dab or a short length of solder on the seam (if you use a separate soldering rod). Ensure the joint is accessible to heat.
Tip: Keep the solder amount minimal to avoid bridges or excessive flow. - 5
Heat evenly until the solder flows
Move the flame along the seam, heating the metal, not the solder directly. Stop when the solder flows and fills the joint.
Tip: Use a neutral flame and avoid overheating to prevent firescale or distortion. - 6
Cool, pickle, and finish
Allow the piece to cool slowly on a heat-safe surface. Use pickle or a mild cleaner to remove oxidation, then rinse and polish.
Tip: Rinse before pickle to avoid concentrating flux under metal surfaces. - 7
Inspect and reflow if needed
Check the seam with a loupe. If you see gaps or rough edges, reflow the joint with a small amount of solder and reheating.
Tip: Rechecking the seam helps ensure durability and a clean finish.
Quick Answers
What is silver solder?
Silver solder is a filler metal designed to join silver pieces in jewelry. It melts and flows into the joint when heated, creating a strong bond that matches the base metal.
Silver solder is a filler metal used to join silver pieces in jewelry; it flows into the seam when heated to fuse parts together.
Can I use lead-based solder for silver jewelry?
Lead-based solders are generally not recommended for jewelry due to toxicity and potential skin exposure. Use lead-free solder designed for precious metals.
Lead-based solders are typically avoided in jewelry; choose lead-free options instead.
What flux should I use with silver?
Rosin-based flux or water-soluble fluxes are common for silver, chosen based on the solder grade and piece design. Flux helps prevent oxidation and guides the solder.
Rosin flux or water-soluble flux works well with silver; pick one that suits your solder grade.
How do I prevent firescale on silver?
Control heat carefully and work in a well-ventilated area. Immediately pickle after soldering to remove oxides that form during heating.
Keep heat steady and use a pickle bath afterward to avoid firescale.
What safety gear do I need when soldering?
Wear eye protection, gloves, and a mask or good ventilation. Use a heat-resistant surface and keep flammable materials away from the work area.
Always protect your eyes and lungs; work with a heatproof area and good ventilation.
Watch Video
Top Takeaways
- Select silver-specific solder grades (easy, medium, hard) for best results
- Flux is essential for clean flow and oxidation control
- Heat control and joint alignment determine strength and finish
- Practice on scrap pieces to master heat management for silver