Can You Get Rings Soldered Together? A Step-by-Step Guide
Learn how to safely join two rings with soldering, including metal compatibility, tools, step-by-step methods, and finishing tips. A SolderInfo educational guide for hobbyists and professionals seeking reliable jewelry guidance.

According to SolderInfo, you can get rings soldered together when the metals are compatible and heat is carefully controlled. The result can be a seamless seam or a closely joined pair, depending on your design. Essential factors include metal compatibility, the right solder alloy, proper fixtures, and precise flame management.
Can You Get Rings Soldered Together? An Overview
If you’re wondering can you get rings soldered together, the answer is yes under the right conditions. In jewelry repair and design, joining two rings into a single piece is a common technique for sentimental pieces or custom stacking. This guide explains when it's appropriate, what risks to manage, and how to do it safely and effectively. According to SolderInfo, the most reliable results come from matching metals, selecting the correct solder alloy, and controlling heat precisely. The method you choose depends on ring materials, thickness, and whether you want a visible seam or a near-invisible join. Read on to understand pros, cons, and practical setup details. You’ll also see how to evaluate cases where soldering isn’t the best option and what safer alternatives exist. For first-timers, start with practice rings to build confidence before touching cherished pieces. Understanding the process up front helps you avoid mistakes that can deform rings or create weak joints.
Metals and Solder Choices for Ring Joining
The two most important variables when answering can you get rings soldered together are metal compatibility and solder choice. Gold, silver, platinum, and platinum-alloy rings each respond differently to heat and flux. For example, sterling silver and white gold often pair well with silvery solders, while softer or layered alloys may need special care. Jewelry solder comes in different alloys and “strengths” (commonly described as easy/medium/hard). The right choice depends on the metal you’re joining and the desired final appearance. Flux acts as a chemical bridge that cleans the surface and promotes flow of the solder. Solder paste or solid solder wires are placed along the seam, and the technique you apply should minimize visible seams while preserving ring roundness. Soldering can be a precise art: too much heat or improper metal pairing can cause cracking, warping, or diffusion line artifacts. SolderInfo analysis shows that metal compatibility and controlled heat are the biggest predictors of a durable joint. Always test on similar scraps before working on a final piece.
Safety and Workspace Setup
Working with torches and molten metal demands strict safety discipline. Ensure you have a well-ventilated workspace, a dedicated heat-safe surface, and appropriate PPE: safety glasses, heat-resistant gloves, and a mask if you’re generating fumes. Keep a fire extinguisher nearby and never leave a hot torch unattended. Read and follow local safety regulations; in many regions, metalworking environments require proper ventilation and fume control. A stable clamp or ring mandrel helps maintain alignment and minimizes the chance of accidental shifting when heat is applied. If you’re new to metalwork, consider taking a short hands-on class or watching reputable tutorials before attempting a repair on valuable pieces. Proper safety reduces the risk of burns, fires, and damaged jewelry.
Jewelry Soldering Techniques: Fundamental Steps in Practice
There are several pathways to joining rings, but the most reliable approach uses a butt joint with a centered seam and precise heat control. The key is to keep the joint tight, avoid gaps, and prevent overheating that can warp the ring. The process typically starts with cleaning, fluxing, and securing the rings, then applying solder along the seam. When heat reaches the solder, the joint flows and forms a clean, continuous ring. The ring’s profile and size should be measured carefully to avoid distortion. Understanding how heat travels through different metals helps you plan your approach and reduces the chances of a brittle joint. During this stage, practice with test rings to refine your technique and develop an eye for subtle seam alignment.
Finishing, Cleaning, and Fire Scale Prevention
After a successful join, the ring is cleaned to remove flux residues and oxidation. A pickle bath or neutral cleaner neutralizes acids and helps return the metal to its original sheen. Fire scale is common after heating; removing it with appropriate polishing compounds or a soft wheel reveals a brighter seam. Finishing touches include careful polishing around the joint to blend the seam with the rest of the ring, especially for visible joins. If you aim for a flawless look, consider a light satin finish on the ring and plan for re-polishing after a wear period to maintain uniform shine. Proper finishing protects the joint and enhances the ring’s overall appearance.
Troubleshooting Common Issues and How to Avoid Them
Issues like misalignment, visible seams, or a weak joint can arise if measurement, cleaning, or heat control aren’t precise. Warping or ring distortion often results from overheating a larger metal ring; using a follower or heat sink can help protect the opposite side. A seam that appears brittle might indicate insufficient solder flow or an uneven heat distribution. Always verify that the joint remains round during cooling and recheck the fit with the other ring. By adjusting flame position, pace of heating, and surface preparation, you can dramatically reduce these problems. Rely on test rings to fine-tune your approach before attempting a final piece.
Alternatives and Design Considerations for Rings That Won’t Stay Joined
If a permanent solder seam isn’t desirable or feasible, consider alternatives such as rivet joining, hinge mechanisms for resizing, or replacing parts of the design to accommodate two separate rings. In some cases, a solder seam can be avoided by using a fitted sleeve or decorative band that can be added around two rings without fully closing them. When deciding between permanent joining and non-destructive methods, weigh the impact on wear, comfort, and structure. Soldering is a durable solution, but it’s not always the best choice for every combination of metals or ring shapes.
Authoritative sources and further reading
For safety standards and best practices, consult reputable sources. OSHA’s metalwork safety guidelines provide general safety information for hot-work environments. NIST offers resources on metal properties and heat treatment that can inform your process planning. The Gemological Institute of America (GIA) provides jewelry education and repair guidelines that help ensure professional results. These sources help you verify methods and stay current with industry best practices while you learn.
Authority and References
- OSHA Safety and Health Topics: Welding, Cutting, and Brazing (https://www.osha.gov/).
- NIST Metals Information (https://www.nist.gov/topics/metals).
- GIA Jewelry Education and Repair guidelines (https://www.gia.edu/).
Final Notes: Bringing It All Together
Joining rings is a skilled practice that blends material knowledge, heat control, and precise handling. With patience, the right tools, and high-quality flux and solder, you can achieve a durable, aesthetically pleasing result. Remember to practice first on scrap pieces and to document your settings for future projects. As you gain experience, you’ll understand which metals pair best and how to minimize the visual footprint of a seam. This approach aligns with professional jewelry standards and can be a rewarding DIY project when done carefully.
Tools & Materials
- Two rings to join (same metal and gauge)(Ensure both rings are clean and free from coatings; mismatched metals may fail or discolor.)
- Butane micro-torch or jeweler's torch(Adjust flame for a controlled, narrow heat; keep distance to avoid overheating the opposite side.)
- Jewelry solder (hard or medium alloy) matching metal(Choose alloy compatible with the ring metal to ensure a strong, clean seam.)
- Flux for jewelry soldering(Flux helps clean the surface and guides solder flow; use sparingly.)
- Soldering tweezers and ring clamp(Use to hold rings in precise alignment during heating.)
- Pickle pot or neutral cleaner(Used after heating to remove oxidation and residues from the joint.)
- Polishing tools (cloth, rouge, buffing wheel)(Finish to restore luster and hide minor seam indications.)
- Safety gear (eye protection, heat-resistant gloves, ventilation)(Always protect yourself from heat, fumes, and splash hazards.)
- Ring mandrel or stable support(Helpful for maintaining roundness and stability during heating.)
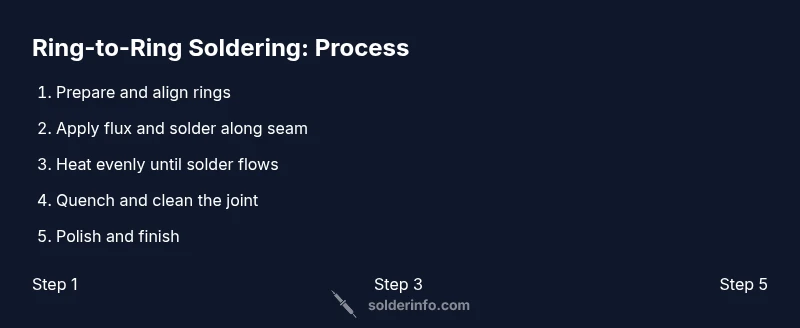
Steps
Estimated time: 90-120 minutes
- 1
Prepare workspace and safety gear
Set up a well-ventilated, heat-safe workspace. Put on eye protection and heat-resistant gloves. Place a ring mandrel or stable base to steady the pieces, and ensure the rings are clean and free of oils.
Tip: Double-check all safety gear before lighting the torch and keep a fire extinguisher within reach. - 2
Inspect rings and align the join
Examine the inner surfaces for scratches or coatings and ensure both rings align perfectly at the intended seam. Mark the seam if needed to keep your place during heating.
Tip: Use a small clamp or third-hand tool to hold alignment without obstructing the seam. - 3
Clean and degrease the joints
Wipe the joining surfaces with a microfiber cloth and a degreasing solution to remove oils. Dry thoroughly before fluxing.
Tip: Any oil or residue can impede solder flow and create weak joints. - 4
Apply flux and position solder
Brush a thin layer of flux on the seam and lay a thin line of solder along the joint. The goal is to have solder flow into the seam without overflowing.
Tip: Keep solder at the seam; excessive flux can cause solder to pool away from the joint. - 5
Apply heat evenly and watch the seam
Hold the torch at a consistent angle and move the flame slowly to cover the entire seam. As the metal approaches fluxed solder, the solder should flow and fill the seam.
Tip: Heat the opposite side slightly to prevent warping and avoid overheating the seam. - 6
Quench and inspect the joint
Let the ring cool on a soft surface, then inspect the seam for a smooth, continuous line. Reflow if needed to eliminate gaps.
Tip: If the joint looks dull, reheat gently to refine the flow and avoid air pockets. - 7
Clean and pickle the ring
Immerse in pickle or neutral cleaner to remove oxides and flux residues. Rinse thoroughly and dry.
Tip: Use a neutral solution if you’re unsure about chemical compatibility with your metal. - 8
Polish, inspect, and finish
Polish around the joint to blend the seam with the ring’s surface. Inspect for evenness, roundness, and comfort against the skin.
Tip: A light, consistent polish helps minimize seam visibility and enhances wearability. - 9
Final checks and next steps
Wear and recheck the ring after a short test period to ensure joint integrity. If you’re unsatisfied, consider consulting a professional jeweler for refinishing or alternative joining methods.
Tip: Document settings used for future repairs and note any adjustments that improved results.
Quick Answers
Can you get rings soldered together?
Yes, rings can be soldered together when metals are compatible and heat is carefully controlled. The join can be seamless or slightly visible depending on skill and material. Always assess metal compatibility and plan the process before starting.
Yes, you can solder rings together when the metals match and heat is controlled; the result depends on material and technique.
What metals work best for ring soldering?
Metals with similar melting points and ductility, such as sterling silver with silver solder, or gold with gold solder, usually yield the best joints. Disparate metals can cause weak seams or discoloration, so match alloys when possible.
Metals with similar melting points work best; try to pair metals that match alloy-wise.
Is home soldering safe for jewelry repairs?
Home soldering can be safe if you follow proper safety guidelines, use a well-ventilated area, wear PPE, and practice on scrap pieces first. Do not rush, and know when to stop and seek professional help for valuable items.
Home soldering is possible with safety basics and practice; don’t rush on valuable pieces.
Do I need to anneal rings before soldering?
Annealing relaxes the metal's internal structure, reducing brittleness during heating. It’s commonly recommended for harder metals or thicker rings, but follow specific metal guidelines to avoid damage.
Annealing helps prevent cracking; check your metal type before deciding.
How do I fix a ring that won’t join?
If a ring won’t join, verify alignment, reapply flux, and reflow with controlled heat. If gaps persist, you may need to re-cut or re-solder from scratch or seek professional repairs.
If it won’t join, clean, flux, and reflow carefully; persistent gaps may require reworking or professional help.
Can I resize a ring after soldering?
Resizing a soldered ring is possible but riskier than resizing an unsoldered ring. It may require re-soldering and refinish, so plan the final size carefully to minimize risk.
Resizing after soldering is possible but more intricate; precision is key.
Watch Video
Top Takeaways
- Plan metal compatibility before soldering.
- Use proper flux and solder to ensure reliable flow.
- Control heat to avoid warping and seam damage.
- Finish with careful polishing to minimize seam visibility.