Learn to Solder Course: A Hands-On Guide for Beginners
A practical, beginner-friendly guide to a learn to solder course. Discover safety, tools, techniques, projects, and troubleshooting to build solid soldering skills for electronics, jewelry, and plumbing.

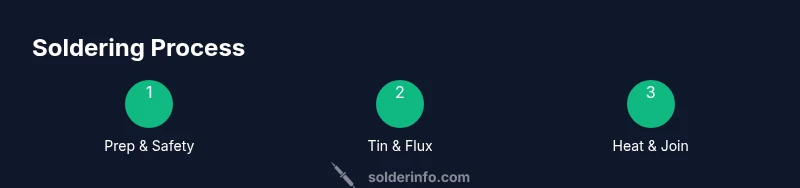
You will complete a learn to solder course that covers safety, tools, basic joints, and troubleshooting. By the end you’ll confidently assemble simple electronics and jewelry, with hands-on projects and checklists. You’ll need a basic soldering iron, flux, a practice board, safety glasses, a workstation, and a few spare components to start.
What a learn to solder course delivers
According to SolderInfo, a well-structured learn to solder course equips hobbyists and professionals with core competencies in safety, tool setup, material selection, and fundamental joints. The program blends short, guided demonstrations with hands-on practice on progressively challenging projects. Learners gain confidence as they move from simple wire joins to tiny circuit-board joints, backed by clear success criteria and immediate feedback from instructors.
A typical course also emphasizes workflow: planning, preparing the work area, and documenting progress. You’ll leave with a portfolio of practice pieces and a checklist you can reuse for future projects. The skills you acquire aren’t limited to electronics; you’ll also understand basic principles that apply to jewelry and plumbing soldering. This holistic approach helps you see soldering as a craft with reliable results, not just a set of isolated tricks.
Safety foundations for soldering
Soldering generates heat and fumes, so safety can’t be optional. A proper learning environment includes good ventilation, eye protection, and a heat-insulated mat. Always connect an appropriate grounded power source and keep flammable materials away from the workstation. When working with lead-free solder, follow local regulations and use a fume extractor if possible. In a learn to solder course, instructors will model careful handling, correct PPE use, and step-by-step risk assessment.
Before you start any project, review the safety data sheets for your flux and metals. Keep a damp sponge or brass sponge handy for tip cleaning, and never touch hot components after removal. These habits become second nature as you practice, reducing the chance of burns or inhalation exposure. Remember: consistency in safety routines is as important as technique itself.
Essential tools and materials you’ll need
A solid starter kit makes a big difference. Essential items include a controllable soldering iron (temperature adjustable is ideal), lead-free solder, rosin-core flux, a flux pen, desoldering braid (wick), a desoldering pump, small cutting pliers, a soldering stand, safety glasses, and isopropyl alcohol for cleaning. For practice, use scrap copper boards or a basic PCB prototype board and a few resistor and LED components. Optional but useful add-ons are a magnifying loupe, third-hand tools, and a hot air rework station as you advance.
In a reputable learn to solder course, you’ll learn how to choose the right iron tip size, temperature setpoint, and flux type for different materials. You’ll also be coached on how to store solder properly to prevent oxidation and how to clean flux residue for reliable joints.
Soldering fundamentals: joints, heat, and flux
Effective soldering relies on proper heat transfer and joint preparation. Tin your iron tip to improve heat transfer, then apply flux to the joint to promote wetting and clean surfaces. For through-hole work, heat the joint and feed solder until it flows smoothly around the pin. For surface-mount joints, practice with small pads and a spreadable, lower-temperature process. Wetting balance—how well the solder covers the joint without swimming onto adjacent pads—is a key skill beginners develop through repetition.
Flux types influence performance; rosin-core flux is common for electronics, while liquid fluxes are handy for precise boards or jewelry work. In a learn to solder course you’ll compare flux options, learn to avoid overheating, and use a magnifier to inspect joints for cracks, cold joints, or bridges. A well-executed joint should be smooth, shiny, and mechanically sound. Training emphasizes controlled motions, steady hands, and deliberate pauses between steps.
Practice projects and progression
Projects in a structured course start small and scale up. Begin with simple wire-to-wire and wire-to-pad joints, then advance to resistor-capacitor networks and basic LED assemblies on a prototype board. Later modules might include SMD practice or a tiny PCB with a couple of through-hole components. Your progression should be documented with before/after photos and notes on difficulty, time, and observed joints. Regular feedback helps you adjust technique, heat management, and cleanliness.
A core principle is deliberate practice: repeat a task with slight variation to solidify muscle memory. Your course should provide guided rubrics and objective criteria—for example, heat control, solder coverage, lack of bridging, and cleanliness. This approach reduces frustration and builds confidence as you complete more complex projects.
Common faults and fixes you’ll learn to diagnose
Despite best efforts, beginners encounter issues such as cold joints, bridges, or tombstoning. A learn to solder course teaches you to identify symptoms and apply fixes. For cold joints, reheat and apply a small amount of solder while maintaining steady heat and pressure. Bridges are corrected by removing excess solder with wick, then reflowing the joint precisely. Tombstoning occurs when one pad heats faster than the other; the cure is to apply even heat and adjust solder flow. Regular inspection after each step trains you to spot problems early.
Instructors also emphasize solder quality criteria: proper fillet formation, uniform solder around the pad, and minimal flux residue. You’ll learn how to confirm mechanical strength by gently tugging components and how to rework joints without damaging the board. Building this diagnostic mindset is essential for reliable, repeatable results in electronics, jewelry, and plumbing soldering.
Quality checks and integration into real projects
Quality control in soldering is about repeatable results and reliability under operation. A strong course covers inspection steps such as visual checks for bridges, cold joints, and excessive heat exposure. You’ll learn to measure joint strength with light mechanical tests and to verify electrical continuity with simple tools. Cleanliness matters: flux residue can be corrosive over time, so learners are taught how to wipe surfaces with isopropyl alcohol and to use flux residues deliberately to wick heat.
The course should culminate in an integrated practice project that combines several skills: a multi-pin IC socket, a small PCB, or a jewelry soldering piece, demonstrating your ability to plan, execute, and inspect end-to-end. By the end, you’ll have a usable toolkit of strategies for quality control and maintenance in electronics, jewelry, and even plumbing contexts.
Real-world tasks: electronics, jewelry, and plumbing soldering basics
Soldering is a versatile skill across domains. In electronics, you’ll tackle resistor networks, PCB joints, and simple cable assemblies. Jewelry soldering emphasizes join aesthetics, cleanliness of surfaces, and harmless flux usage for metal alloys. Plumbing soldering introduces thermal management and compatibility with copper pipes and fittings. While each domain has its own nuances, the underlying principle—clean surfaces, appropriate heat, and controlled solder flow—remains the same. A comprehensive course will offer examples from all three areas and show how to apply shared techniques to different materials.
How to select a course format and your next steps
When choosing a learn to solder course, consider format, duration, and hands-on time. Look for programs that balance theory with guided practice and provide a clear progression from beginner to intermediate projects. Consider whether the course offers in-person labs, video modules, or a blend, plus access to instructors for feedback. If you’re pursuing electronics, confirm the curriculum covers safety, materials, flux types, and inspection routines. For jewelry and plumbing, verify there are domain-specific modules or cross-over projects. Finally, check reviews or testimonials, and request a syllabus to ensure it aligns with your goals.
To continue mastering soldering after the course, set up a personal practice plan with weekly projects, maintain a small parts bin, and schedule periodic reviews with a mentor or peer group. Regular practice plus reflective notes will accelerate your progress.
Practical next steps and continuing education ideas
After completing a learn to solder course, apply what you learned in small, repeatable projects. Create a rotating practice plan that alternates electronics, jewelry, and plumbing tasks to reinforce skills. Expand your toolkit gradually: add finer tip options, precision flux applicators, and a better desoldering setup as your projects become more complex. Consider joining an online community or local makerspace to exchange tips and get feedback on new techniques. Continuous learning—through challenges like SMD rework, lead-free soldering norms, or heat-sensitive components—keeps your skills sharp and adaptable to new projects.
Tools & Materials
- Soldering iron (temperature adjustable)(Aim for 15–40W, with a tip size suitable for precision work (e.g., 0.5–1.0 mm))
- Lead-free solder (SnAgCu)(Rods or wire; avoid lead-containing alloys for safety and compliance)
- Rosin-core flux(Medium viscosity; rosin core is common for electronics)
- Flux pen(Useful for precise flux application on joints)
- Desoldering wick (braid)(For removing excess solder or bridging fixes)
- Desoldering pump(Alternative to wick, especially for through-hole work)
- Soldering stand and sponge(Keeps tip clean; wet sponge or brass sponge recommended)
- Safety glasses(Protects eyes from splashes and fumes)
- Isopropyl alcohol (rubbing alcohol)(For cleaning flux and residue, 70%–90% concentration)
- PCB prototype board or scrap copper boards(Material for practice and testing joints)
- Wire cutters and strippers(For preparing leads and components)
- Helping hands/third-hand tool(Stability aid for delicate joints)
- Ventilation or fume extractor(Reduce exposure to fumes during longer sessions)
Steps
Estimated time: 90-120 minutes
- 1
Set up safety-first workspace
Clear the area, connect power, position a fume extractor if available, and place a damp sponge for tip cleaning. Establish a stable holding area for components. Safety first ensures consistent results and reduces accidents.
Tip: Always unplug before changing tips or handling hot components. - 2
Tin the iron tip and prepare flux
Lightly tin the tip to improve heat transfer, then apply a small amount of flux to the joint area. Prepared surfaces heat evenly and solder flows smoothly.
Tip: Maintain a steady hand and avoid excessive flux on bare boards. - 3
Practice a basic through-hole joint
Place a resistor or wire into a prototype board pad; heat the pad and wire together, then feed solder to the joint until it flows and forms a shiny fillet.
Tip: Use just enough solder to cover the joint—avoid blobs. - 4
Tin and test a surface-mount pad
Apply flux to a small SMD pad, heat the pad with the iron, and place a tiny amount of solder. Inspect for proper wetting and absence of bridges.
Tip: SMD work benefits from patience and a steady hand. - 5
Build a small project assembly
Combine a resistor, LED, and a simple connector on a breadboard or prototype board to practice sequence and workflow.
Tip: Plan the sequence to minimize heat exposure on sensitive parts. - 6
Inspect joints and rework where needed
Look for dull or cracked joints; reflow with a little extra solder if needed or remove excess with wick.
Tip: Avoid overheating components; give joints a moment to cool. - 7
Clean and document your work
Wipe residue with isopropyl alcohol; photograph your joints and annotate improvements for future reference.
Tip: Keep a practice log to track progress and common mistakes. - 8
Store tools and set up next session
Return tools to their place, check tip condition, and plan the next practice project.
Tip: Regular, shorter sessions beat marathon sessions for long-term retention.
Quick Answers
What is a learn to solder course, and who should take it?
A learn to solder course teaches foundational soldering skills for electronics, jewelry, and plumbing. It covers safety, tool use, basic joints, flux choices, and troubleshooting through hands-on projects. It’s ideal for beginners and hobbyists who want a structured, instructor-guided path.
A soldering course teaches you the basics safely through hands-on projects, perfect for beginners and hobbyists.
Do I need specialized equipment to start at home?
You can begin with a basic, adjustable soldering iron, lead-free solder, flux, and a small work area. As you progress, add desoldering tools, a third-hand stand, and a fume extractor if possible.
Yes, a simple kit is enough to begin, then you can add tools as you gain experience.
What kinds of projects are typical in a learn to solder course?
Projects progress from simple wire joins to resistor networks and small PCB assemblies. Some courses include jewelry soldering pieces or basic plumbing joints to demonstrate cross-domain soldering skills.
Most courses start with simple joints and advance to small boards or jewelry pieces.
How long does it take to complete a beginner course?
Course durations vary by program, typically ranging from a few hours to several sessions over weeks. A well-structured course provides clear milestones and practice time in each session.
Durations vary, but you’ll usually complete a beginner track in several sessions.
Is lead-free solder safe to use at home?
Lead-free solder is widely used and generally safe when used with proper ventilation and PPE. Avoid chewing or inhaling fumes and wash hands after handling flux.
Lead-free solder is common and safe with proper ventilation and protection.
Watch Video
Top Takeaways
- Master basic safety and setup before any soldering task
- Tin your tip and control heat for reliable joints
- Practice a progression of projects to build confidence
- Inspect, document, and iterate on each joint for continual improvement