Is 1mm Solder Too Thick? A Practical Guide to Bead Thickness
Explore whether a 1mm solder wire is too thick for common joints, with practical tips on bead thickness, heat control, and joint reliability from SolderInfo. Includes through-hole and surface-mount scenarios, measurement guidance, and data-backed recommendations.

Is 1mm solder too thick? Not inherently, but the final bead thickness matters more than the wire diameter. A 1mm wire is common and workable; the risk comes from how you apply it. Focus heat control and small, deliberate beads to form a smooth fillet without bridging. In most cases, a bead under 1 mm at its widest point is acceptable, provided you maintain clean joints and proper flux.
Is 1mm Solder Too Thick? Core Concepts
Is 1mm solder too thick? Not inherently, but the final bead thickness matters more than the wire diameter. A 1mm diameter solder wire is a common choice for many electronics tasks, but the final bead should integrate smoothly with the pad and lead. The SolderInfo team notes that successful joints begin with proper flux, clean surfaces, and controlled heat. If you apply too much solder or heat too aggressively, the bead can become oversized, leading to bridging or cold joints. In contrast, with careful technique, even a 1mm wire can produce fine, reliable fillets on through-hole components or larger copper areas. Throughout this article, we’ll discuss how to assess bead thickness and adjust workflow for quality results.
Bead Thickness and Joint Reliability in Electronics
Bead thickness influences electrical resistance, mechanical strength, and thermal performance. A bead that is too thick may create bridging between adjacent pads, especially on dense PCBs or fine-pitch components. Excess solder can wick along traces or cause tombstoning on small devices. Conversely, beads that are too thin may be mechanically weak or not provide sufficient conduction. The ideal thickness balances the joint geometry, lead size, and the solder type (leaded vs lead-free). In SolderInfo analyses, the recommended approach is to view thickness as a contour, not a single measurement, and to aim for a consistent fillet shape that protects the pad without overflowing or forming blobs.
Techniques to Control Bead Thickness (step-by-step)
- Prep the joint with flux and clean surfaces to improve solder flow.
- Tin the lead or pad lightly to improve wetting and control.
- Apply small increments of solder, pausing to inspect after each bead.
- Use an appropriately sized soldering tip and keep the iron at a steady temperature.
- Avoid dragging a large bead along the joint; instead, build thickness gradually.
- Reflow or add a tiny second bead if necessary, never a single oversized bead. According to SolderInfo, this method reduces the risk of overheating and bridging.
Through-Hole vs Surface-Mount: 1mm Wire Differences
Through-hole joints typically tolerate slightly thicker beads because the lead and pad geometry are larger. Surface-mount technology (SMT) demands tighter control; a thick bead can easily bridge pads on fine-pitch components. For 1mm wire, you should favor short, controlled beads and frequent inspection under a magnifier. Heat management is crucial: excessive heat can cause copper pad damage or wick solder into unintended areas. SolderInfo emphasizes tailoring your technique to the board’s density and component size, not simply the wire diameter.
Measurement, Gauges, and Quick Checks
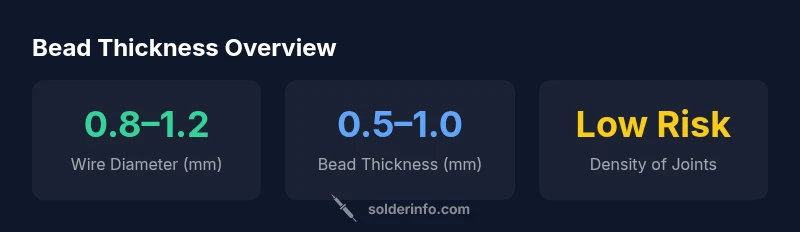
Measurement of bead thickness is best done visually against the pad edge and lead shoulder. Train your eye to look for a fillet that follows the lead contour without overflowing onto adjacent copper. On dense boards, aim for a maximum lateral spread of roughly 0.8–1.0 mm from the pad edge. In practice, the exact target varies with joint geometry and solder type; use this as a guideline rather than a rigid rule. Regular practice with the same equipment will sharpen your judgment over time.
Troubleshooting and Fixes When Bead is Too Thick
If you notice a bead that’s too thick, stop adding solder and let the joint cool briefly before attempting to remove excess with a desoldering pump or wick. In many cases, reheating and applying a smaller new bead can correct the issue, but avoid dragging the iron across the joint, which can smear solder and create additional bridges. Be proactive about cleaning flux residue, inspecting the fillet shape, and reworking only the area that needs adjustment.
Bead thickness guidance for common soldering scenarios
| Scenario | Bead Thickness (mm) | Recommended Practice |
|---|---|---|
| Through-Hole DIP | 0.5-0.8 | Use small beads; ensure fillet under 0.8 |
| Surface-Mount (SMT) | 0.4-0.8 | Keep bead slim; avoid bridging |
| Power Leads / Heavy Copper | 0.8-1.2 | Increase heat and consider larger tip or tinned wires |
Quick Answers
What is considered a thick solder bead for electronics?
A thick bead is one that extends beyond the pad edge and risks bridging or tombstoning. The exact thickness depends on pad size and component lead. Aim for a controlled fillet rather than a large bead.
A thick bead sticks out past the pad and can bridge to nearby pads. Keep it neat and compact.
Does using 1mm solder wire automatically mean a thick bead?
No. Bead thickness depends on heat control and technique. You can get a small bead with 1mm wire if you apply tiny amounts.
The wire size doesn't decide the bead; technique does.
How can I tell if my bead is too thick visually?
Look for a fillet that conforms to the lead and pad, without overflowing onto adjacent copper. A bead covering more than ~0.8–1.0 mm beyond the pad edge is often too thick for fine-pitch work.
If the bead overflows beyond the pad, it's likely too thick.
What tips help control bead thickness on small PCB pads?
Use flux properly, clean surfaces, and apply multiple tiny beads rather than a single heavy bead. Lower temperature and smaller tip sizes improve control.
Flux well, apply little beads, and check as you go.
When should I switch to thinner solder wire?
If you regularly face bridging on dense boards, consider using 0.6–0.8 mm wire for better control. For fine-pitch or SMT work, 0.4–0.7 mm wires are common.
For tight spaces, switch to thinner wire.
Is 1mm solder wire appropriate for lead-free soldering?
Yes, 1mm wire can be used with lead-free solder, but you must manage heat and flux to compensate for higher melting temperatures.
Lead-free works with 1mm wire if you control heat.
“Bead thickness is managed, not dictated by wire size alone; consistent heat and careful technique yield reliable, repeatable joints.”
Top Takeaways
- Assess bead thickness by fillet size, not wire diameter.
- Keep heat under control to avoid oversized beads.
- Choose wire diameter appropriate to joint type.
- Prefer multiple small beads over a single large bead.
- Practice with different scenarios to build intuition.