How to Use Solder Seal Wire Connectors: A Practical Guide
Learn how to use solder seal wire connectors for reliable, moisture-resistant splices in electronics, automotive, and jewelry projects. This step-by-step guide covers sizing, sealing, testing, and safety to help you complete quality joints.

Learn how to use solder seal wire connectors to join wires quickly, safely, and reliably. This guide covers preparation, correct connector sizing, sealing, and inspection, with practical tips for electronics, automotive, and jewelry projects. You’ll need basic tools and the right heat-shrink or sealing option for a durable splice. Follow the steps to ensure moisture protection, strain relief, and long-term performance.
Introduction to solder seal wire connectors
According to SolderInfo, solder seal wire connectors offer a compact, moisture-resistant splice ideal for low-voltage circuits and multi-conductor cables. They combine a small internal solder bead with reactive resin that seals when heated, creating a weatherproof joint without a separate heat-shrink sleeve. For hobbyists and professionals alike, these connectors save time and reduce bulk at the splice point. SolderInfo emphasizes choosing the right size for your wire gauge and keeping heat application controlled to avoid overheating the plastic seal. In this guide, you’ll learn how to select, prepare, and apply solder seal connectors across electronics, automotive, and jewelry applications, with practical checks to prevent common failures.
Understanding the core concept
Solder seal wire connectors encase stripped conductors in a pre-attached sealing material that melts and bonds to seal the joint when heated. Unlike traditional solder-only methods, these connectors provide both mechanical grip and moisture resistance in a single step. They are particularly useful in environments where corrosion is a risk or where field repairs require a compact, quick solution. For best results, work in a clean, dry area and avoid moisture on the wire ends before sealing. As you practice, you’ll gain confidence in determining when a solder seal is appropriate versus a standard crimp or solder joint.
What makes solder seal connectors different
Compared to conventional soldering, solder seal connectors remove several conventional steps: no separate flux, no separate heat-shrink sleeve, and often no torch handling for the final seal. This can reduce the heat exposure time for delicate insulation and minimize the risk of heat damage to surrounding components. SolderInfo notes that proper connector sizing is crucial because a mismatch can lead to weak mechanical hold or incomplete sealing. You’ll learn to match gauges and connector sizes to ensure a reliable splice that withstands vibration and moisture.
Choosing the right size and type
Solder seal connectors come in a range of sizes corresponding to wire gauge and conductor material. When selecting, reference the color code of the connector body and confirm it matches your wire diameter. For stranded wires, ensure enough exposed conductor to fit inside the connector without excessive bending. Temperature ratings matter, especially in automotive or outdoor use. If you’re unsure about a gauge, measure the bare conductor diameter with calipers and compare it to the connector’s specification. Using the wrong size can cause poor sealing or mechanical failure over time. This is where planning ahead saves you from rework.
Tools and materials you’ll need
Gather a clean workspace, a good pair of wire strippers, a sharp utility knife, the solder seal connectors rated for your wire gauge, a heat source such as a heat gun or butane torch (set to a controlled temperature), heat shrink tubing as a backup if desired, alcohol wipes for cleanup, and a multimeter for basic continuity checks. Keep spare wire of the same type and gauge on hand. Having a dedicated tray for spare connectors reduces the chance of cross-contamination between different gauges and types. SolderInfo suggests testing a few sample joints before starting a critical project to confirm seals perform as expected.
Prep steps before connecting
Start by powering down the system and disconnecting power if dealing with any live circuit. Use wire strippers to remove insulation cleanly, exposing the exact amount of conductor required by the connector. Twist stranded conductors gently to form a uniform bundle without frays. Inspect the bare wire for nicks or damaged strands; any imperfection can compromise the joint. Wipe the stripped ends with an alcohol pad to remove oils and residue, then let them dry completely. Dry, well-prepared ends are essential for a strong, reliable seal. Remember, moisture on the conductor can interfere with the seal and promote corrosion.
Step-by-step: applying the solder seal connector
Insert the prepared wire into the solder seal connector until the conductor is seated fully against the internal terminal. If using multiple conductors, align them so they don’t share space and avoid bending. Apply heat evenly around the connector body and avoid direct contact with the joint to prevent insulation damage. As the heat rises, the internal solder bead melts and the sealant cures to lock the wires in place. Do not overheat, which can degrade insulation or melt nearby components. Let the joint cool undisturbed for a few seconds before test.
Verification and testing after sealing
Check that the connector is fully closed and the sealant has formed a uniform bead around the joint. Perform a gentle pull test to ensure the wires are firmly held and the joint does not slide. Visually inspect for any gaps or gaps in the seal. If you have access to a moisture chamber or submersion test in a controlled setup, you can confirm the seal’s integrity, but avoid immersing live circuits. A simple continuity check with a multimeter confirms that the circuit path remains intact after sealing. If any sign of failure appears, cut back to clean conductor and re-seal a new joint.
Special considerations for different use cases
Electronics projects demand careful heat control to prevent damage to sensors or microcontrollers; automotive and outdoor installations may require higher moisture resistance and UV stability. In jewelry work, aesthetics and minimal heat exposure are key, so consider using low-heat sealing options and inspect joints for uniform appearance. Always verify the sealant compatibility with insulation material and environmental conditions. For harsh environments, consider combining solder seal connectors with additional protective measures, such as conformal coating or enclosure sealing, to extend longevity.
Common mistakes and how to avoid them
A frequent error is using the wrong connector size for the wire gauge, resulting in weak seal or poor retention. Another pitfall is overheating the joint, which can melt insulation or degrade the sealing resin. Skipping cleaning steps leads to oily residues that hamper sealing. Finally, neglecting a proper test can leave a failed joint undetected until it is stressed in the field. Plan a small test batch to confirm the process before scaling up to a full project.
Safety and best practices
Always work in a well-ventilated area, and wear eye protection and heat-resistant gloves. Keep flammable materials away from the work zone and have a fire extinguisher nearby. Do not rush the sealing process; allow the joint to cool fully before moving. Dispose of old or damaged connectors according to local regulations. When dealing with high energy or high humidity environments, consider additional protective measures to ensure long-term reliability.
Real-world applications and project ideas
Solder seal connectors are handy for harness repairs in vehicles, appliance upgrades, and hobbyist electronics like sensor networks. In jewelry making, they can be used for discreet, durable wire connections in wearable pieces, provided heat exposure is controlled. For educational purposes, practice with scrap wire to build a small harness that demonstrates the sealing action and corrosion resistance. The key is to understand cable gauge, connector rating, and heat application to achieve consistent results.
Maintenance, storage, and long-term care
Store connectors in a dry, sealable container away from direct sunlight to prevent resin degradation. Keep a few spare sizes on hand and label them by gauge. Periodically inspect installed joints for signs of moisture ingress, corrosion, or insulation damage, especially in outdoor or automotive environments. If a joint shows signs of wear, cut back and reseal with a fresh connector. Regular practice and clean storage help sustain reliability in the long term.
Troubleshooting quick-reference: when a joint fails
If you notice a weak joint, check for wire damage, improper seating, insufficient heat, or incomplete sealing. Re-strip the ends, clean, reinsert, and reseal using a fresh connector. For persistent failures, verify the wire gauge matches the connector spec and consider a different size or alternative sealing method. If in doubt, test with a spare length of wire before reworking the primary harness.
Tools & Materials
- Wire stripper(Quality stripper with adjustable gauges)
- Utility knife(Sharp blade for clean insulation removal)
- Solder seal connectors(Match gauge to conductor (check color code))
- Heat source (heat gun or butane torch)(Set to controlled temperature; avoid direct flame)
- Heat shrink tubing (optional)(For extra strain relief if desired)
- Alcohol wipes(Clean conductors before sealing)
- Multimeter(Check continuity after sealing)
- Heat-resistant gloves(Protect hands while heating)
Steps
Estimated time: 45-60 minutes
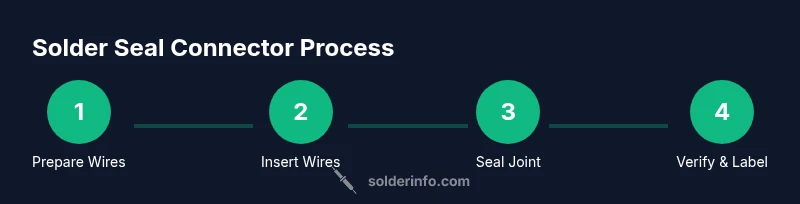
- 1
Prepare wires
Power down the circuit, strip insulation to expose the conductor length required by the connector, and twist the strands gently to form a compact bundle without frays. Clean the exposed wires with alcohol and allow to dry. This ensures a reliable, even seating inside the connector.
Tip: Use a sharp stripping tool and keep the exposed length consistent with the connector spec. - 2
Select the correct connector
Choose a solder seal connector that matches the wire gauge and the number of conductors in your splice. Double-check the color code on the connector body and confirm it corresponds to your conductor size before inserting wires.
Tip: If in doubt, test a spare length of wire to confirm fit. - 3
Insert wires into connector
Insert the stripped wires fully into the connector so the conductors reach the internal terminal. Ensure there is no insulation trapped inside the terminal area. For multiple wires, align them to avoid crowding and mutual interference.
Tip: Do not force wires; re-strip if they don't seat cleanly. - 4
Apply heat evenly
Apply heat around the connector body in a steady, even motion. Do not hold the flame in one spot; distribute heat to melt the internal solder bead and activate the sealant without overheating the plastic.
Tip: Keep the heat source at a safe distance to avoid scorching. - 5
Allow joint to seal and cool
Let the joint cool naturally for several seconds until the resin cures and the joint is firm to the touch. Avoid moving the wires during cooling to prevent misalignment.
Tip: Use a timer to ensure adequate cooling time. - 6
Inspect the seal
Visually inspect the joint for a uniform bead around the circumference and absence of gaps. A solid seal indicates moisture resistance and proper sealing.
Tip: If you see gaps, reheat slightly and reseal with a fresh connector. - 7
Test connectivity
Use a multimeter to verify continuity across the joint. A healthy reading confirms electrical integrity; otherwise, rework the splice.
Tip: Test under the same load conditions the final installation will experience. - 8
Finalize and protect
Optionally apply heat shrink tubing over the seal for additional physical protection and strain relief. Label the joint if part of a larger harness for easier maintenance.
Tip: Avoid obstructing venting paths or interfering with nearby components.
Quick Answers
What are solder seal wire connectors?
Solder seal wire connectors are pre-sealed joints that combine a solder bead with a sealing material to create a moisture-resistant connection. They simplify splicing by providing both electrical contact and environmental protection in one step.
Solder seal wire connectors are pre-sealed joints that combine solder and a seal to make a moisture-resistant splice in one step.
Can they be used on all wire types?
They work best with common electronics and automotive conductors, especially copper or tinned copper. Unusual insulation or high-grade exotic wires may require testing or alternatives.
They work best with common copper wires; for unusual wires, test first before committing to a full run.
What tools are needed?
You need proper wire strippers, a heat source, and the correct solder seal connectors for your wire gauge. A multimeter helps verify connectivity after sealing.
Use the right strippers, heat source, and the correct connectors, then test with a multimeter.
How long do joints last?
With correct sizing, clean prep, and proper sealing, solder seal joints can last many years in suitable environments. Regular inspections help catch degradation early.
If sized and sealed correctly, these joints last for years; inspect periodically to catch wear.
Are they suitable for outdoor use?
Yes, when rated for moisture and UV exposure and used with the proper enclosure or coating. For extreme conditions, combine with additional protection.
They can be outdoor-ready if rated for moisture and UV and used with extra protection.
Watch Video
Top Takeaways
- Understand when to use solder seal connectors versus traditional methods
- Match connector size to wire gauge for reliable seals
- Keep insulation clean and dry before sealing
- Heat evenly and avoid overheating the plastic seal
- Test joints for continuity and moisture resistance