How to Solder Deans Plugs: Step-by-Step Guide
Learn how to solder Deans plugs safely and reliably with a step-by-step approach that covers tools, wire prep, flux, tinning, and testing for durable audio connections.

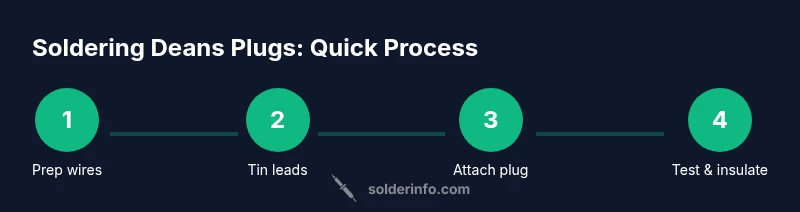
By the end of this guide you'll be able to solder Deans plugs reliably and safely. You'll learn how to prepare wires, choose the right solder and flux, tin connections, and make clean, mechanically strong joints. This step-by-step approach minimizes waste and protects equipment from shorts and failures.
Why mastering how to solder deans plugs matters
Deans plugs are a popular choice for high-current audio and RC power connections because they combine a compact design with low resistance. If you want to deliver stable power without intermittent failures, mastering how to solder deans plugs is essential. A solid joint resists vibration, prevents arcing, and maintains good electrical contact even when cables flex during use. In this guide we’ll outline the practical reasons to learn this skill and what you gain by following a careful, repeatable method. According to SolderInfo Team, investing time in proper technique pays off with fewer troubleshooting times and longer connector life, especially in portable or field-hardy setups. For additional safety guidance, see OSHA.gov and related standards in NIST.gov materials; these sources emphasize clean workspaces, proper ventilation, and avoiding overheating.
Safety and workspace setup
Before you heat metal, set up a clean, well-ventilated area and organize your components. Wear safety glasses and keep a stand for your iron. Use a fundamental fume source or extractor when melting rosin-based flux. Ensure your Deans plugs and wires are free of damage and clean from oxidation. Keep away from flammable materials and avoid crowded power strips. Use a temperature-controlled iron and set it to the recommended range for lead-free solder, typically around 320–360°C, while maintaining a light touch to avoid overheating parts. This guidance aligns with general workplace safety principles published by OSHA and educational resources from NIST to help hobbyists keep a safe soldering environment.
Wire preparation and connector inspection
Inspect the Deans plug contacts for corrosion or bent pins. If you see any damage, replace the connector rather than forcing a poor fit. Cut your wires to a practical length and strip insulation to expose about 3–4 mm of copper. Keep conductors tidy and parallel, and twist only if necessary to prevent fraying. Separate channels so you know which wire goes to which contact, reducing mixups during final assembly. Inspect the mating socket for debris that could prevent a solid connection. Proper inspection reduces the chance of hidden shorts after soldering.
Flux, insulation, and solder selection
Flux improves wetting and helps solder flow into tight gaps, which is important when joining small Deans plug terminals. Use rosin-core solder or flux pen appropriate for electronics, and avoid excessive flux that can trap moisture or debris. Tin the exposed wire ends lightly; this creates a ready surface for the final joint. When insulation is applied, leave enough room for the joint and heat shrink without kinking the leads. For best results, choose lead-free solder compatible with electronics and follow the solder manufacturer guidelines; OSHA and NIST resources emphasize safe handling and appropriate ventilation when fluxes are used.
Soldering technique for Deans plugs
Position the wires on each contact so the copper is centered on the solder pad. Apply heat to the joint and feed a small amount of solder until a shiny, smooth fillet forms. Do not overheat the plastic housing, which can deform. Solder one lead at a time to avoid shorts, then visually inspect for even coverage and clean angles. If a joint looks dull or has a notch, reheat and reflow with a touch more solder. Keep your iron tip clean on a damp sponge to prevent oxidized surfaces from hindering wetting.
Testing, insulation, and strain relief
Once both leads are soldered, cover each joint with heat shrink that fits snugly over the pin area. Use a heat gun or careful flame control to shrink evenly. Check continuity with a multimeter to confirm low resistance and no short between the two paths. Also gently tug the assembly to test strain relief; if the wires move in the shell, rework the joint. After final assembly, label the connector clearly and store it in a dry, cool environment to reduce oxidation risk. For further validation, refer to safety guidelines on OSHA.gov and testing recommendations on NIST.gov resources.
Common mistakes and how to avoid them
Common mistakes include overheating contacts, using too much solder, and failing to tin wires first. Always clean the iron tip and avoid letting flux dry on the interface. Keep wires aligned and avoid cross-threading the joints. Take your time and test after each joint to catch problems early. A systematic approach reduces cold joints and ensures reliable performance in real-world use. If you encounter stubborn joints, pause, re-tin the wire, and reflow with fresh solder to restore a clean fillet.
Advanced tips for reliability and future projects
For frequent use, pre-tin both wires and the plug blades before final assembly. Consider using thinner wires for low current links and heavier gauge for high current. Keep spare Deans plugs with pre-tinned leads for speed. Document the color code and polarity for future projects to ensure consistent, repeatable results. If you solder in demanding environments, you may want to apply heat shrink with adhesive lining for improved strain relief and environmental sealing. This practice aligns with quality standards discussed in industry literature and can improve long-term reliability.
Tools & Materials
- Soldering iron (temperature-controlled)(Set around 320–360°C for lead-free solder; use a fine tip for precision on plug pads.)
- Lead-free solder (rosin-core)(Choose Sn-Ag-Cu formulation preferred for electronics; rosin flux helps flow.)
- Rosin flux or flux pen(Apply sparingly to improve wetting on contacts and wires.)
- Deans plugs (two-pin connector)(Inspect for bent pins, corrosion, or deformities before use.)
- Wire cutters/strippers(Strip 3–4 mm of insulation; use precise cuts to avoid nicking copper.)
- Heat shrink tubing(Select a size that comfortably fits around the solder joints with a tight seal.)
- Soldering iron stand(Keep the hot iron in a safe cradle when not in use.)
- Multimeter(For continuity and short tests; helpful but not mandatory.)
- Safety glasses(Protect eyes from splashes and hot flux.)
- Ventilation or fume extractor(Improves air quality; recommended for long sessions.)
- Desoldering braid(Helpful if you need to correct a joint without damaging the plastic shell.)
Steps
Estimated time: 45-75 minutes
- 1
Prepare workspace and gather components
Set up a clean, well-ventilated area with your Deans plugs, wire, flux, and solder within easy reach. Confirm you have a temperature-controlled iron and a safe stand. Align components so you can work calmly and avoid crossovers that cause mix-ups.
Tip: Arrange parts in the order you will use them to minimize motion and avoid heat exposure on adjacent components. - 2
Measure and cut wires to length
Trim wires to a sensible length that leaves room for strain relief. Strip insulation on each wire to expose about 3–4 mm of copper. Keep wires tidy and out of the way to prevent accidental contact with the hot iron.
Tip: Use sharp snips and a precise wire stripper to avoid nicking or fraying the copper. - 3
Strip insulation cleanly
Carefully remove insulation without nicking copper strands. Bend wires slightly to form a neat, parallel lead for the contact pads. If strands are frayed, twist them gently and trim excess.
Tip: Double-check that no stray strands cross over the plug pad; a small short can ruin the joint. - 4
Tin the wire ends lightly
Apply a thin layer of solder to the exposed copper. Tinning helps the wire flow into the joint when you apply heat. Avoid excessive tinning that could dampen flexibility or create blobs.
Tip: Keep the amount of flux balanced; too much flux can cause solder to wick away from the joint. - 5
Prepare Deans plug contacts
Inspect the plug contacts for oxide or damage. If needed, clean contacts gently with a small brush or abrasive pad. Align the wire ends with the corresponding contact pads so polarity is clear.
Tip: A tiny amount of flux on the plug pad can help wetting; avoid flooding the pad. - 6
Position wires and solder joints
Place each tin-coated wire onto its corresponding pad. Apply heat to the joint and feed solder until a smooth fillet forms. Do not overheat the plastic housing; limit dwell time at the metal interface.
Tip: Solder one lead at a time to prevent accidental shorts between the two pads. - 7
Insulate and reinforce with heat shrink
Slide heat shrink over each joint and apply heat evenly to shrink. The adhesive-lined shrink can provide extra strain relief and environmental protection. Recheck alignment before finalizing.
Tip: Use a heat gun or careful light flame; avoid direct contact with the plug body. - 8
Test, label, and finalize
Use a multimeter to verify continuity between the two pins and confirm no short between them. Tug gently to test strain relief. Label the connector for future reference and store it in a dry area.
Tip: If you see any dull or cracked joints, reflow with a small amount of solder and recheck.
Quick Answers
What are Deans plugs used for?
Deans plugs are two-pin connectors commonly used in RC power systems and compact audio gear. They offer a low-resistance, compact solution and require clean solder joints and solid mechanical support for reliable use.
Deans plugs are two-pin connectors used in RC power systems and compact audio gear; they provide low resistance and require solid workmanship for reliability.
Can I solder Deans plugs with flux?
Yes. Flux improves wetting and helps solder flow into tight gaps on the plug pads. Use rosin-core solder or flux pen suited for electronics, and avoid excessive flux.
Yes. Flux helps the solder flow nicely into the small pads; use rosin-core flux and avoid too much flux.
What solder should I use for hobby projects?
Lead-free solder is recommended for hobby electronics. It provides reliable joints with less health risk and is compatible with modern flux products. Always follow the manufacturer’s guidelines for temperature and flux.
Lead-free solder is best for hobby electronics; follow the product instructions for temperature and flux.
How can I tell if a joint is bad?
A bad joint often looks dull or has a cold fillet. Reheat to reflow and add a touch more solder if needed. Ensure the joint is shiny, smooth, and well attached to both the wire and the pad.
Look for a dull, grainy, or cracked joint; reflow with a bit more solder to fix it.
Is it safe to reuse Deans plugs after desoldering?
If the plug pins and housing remain undamaged, you can reuse, but inspect contact surfaces for oxidation. Replace the plug if the contacts are deformed or unreliable.
You can reuse if the contacts are undamaged; otherwise replace the plug to ensure a solid connection.
Why is insulation important after soldering?
Insulation prevents shorts and provides strain relief. Heat shrink with a snug fit is commonly used to protect the joint and maintain mechanical integrity.
Insulation stops shorts and helps hold the joint in place; shrink it tightly over the joint.
Watch Video
Top Takeaways
- Plan joints before applying heat for reliable results
- Tin wires and plug contacts prior to soldering
- Use lead-free solder and proper flux for clean wetting
- Inspect joints for shiny fillets and absence of cold joints
- Test continuity and secure strain relief after assembly