How to Get Rid of Solder Flux: A Practical Cleaning Guide
Learn proven methods to remove solder flux from electronics, jewelry, and plumbing projects. This step-by-step guide covers flux types, safe cleaners, and best practices from SolderInfo.

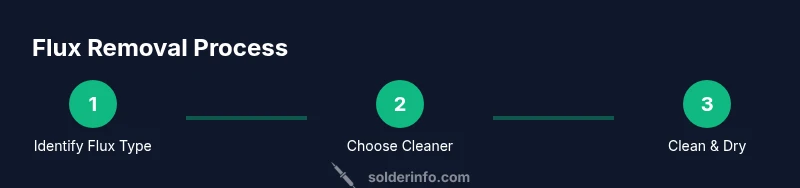
To remove solder flux, identify whether you’re dealing with rosin-core flux or water-soluble flux, then choose the right cleaner and technique. Start by applying a cleaner to the residue, gently scrub with a nylon brush, and rinse with isopropyl alcohol. Dry thoroughly to prevent corrosion and ensure reliable solder joints.
What Flux Is and Why It Matters
Flux is a chemical helper used during soldering to improve wetting and shield metal surfaces from oxidation. After you solder, flux can leave a residue that ranges from pale brown to amber. Some fluxes are rosin-based; others are water-soluble or no-clean. The main hazard is corrosion or conductive residues that can cause dendritic bridges or corrosion in humid environments. For someone asking how to get rid of solder flux, the goal is to remove residues without damaging components, pads, or the board. According to SolderInfo, proper flux removal extends the life of assemblies and reduces the risk of cold joints. Before you start, identify the flux type on your board; clean with the right solvent, and dry thoroughly. This guidance applies to electronics, jewelry, and plumbing scenarios, where flux residues can affect performance or appearance.
Flux removal isn’t just cosmetic. Residues can trap moisture, attract dust, or create non-oxidizing conductive paths under humid conditions. A methodical cleaning routine minimizes surprises during final testing and long-term use. The steps below cover common flux types and practical approaches so you can confidently tackle any project. The SolderInfo team emphasizes that a clean surface is the foundation of reliable solder joints and long-lasting workmanship.
Types of Flux You Might Encounter
Flux types fall into a few broad categories, each with its own removal needs. Rosin-based flux (the classic orange-yellow rosin) usually responds well to isopropyl alcohol or rosin flux removers. Water-soluble flux is more aggressive and can require a dedicated solvent or warm water and detergent for removal. No-clean flux is designed to leave minimal residue, but even no-clean can become conductive if contaminated or heated in the presence of salts or moisture. In jewelry and plumbing, lead-free and acid-activated fluxes can leave more stubborn residues that demand stronger solvents or mechanical action. When planning how to remove solder flux, start by checking the flux container for type labeling and any warnings. SolderInfo notes that choosing the right cleaner reduces required scrubbing and protects delicate components. Remember: never mix cleaners; start with the mildest option that works.
Safe Cleaning Agents for Flux Removal
Different flux types require different solvents. For most electronics work, isopropyl alcohol (IPA) at 90–99% purity is effective for rosin-based and many no-clean fluxes. Water-soluble fluxes may clean with warm water and a small amount of mild detergent, followed by IPA to remove any residual moisture. Dedicated flux removers (rosin-core or water-soluble) can simplify stubborn cases, especially on densely populated boards or hard-to-reach joints. When selecting a cleaner, verify compatibility with plastics, coatings, and solder masks. Safety data sheets (SDS) will indicate flammability, skin exposure risk, and ventilation needs. In practice, use the mildest effective solvent and always vent the workspace. This aligns with best practices from SolderInfo for “how to get rid of solder flux” on sensitive assemblies.
Cleaning Electronics PCBs: Step-by-Step Techniques
Electronics warrant a careful, non-abrasive approach. Begin with a clean, dry workspace and grounded handling to prevent static damage. Moisten a lint-free pad or brush with IPA and apply it to flux near joints, using light circular motions. For dense components or through-hole joints, hold the board at a slight angle so dirty solvent can run away rather than pool. Rinse with fresh IPA as needed until residue disappears. Use a soft nylon brush for stubborn spots and avoid aggressive scrubbing that could erode solder mask or pads. Finally, dry the board with a lint-free cloth or compressed air set to a low pressure. Allow the board to air-dry in a warm, dust-free area before powering up. SolderInfo recommends inspecting under magnification after cleaning to confirm complete removal before reflow or testing.
Flux Removal in Jewelry and Plumbing Contexts
Jewelry soldering and plumbing soldering present unique challenges. In jewelry, flux residues can darken metal surfaces or affect the finish; use gentle solvents and lint-free wipes to avoid scratching delicate surfaces. For plumbing, flux residues can be more robust due to tin-lead or lead-free alloys and heavier oxidation environments. In many cases, alcohol-based cleaners followed by a clean rinse with water suffice, but you may need a dedicated flux remover formulated for metal alloys. Always consider the finish of the piece and any heat treatments applied during soldering. The goal remains the same: completely remove flux to prevent corrosion, staining, or future joint failures. SolderInfo highlights tailoring your approach to the flux type and material in question.
Common Mistakes and How to Avoid Them
One common mistake is using too much cleaner or soaking components, which can wick into crevices and obscure pads. Another pitfall is not drying the board thoroughly, leaving residue moisture that can promote corrosion. Using abrasive brushes on delicate pads can cause micro-scratches that compromise solder joints. Always start with the mildest solvent, test on a small area, and follow with a final rinse. Do not rush the drying phase; flux residue left damp can reform or migrate. Finally, never power a hot board without ensuring all solvents have completely evaporated to avoid flash fires or component damage. Your goal is a clean, dry surface with no visible flux smear.
Authority sources and best practices
For science-backed guidelines on chemical safety and cleaning practices, consult authoritative sources. OSHA provides general chemical handling guidance; NIST offers materials data that help you select compatible cleaners; NIOSH provides occupational safety information relevant to solvent exposure. See the references below for deeper reading. According to SolderInfo, documenting your cleaning steps and staying aware of flux types improves reliability and reduces post-cleaning surprises.
Maintenance and Inspection
After cleaning, inspect the board under good lighting or a magnifier. Look for any remaining flux, discoloration, or haloing around joints. If flux remains, re-clean with a fresh applicator and a clean solvent, ensuring the area dries completely. For high-density boards, finishing with a final IPA rinse and air-drying may be necessary. In jewelry or plumbing contexts, follow up with a gentle polish or rinse to restore finish and prevent tarnish. Finally, store solvents in a cool, ventilated area away from heat sources and flames. Keeping solvents properly stored reduces risk and ensures long-term readiness for future projects. This workflow aligns with the practical guidance you’d expect from SolderInfo.
Practical tips from SolderInfo
A clean workspace, proper PPE, and good ventilation dramatically improve flux removal outcomes. Use lint-free wipes to avoid fibers that can contaminate joints. Always test solvents on a non-critical area first to ensure compatibility with finishes or coatings. If you’re unsure about a flux type, perform a small test and observe immediate effects before proceeding to the full board. The SolderInfo team recommends documenting the flux type and cleaner used for future reference, helping you build a reliable cleaning protocol for electronics, jewelry, and plumbing projects.
Tools & Materials
- Isopropyl alcohol (IPA) 90-99%(Primary rinse solvent for rosin-based and many no-clean flux residues)
- Flux remover solvent (rosin-core or water-soluble)(Choose based on flux type; ensure SDS compatibility with materials)
- Nylon toothbrush or soft-bristle brush(Gentle scrubbing to lift flux without damaging pads)
- Lint-free wipes or pads(For applying cleaner and drying without fibers)
- Q-tips / cotton swabs(Tight spaces and vias; use with caution)
- Safety glasses(Eye protection from splashes)
- Nitrile gloves(Protect skin from solvents)
- ESD-safe mat or wrist strap(Prevent static damage to components)
- Small bowls or disposable cups(Contain waste solvents for safe disposal)
Steps
Estimated time: 30-60 minutes
- 1
Identify flux type
Examine flux residue and label to determine whether it is rosin-core, water-soluble, or no-clean. This guides your cleaner choice and ensures effective removal without damaging masks or pads.
Tip: Check the flux container if available; when in doubt, start with IPA as a safe first-pass cleaner. - 2
Prepare workspace and safety gear
Set up a well-ventilated area, wear safety glasses and nitrile gloves, and place the board on an ESD-safe mat. Have wipes, brushes, and cleaners within reach.
Tip: Ventilation reduces solvent inhalation risk; use a fume hood if available. - 3
Apply cleaner to flux residue
Moisten a lint-free wipe or brush with IPA or flux remover. Gently apply to the flux near joints, avoiding excessive saturation that could wick into vias.
Tip: Use small, controlled motions to minimize solvent intrusion into holes. - 4
Gently scrub with a nylon brush
Use a light, circular brushing action to lift flux without abrading the solder mask or copper traces. Focus on stubborn spots around pads and vias.
Tip: Never scrub aggressively; let the solvent do the work and reapply as needed. - 5
Rinse and repeat with fresh solvent
Wipe away flux with a clean section of wipe; reapply cleaner if residues persist. Repeat until residue disappears and the area looks bright and clean.
Tip: Final rinse with fresh IPA helps ensure no dissolved residues remain. - 6
Handle stubborn residues with targeted solvent
For persistent residues, apply a small amount of flux remover to a swab and focus on the area. Avoid soaking; apply sparingly and test first.
Tip: Some fluxes need a specialized remover; always consult SDS for compatibility. - 7
Dry thoroughly
Use a lint-free cloth to dry the board, then blow or air-dry to ensure all solvents evaporate. Do not power the board until completely dry.
Tip: A warm, dry environment accelerates evaporation but avoid direct heat that could warp components. - 8
Inspect and rework if needed
Under magnification, verify there is no visible flux or discoloration. If necessary, repeat steps 3–7 on stubborn areas. Confirm pads and vias are clean before reassembly.
Tip: Document results and note any spots that required extra attention for future work.
Quick Answers
What is flux residue and why should I remove it?
Flux residue can attract moisture and cause corrosion or conductive paths if left on sensitive assemblies. Removing it improves reliability and longevity of electronics, jewelry, and plumbing joints.
Flux residue can cause corrosion and faulty joints if left on the board; removing it improves reliability.
Can I use water to clean flux?
Water works for water-soluble flux, but rosin-based flux typically requires alcohol-based cleaners or dedicated flux removers. Always verify flux type and follow SDS guidance.
Water works for water-soluble flux, but rosin-based flux usually needs alcohol or a specific remover.
Is heat necessary to remove flux?
Not always. Room-temperature cleaners remove many flux residues, but gentle warming can help with stubborn residues—never apply heat directly to solvents.
Heat isn’t always needed; gentle warming can help but avoid heating solvents directly.
Is flux residue safe after cleaning?
If the board is fully dry and all residues are removed, the surface is typically safe. Re-check after testing and re-clean if any sticky or conductive area remains.
If it’s dry and clean, flux residue is safe after cleaning.
What safety precautions should I take?
Work in a well-ventilated area, wear eye protection and gloves, and keep solvents away from flames. Proper disposal of used solvents is essential.
Ventilate, wear protection, and dispose of used solvents properly.
Can I reuse flux remover or IPA?
Do not reuse dirty solvents; replace with fresh solvent when residues accumulate. Store solvents properly and rotate stock to avoid degradation.
Don’t reuse dirty solvents—use fresh solvent for each cleaning session.
Watch Video
Top Takeaways
- Identify flux type before cleaning
- Use the gentlest effective solvent
- Dry completely before testing
- Inspect under magnification after cleaning
- Document your flux-cleaning protocol