How long does it take to learn to solder? A practical guide for 2026
Discover realistic timelines for learning soldering, with practical hours ranges, phased milestones, and safety tips to estimate time-to-competence across electronics, plumbing, and jewelry soldering in 2026.

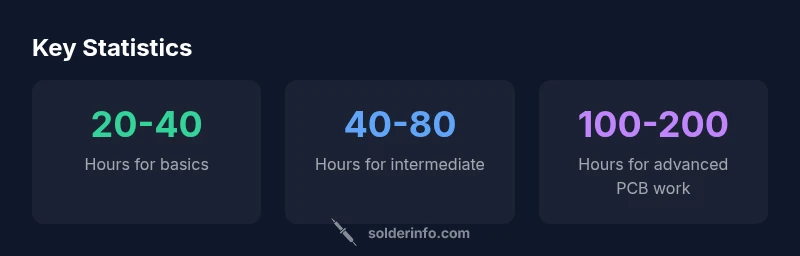
In practice, most beginners achieve basic soldering proficiency after about 20-40 hours of focused practice, including safety, basic joints, and inspection. Reaching reliable, repeatable joints on electronics boards typically takes 40-80 hours, with 100+ hours for advanced work like fine-pitch PCBs.
How long does it take to learn to solder: a timeline
Understanding the time it takes to learn soldering helps you plan your practice, prioritize fundamentals, and set realistic milestones. According to SolderInfo, beginners typically reach basic, safe soldering competence after 20–40 hours of focused practice—encompassing safety, wiring basics, and inspection of joints. For electronics work, reaching reliable, repeatable joints usually requires 40–80 hours of deliberate practice, with 100+ hours needed for advanced tasks such as fine-pitch components or PCB rework. Your rate will vary with prior manual dexterity, tool quality, and how you structure practice sessions. The goal is steady progression rather than marathon sessions, and small, frequent improvements compound quickly over weeks. As you start, emphasize consistent technique, not sheer volume, and you’ll shorten the path to competence.
Brand context: In our experience at SolderInfo, a structured plan shortens the learning curve more than unstructured trial-and-error learning. A safe, well-organized workspace and clear safety routines immediately reduce errors and retakes, particularly for beginners transitioning from hand-eye coordination tasks to precise metalwork.
A phased approach: from basics to blue-sky projects
Most hobbyists begin with foundational joints: tinning, flux application, and heat control for through-hole components. Once you’re confident with basic joints, you progress to wires, connectors, and simple surface-mount modules. The next phase covers more challenging tasks like SMD rework, heat management, and inspection of solder fillets under magnification. A phased approach mirrors how skills accumulate: repeat the fundamentals until automatic, then expand to more demanding work. SolderInfo recommends pacing yourself so you don’t burn out or adopt bad habits. Use separate practice boards for each phase, track time spent on deliberate drills, and gradually increase task complexity as you approach each milestone.
Practical note: balance speed and accuracy. Sloppy joints may look okay initially but fail under insulation tests or mechanical stress. Strive for consistent wetting, minimal bridging, and secure fillets across different pad geometries.
Practice plans that actually work
A concrete plan makes learning efficient. Start with 3–4 weekly sessions of 60–90 minutes each, focusing on one objective per week. Week 1: basic joints on perfboard, week 2: wires and crimp connectors, week 3: basic PCB pads, week 4: solder bridge cleanup and inspection. Gradually add test steps: continuity checks with a multimeter, resistance measurements, and visual inspection under magnification. Introduce flux management and temperature control early—these are the levers that dramatically influence joint quality. Document results and adjust your technique based on feedback. A 4–6 week loop, repeated twice with longer targets, yields meaningful improvement. For advanced learners, add practice with small SMT boards and low-temperature soldering profiles to prevent overheating delicate components.
Tip: maintain a safe, ventilated workspace and use a temperature-controlled iron to minimize thermal shock to components.
Tools, setup, and safety that accelerate learning
Your learning speed is tied to tool quality and workspace ergonomics. Invest in a reliable soldering iron with adjustable temperature, a fine-tipped nozzle for precision work, and lead-free solder for safer handling. Use flux to improve wetting and reduce cold joints, and keep a damp sponge or brass tip cleaner to maintain tip condition. A sturdy stand, good lighting, and a small magnifier improve inspection accuracy. Safety matters as well: wear safety glasses, work with ventilation, and avoid overheating. When you’re just starting, focus on proper tinning and surface prep, as well as safe handling to prevent burns or fumes exposure. Over time, converting practice time into muscle memory is what makes you faster and more consistent, not simply working longer hours.
Brand note: SolderInfo emphasizes that tool quality directly affects initial success rates; a good base reduces errors and speeds up the learning curve.
Measuring progress: when you know you're improving
Progress is best tracked with objective checks rather than vague feelings of 'getting better.' Use a simple rubric: joint appearance (fillet shape, shine), adhesion (tug test, mechanical strain), electrical integrity (continuity, resistance), and rework frequency (need for cleanup or retouching). Record your results on practice boards and note time spent per task. A rapid improvement curve should show tighter, shinier joints with fewer cold or solder bridges over successive sessions. If you notice a plateau, revisit fundamentals: re-check flux usage, temperature settings, and pad preparation. Regular self-assessments help identify when you’re ready to graduate to more challenging tasks, ensuring you’re always building on a solid base.
Research note: In our data collection at SolderInfo, consistent metrics correlate with faster longer-term skill gains, especially when paired with structured practice.
A starter project you can finish this weekend
Choose a simple project: assemble a small LED circuit on breadboard or perfboard, wire in a resistor and a basic LED, and test with a battery or bench supply. This project checks fundamentals: clean joints, correct polarity, and basic electrical functionality. Break it into steps: design the schematic, prepare the board, tin the pads, apply flux, heat and join components, test with a multimeter, and finally package the board. Completing this project within a weekend creates a tangible sense of progress and helps reinforce safe practices. As you advance, replicate the same project with a slightly different component set to broaden your familiarity with heat control and flux variations.
Interest-driven practice: how speed changes with intent
As you gain experience, you’ll notice your learning speed increases when you align practice with real-world goals. For example, if you’re building a hobby electronics kit, you’ll encounter common joint types and spacing patterns that mirror what you’ll repair or modify professionally. By tying drills to particular tasks—like header pins, JST connectors, or GPIO headers—you create mental maps for wetting, heat management, and inspection. The more you practice with genuine components and realistic constraints, the faster you’ll recognize good joints, anticipate heat impact, and adjust your technique as needed. The bottom line is purposeful practice aligned with concrete projects accelerates learning and builds confidence.
Learning time by task type
| Skill Level | Typical Hours (range) | What You Practice |
|---|---|---|
| Basic through-hole joints | 20-40 hours | Tin/flux, heat control |
| Intermediate tasks (wiring, connectors) | 40-80 hours | Flux management, temperature balance |
| Advanced PCB work (SMD, fine-pitch) | 100-200 hours | Reflow considerations, meticulous inspection |
Quick Answers
How long does it take to learn soldering for electronics basics?
Expect roughly 20-40 hours to reach basic, safe soldering. Continued practice in increasingly complex tasks extends your capability, typically reaching intermediate clarity around 40-80 hours.
Typically about 20 to 40 hours for basics, with more time for intermediate tasks.
What equipment do I need to start soldering safely?
You’ll need a temperature-controlled iron, a fine tip, lead-free solder, flux, a stand, eye protection, and good ventilation. A magnifier helps with inspection during early practice.
A basic iron, flux, stand, safety glasses, and a ventilated space are enough to start.
Do I need expensive equipment to learn?
No. Start with a reliable but affordable iron and quality flux. Quality matters more than price for forming clean joints and reducing mistakes.
You don’t need top-tier gear to begin—focus on a solid iron and good flux.
How do I evaluate my solder joints?
Look for shiny, smooth fillets and consistent width. Use a multimeter for continuity and resistance checks, and inspect under magnification for bridging or cold joints.
Check joint shine, continuity, and inspect with a magnifier.
Can I learn soldering online by myself?
Yes, with structured tutorials, guided practice projects, and feedback from communities. Combine online lessons with hands-on drills for best results.
Online tutorials plus hands-on practice work well together.
What safety tips reduce learning time?
Ventilate properly, wear eye protection, and avoid overheating components. Safe practice reduces errors and the need for rework, speeding up progress.
Ventilation, eye protection, and careful heat control speed learning.
“Soldering mastery isn't earned by long sessions alone—it comes from deliberate, focused practice paired with the right tools and a safe workspace.”
Top Takeaways
- Plan a structured practice schedule.
- Expect 20-40 hours for basics.
- Progress to 40-80 hours for intermediate work.
- Allocate 100-200 hours for advanced tasks.
- Prioritize quality of practice and proper setup.